Build-Your-Own Chimichurri

Chimichurri Word Swag


This recipe will save any dish that goes wrong in your kitchen. 

It’s a game changer.   

I’m talkin’ about a flavor-packed meal in the blink of an eye. With this sauce you can transform just about anything. Trust me, people will be asking for seconds. 

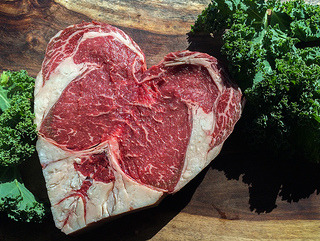
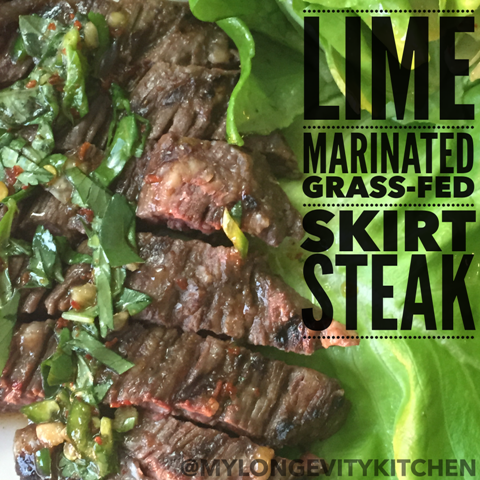
I’ve been making chimichurri for many years now. My husband fell in love with chimichurri long before he met me because he spent some time in Brazil. Together, years later, we dined at a famous Argentinian steak house in Chicago, called Tango Sur (white tablecloth, Argentinian staff, no reservations, and BYOB!). Tango Sur serves up steaks the size of the dinner plate, and along-side is a bowl of this glorious tangy garlicky sauce: Chimichurri. 

Thank you Argentina, for bringing this to the American table. 


Tango Sur
Photo Courtesy of “Chewables Chicago” and Chicago Now


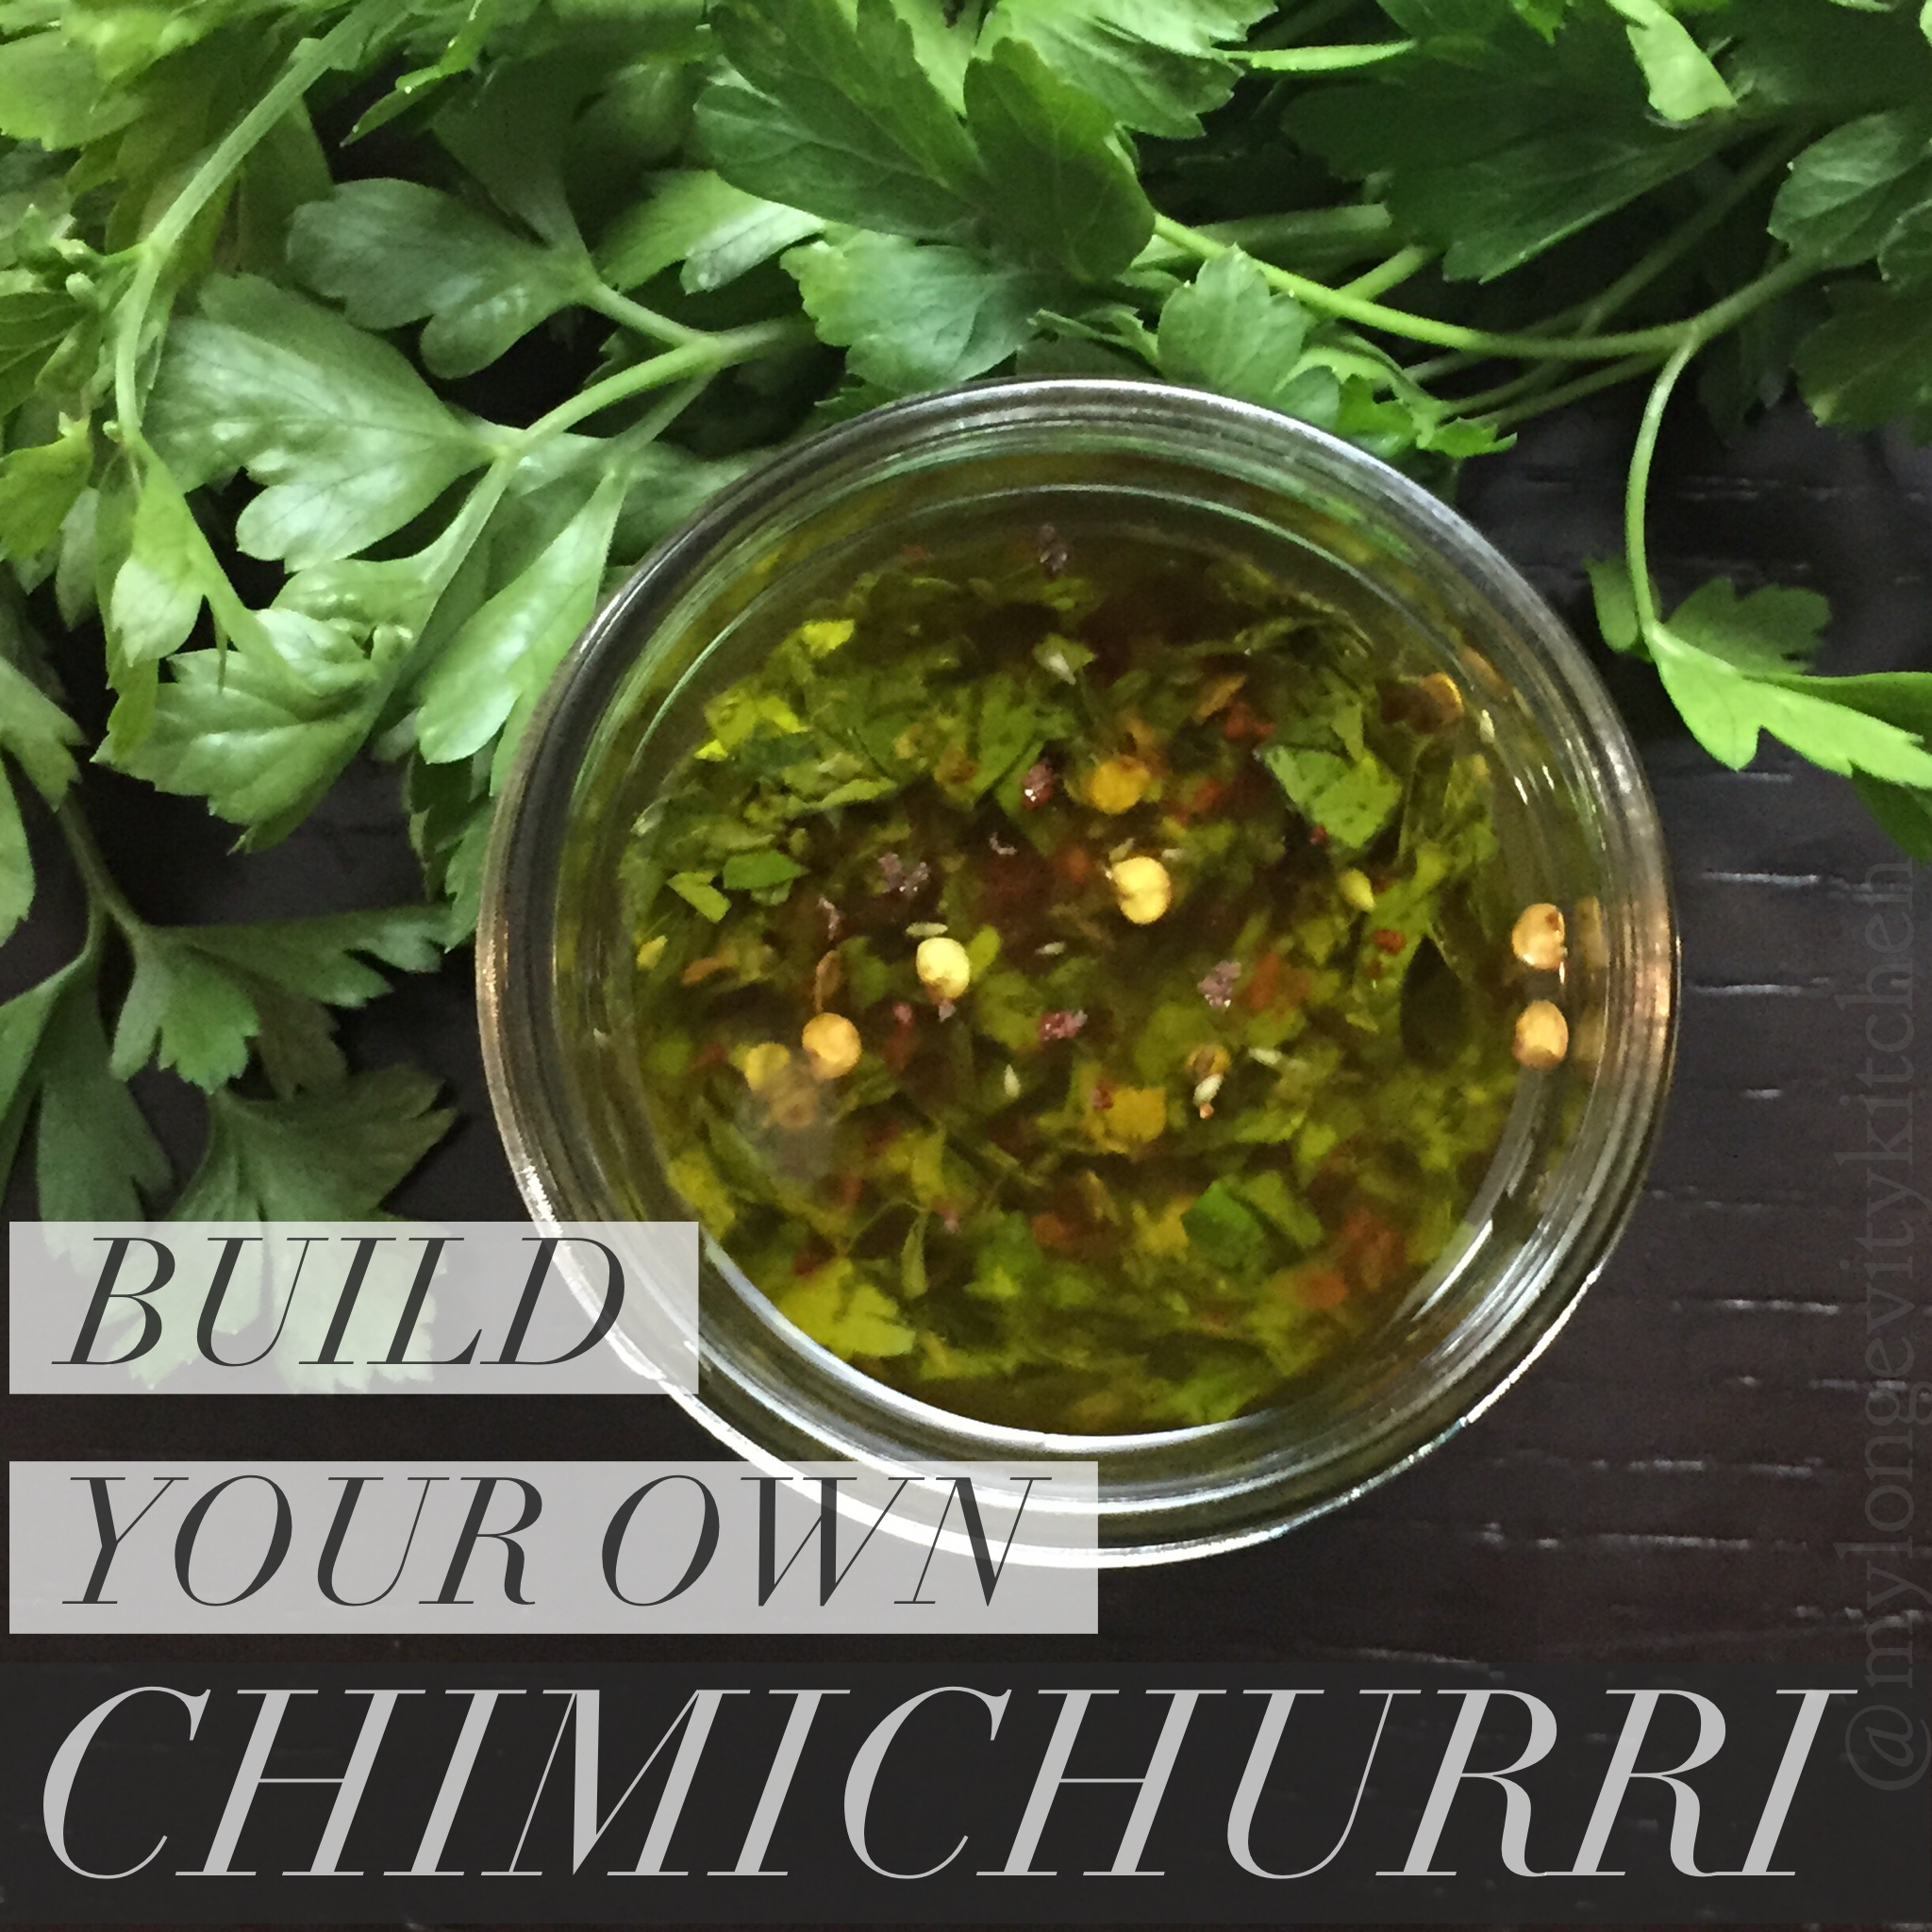
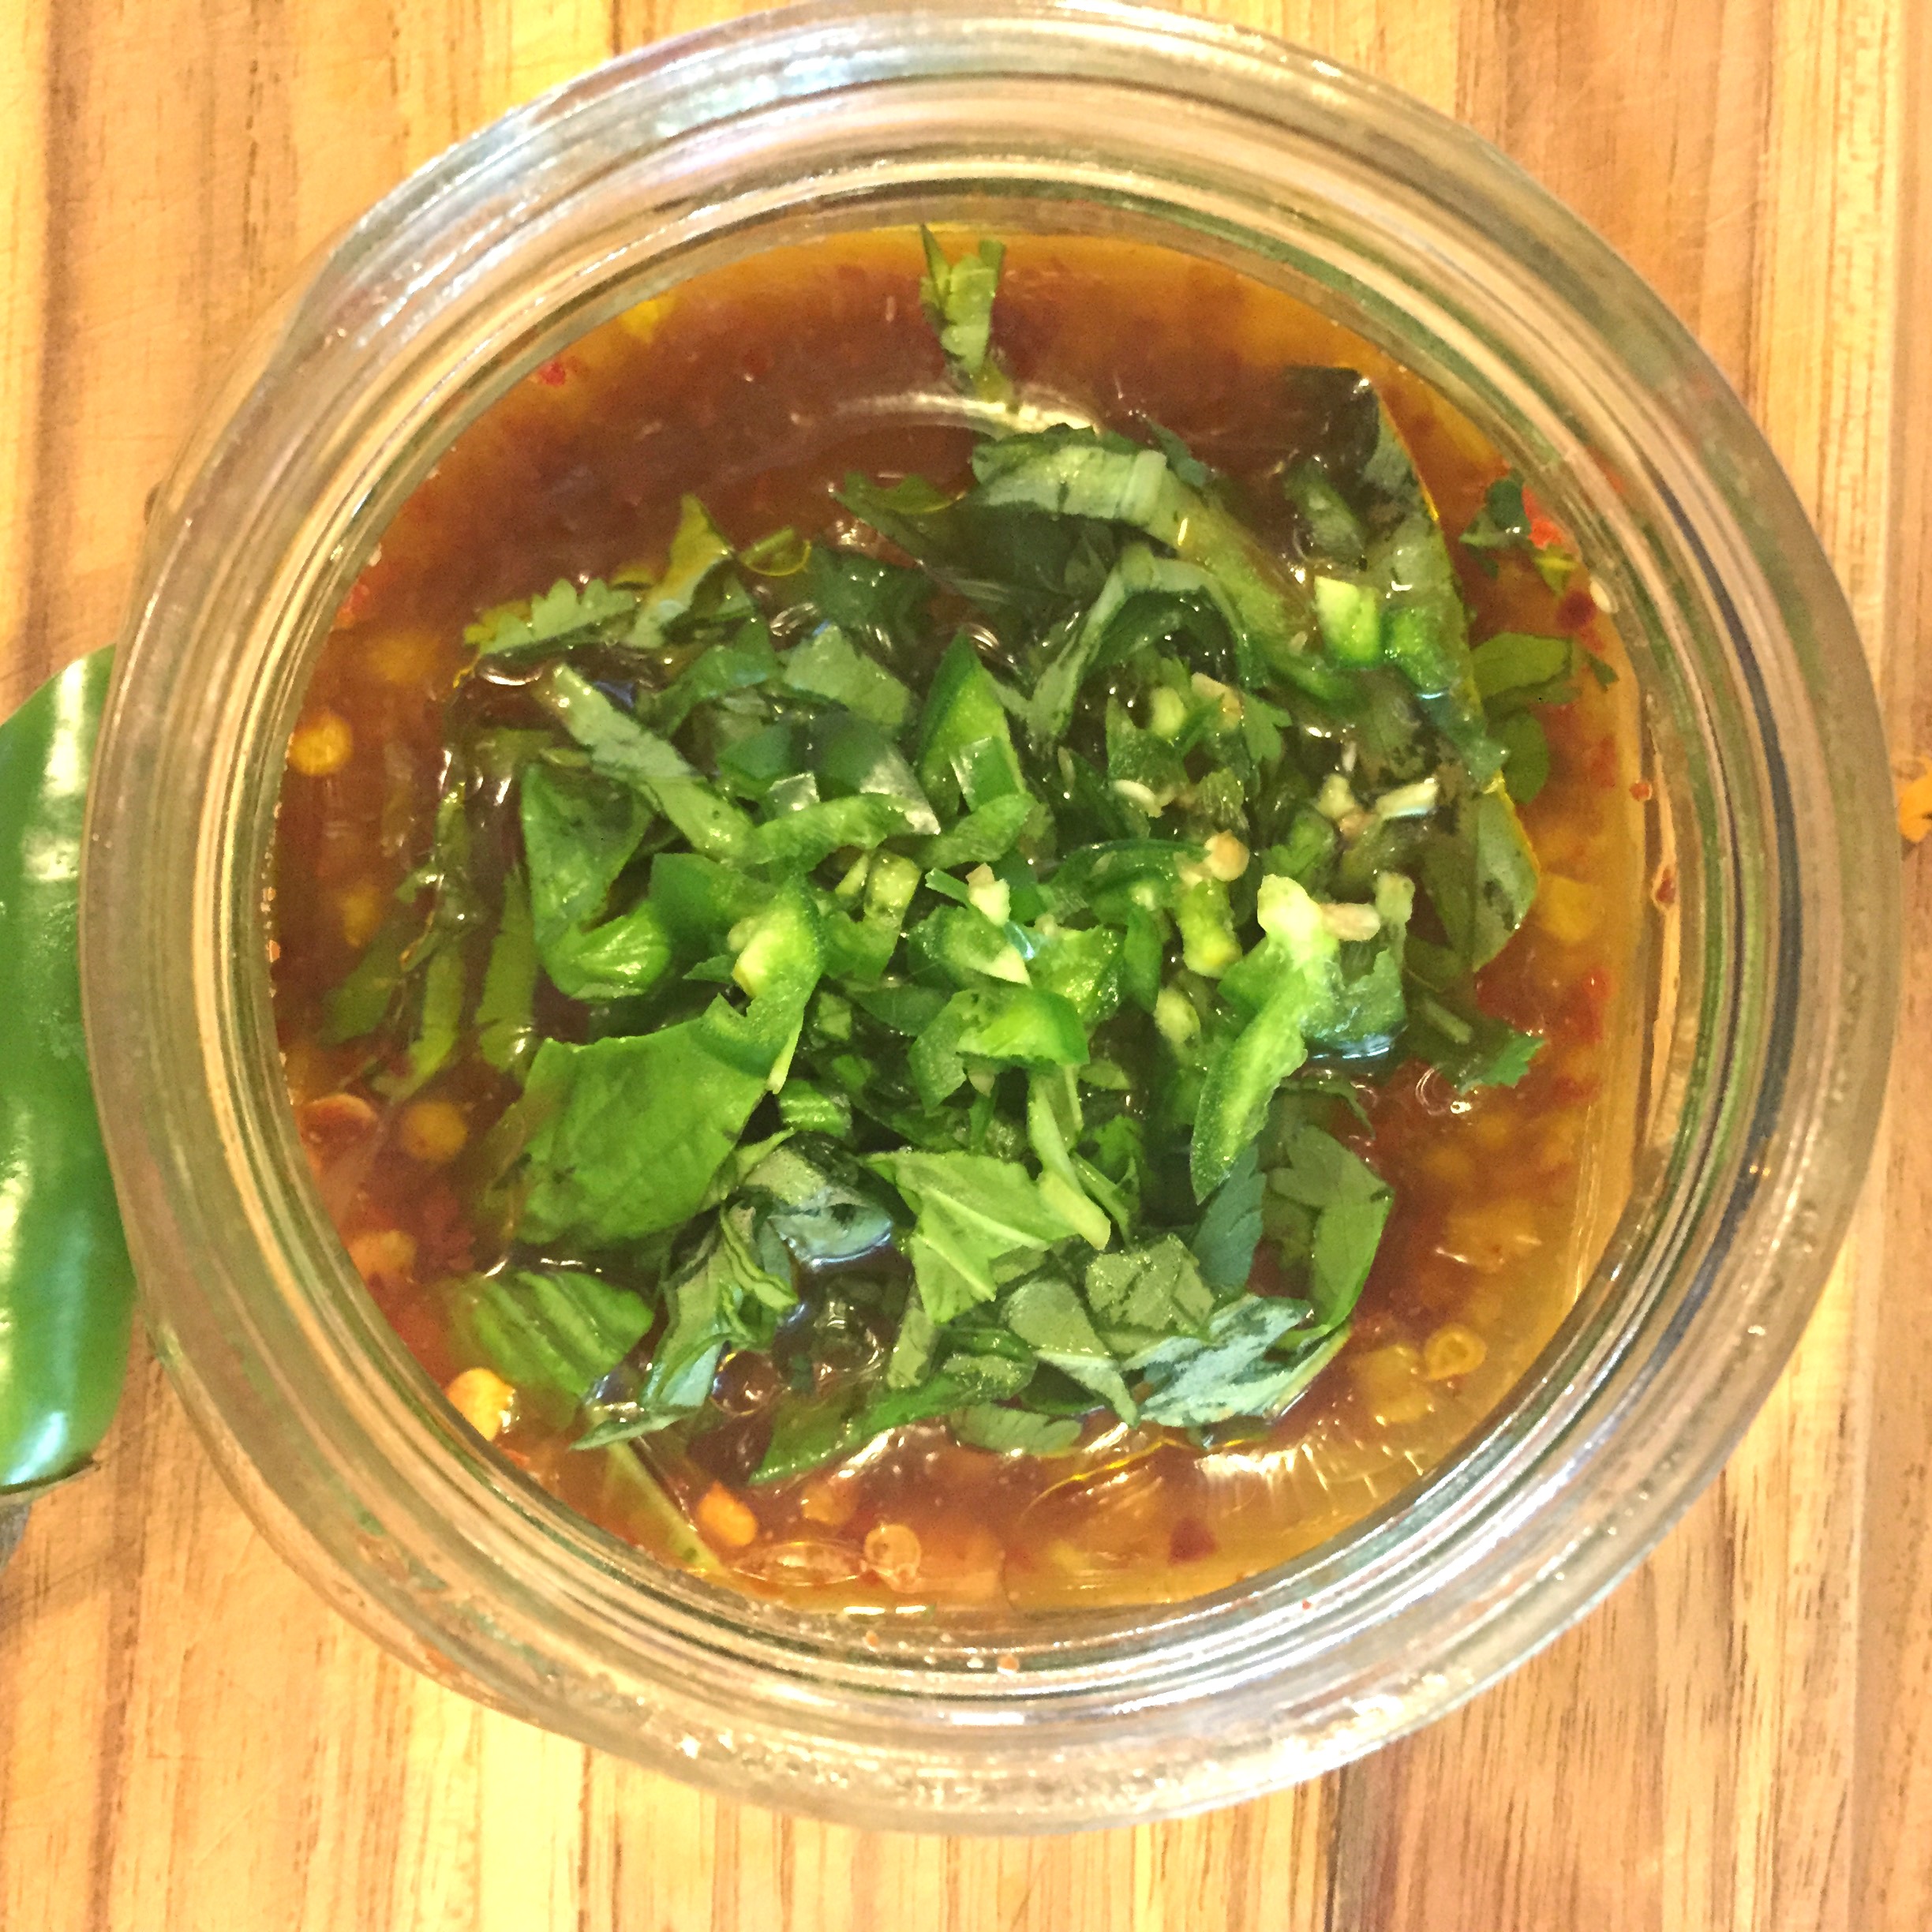
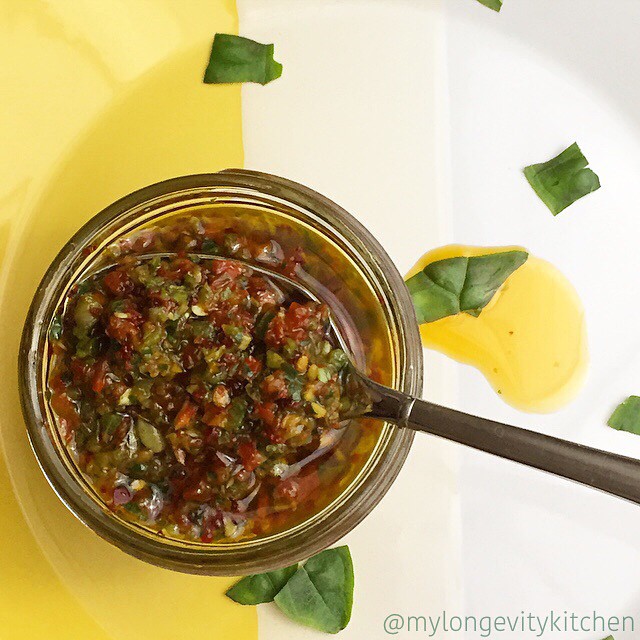
So what is Chimichurri? 


rustic spoon
The authentic version is rustic, and made by hand

Basically, Chimichurri is like a vinegary pesto, without the cheese or nuts. It is herbs, fresh and dried, with garlic, vinegar, plenty of oil, water, sometimes lime, and peppers, onions, and spices.

What do I serve it with?  

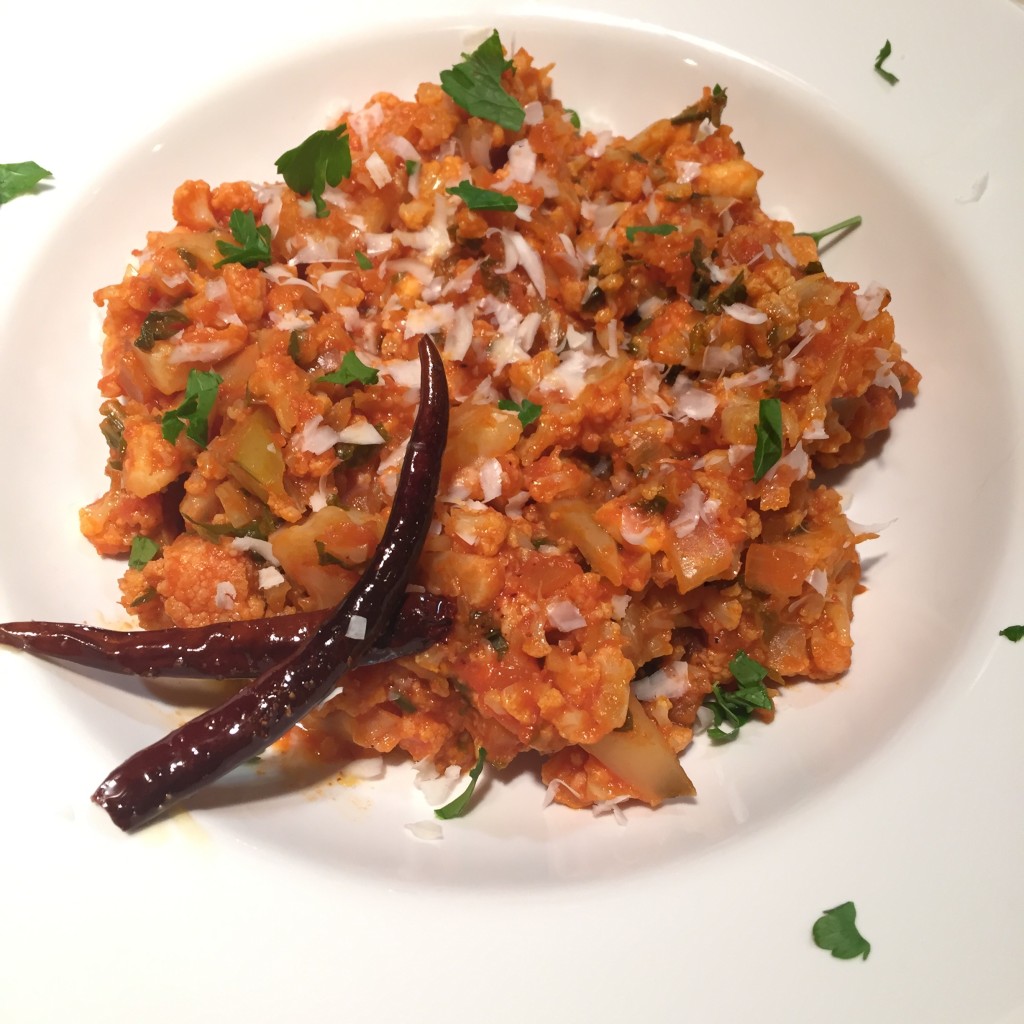
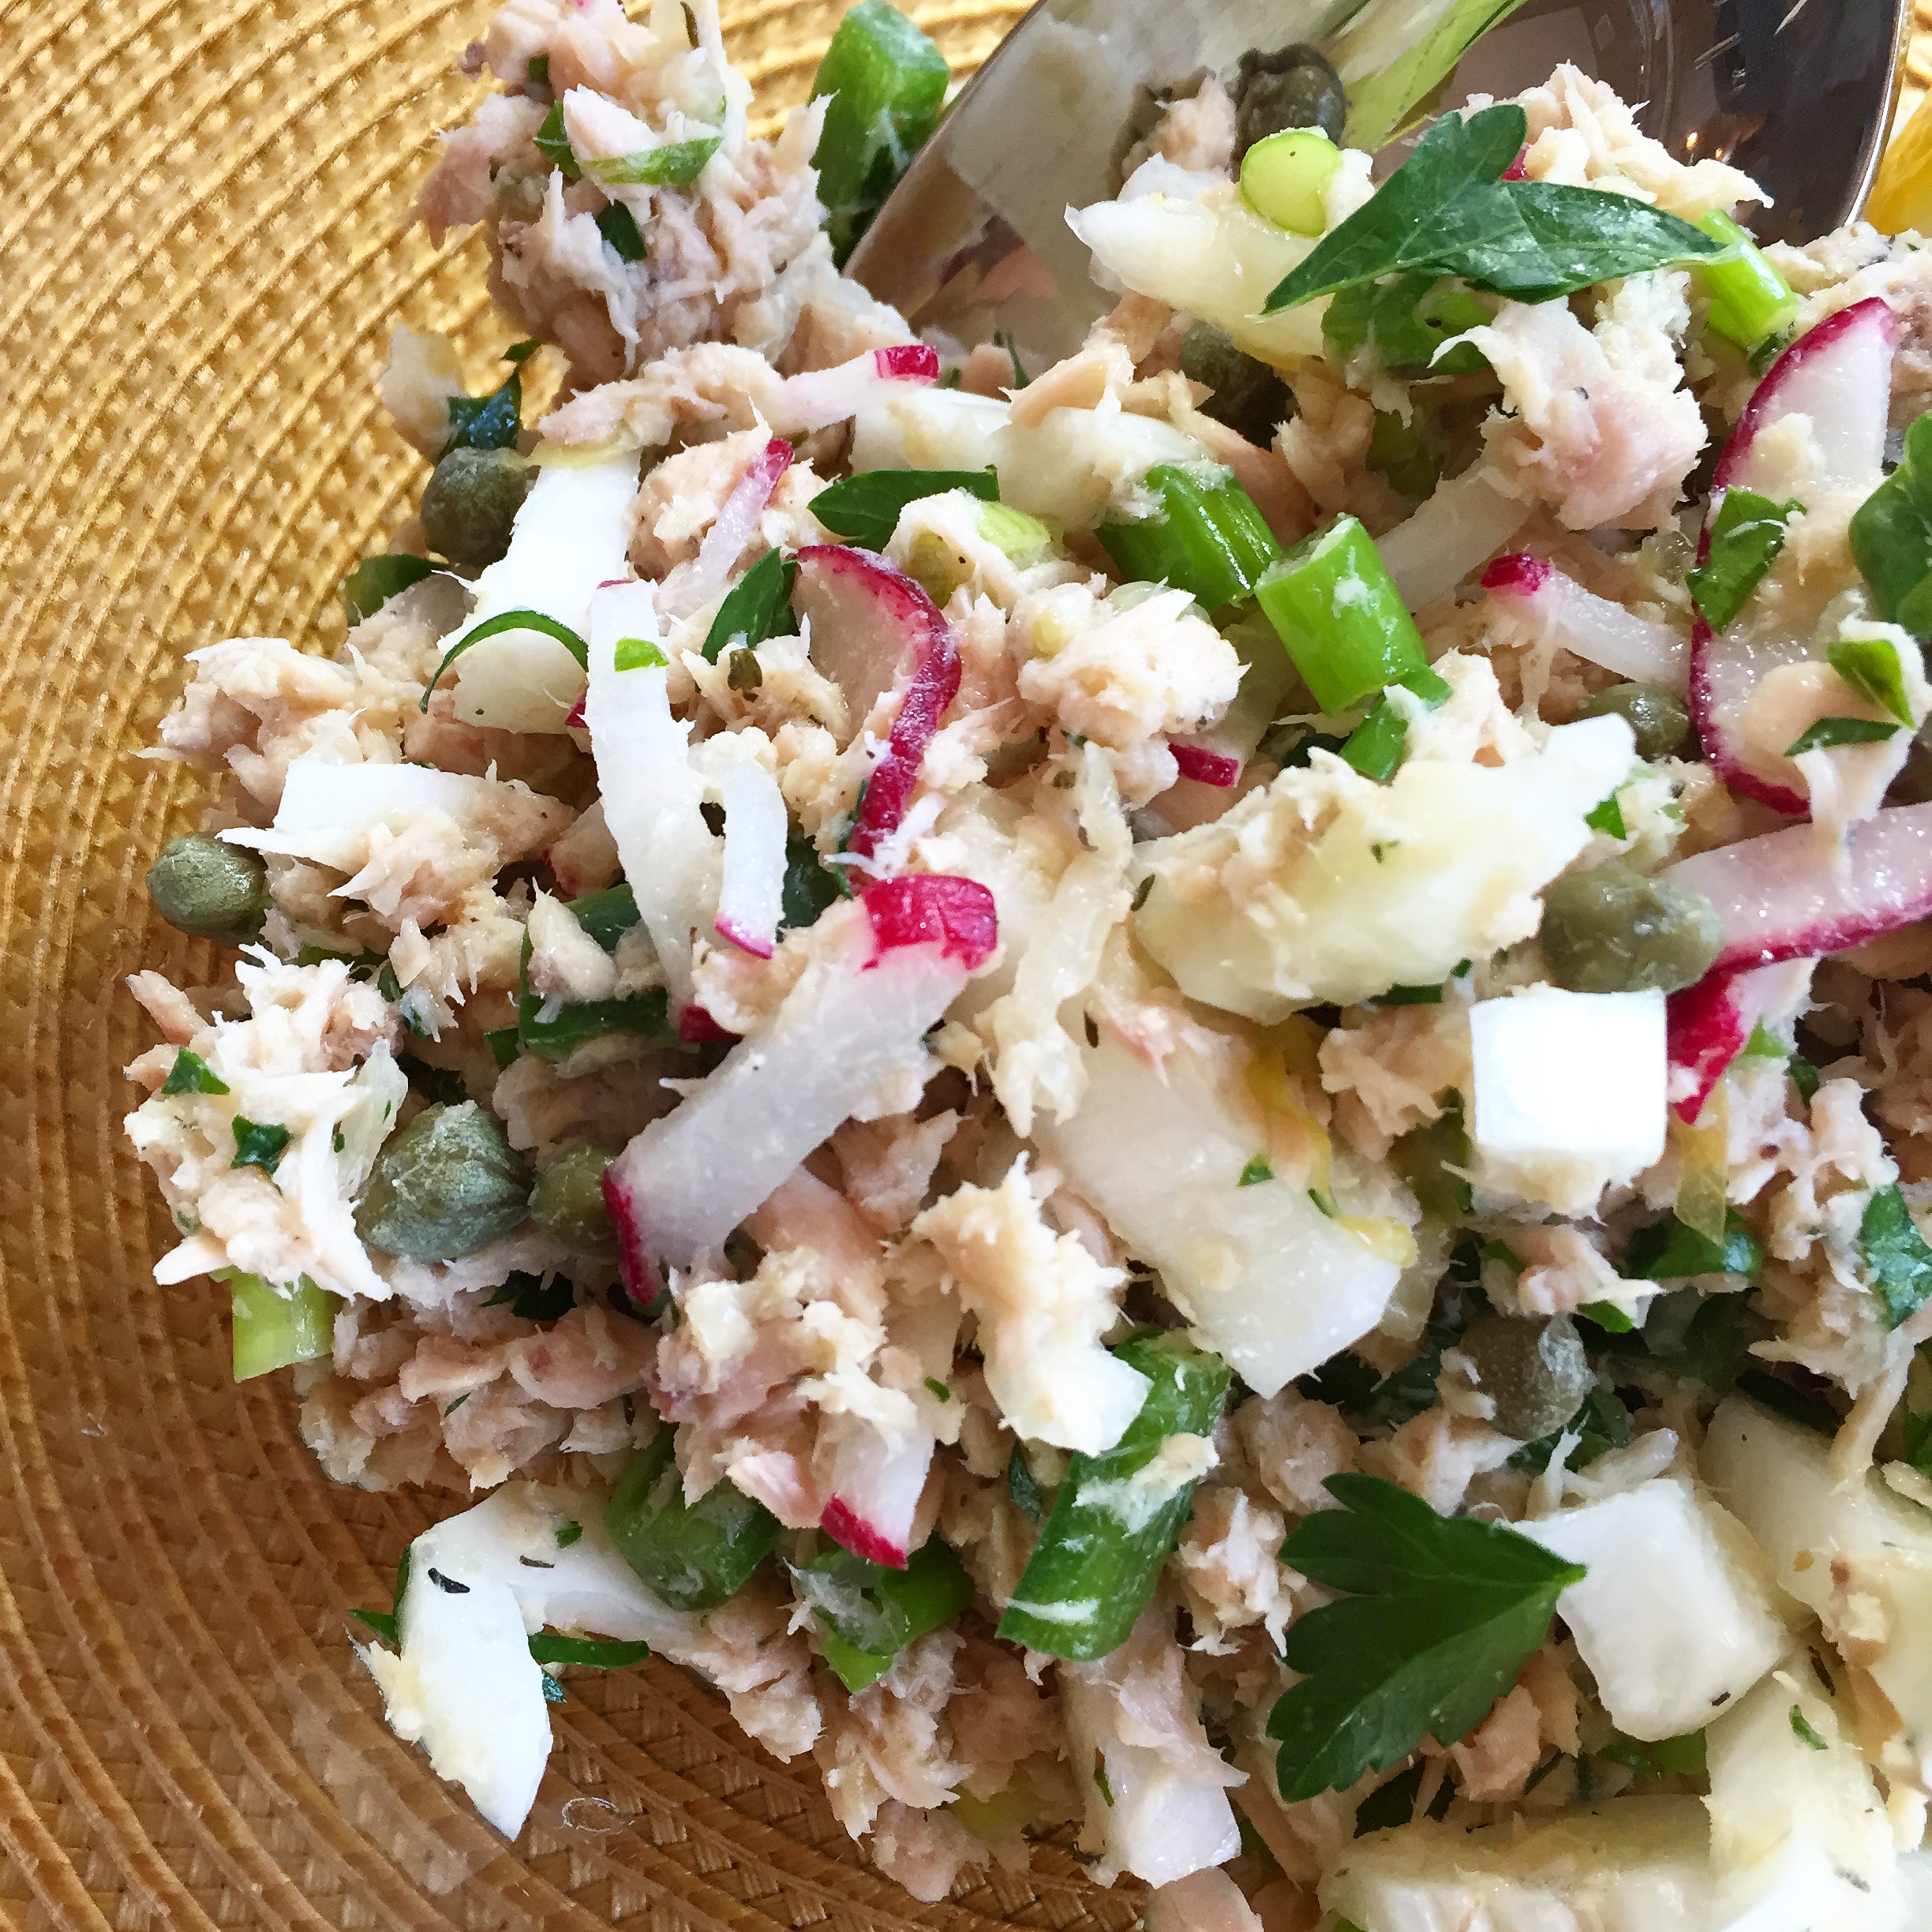
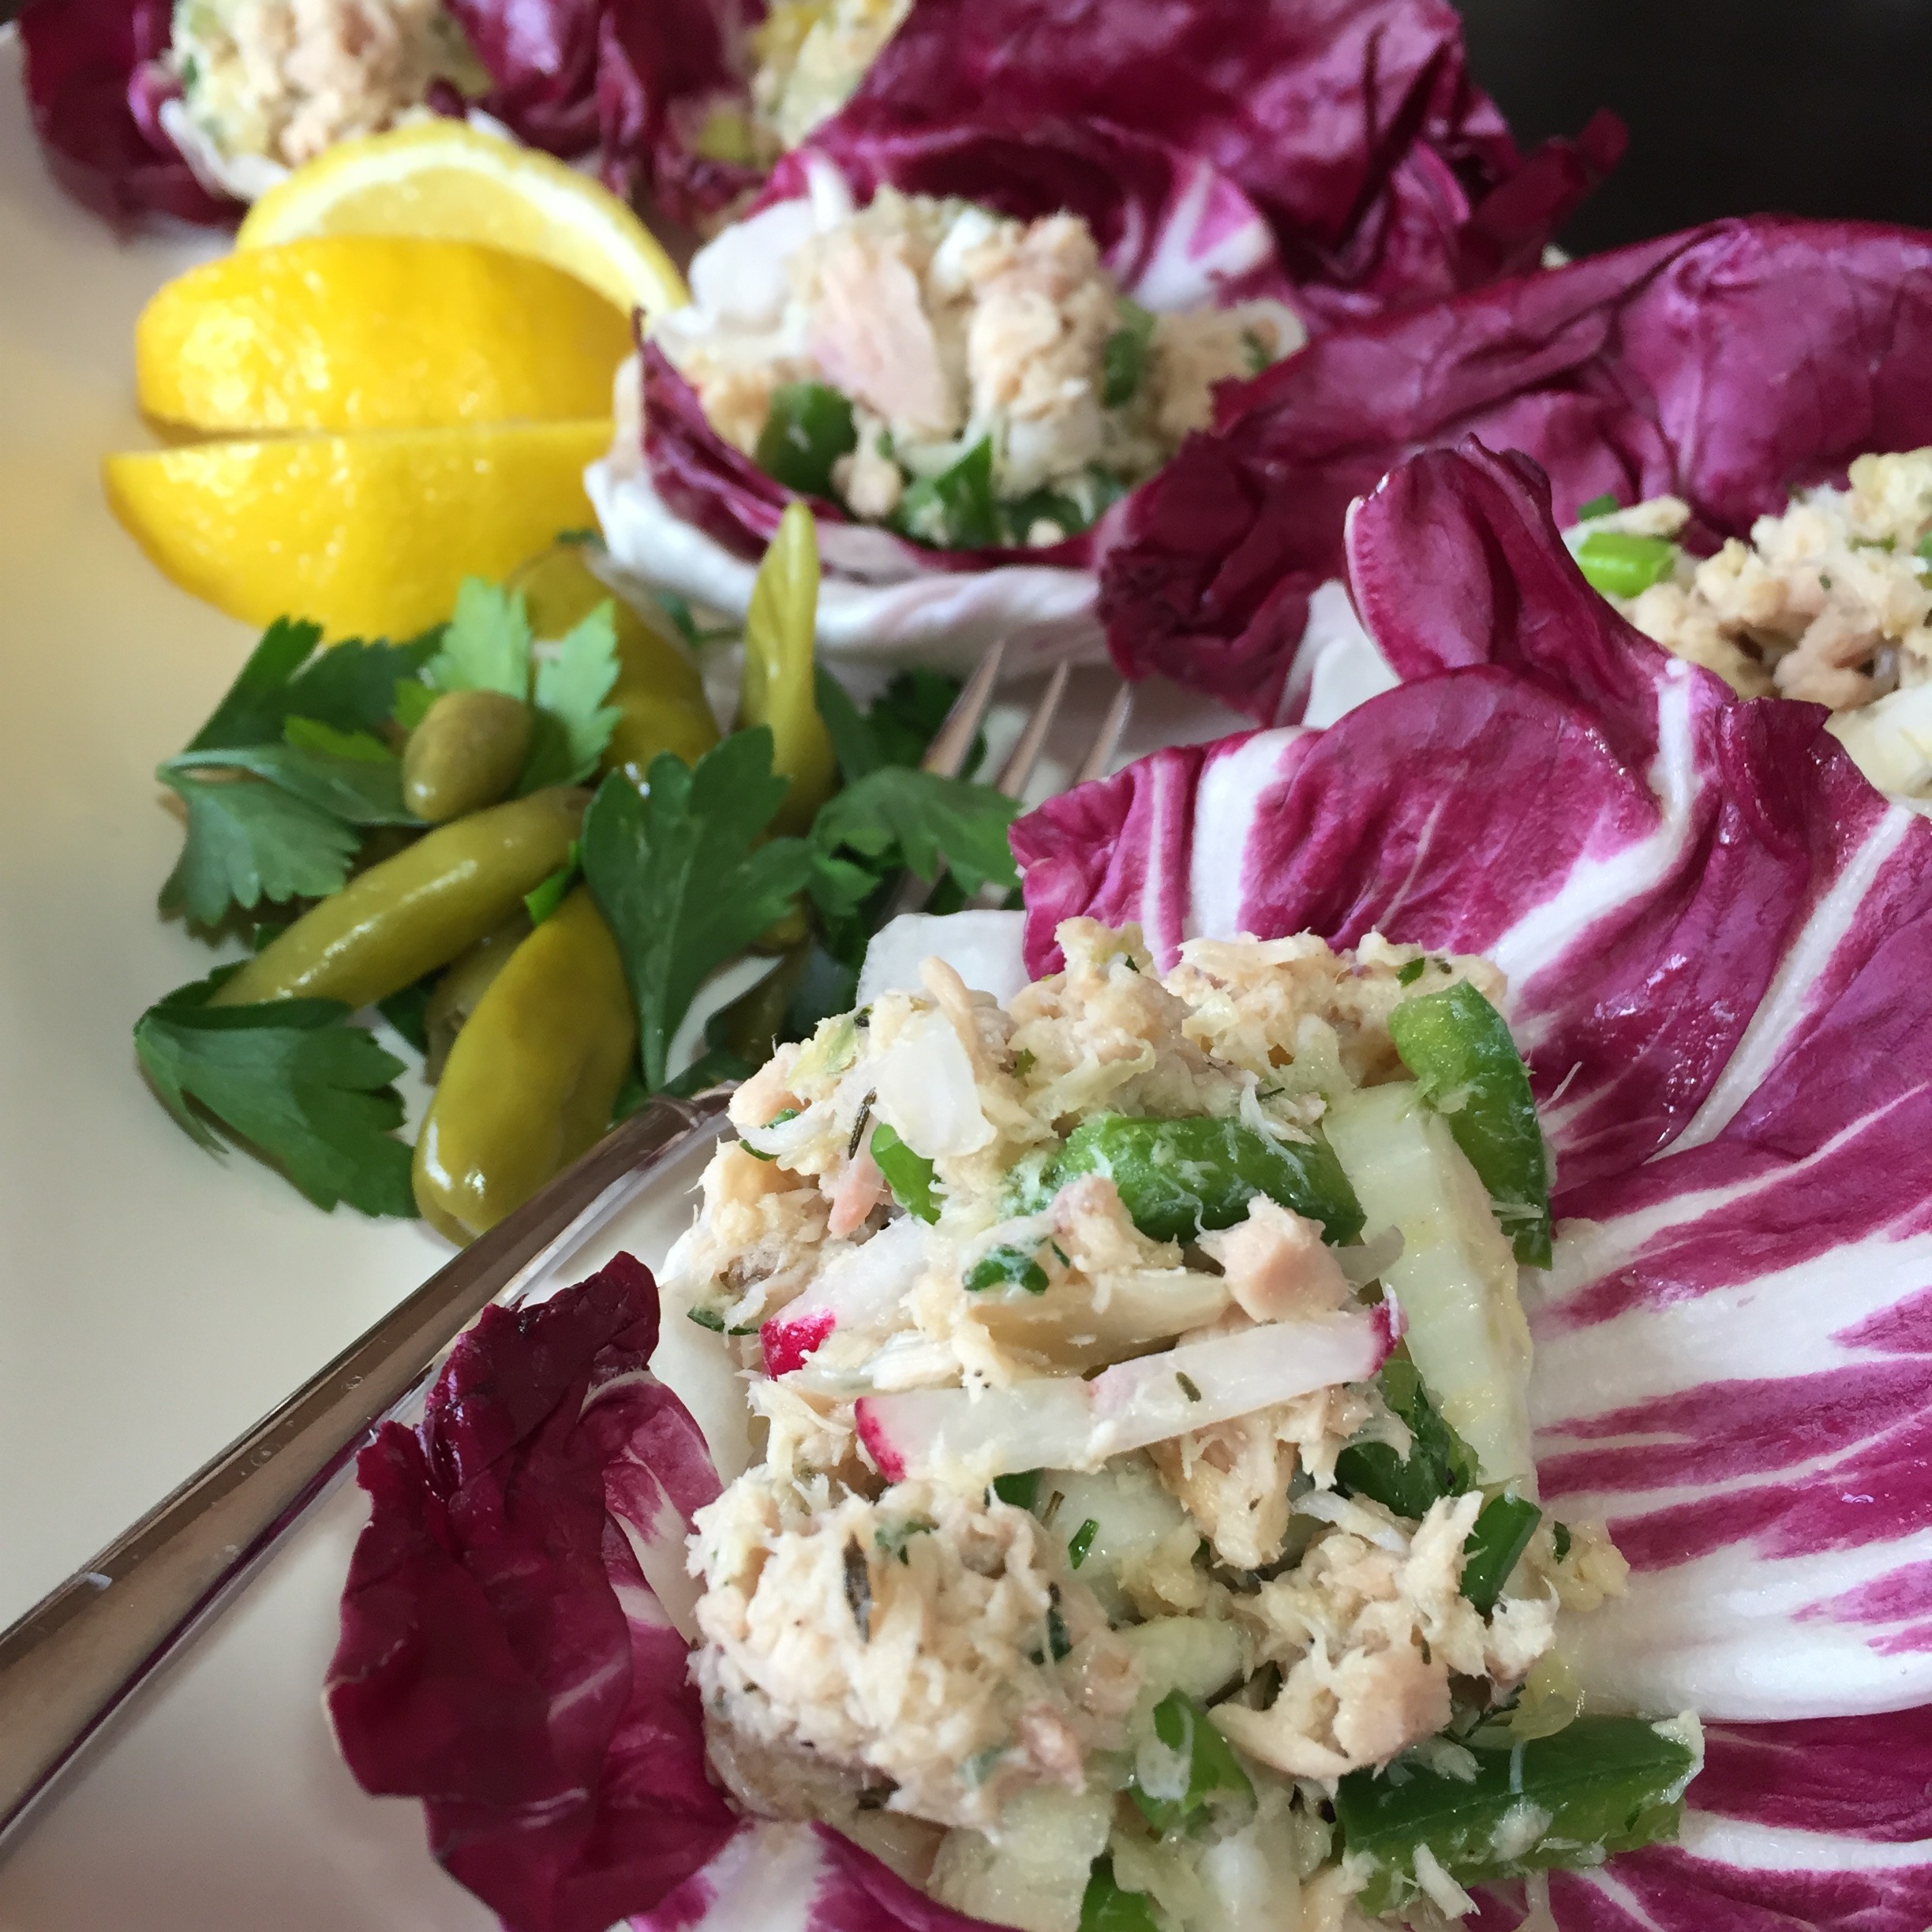
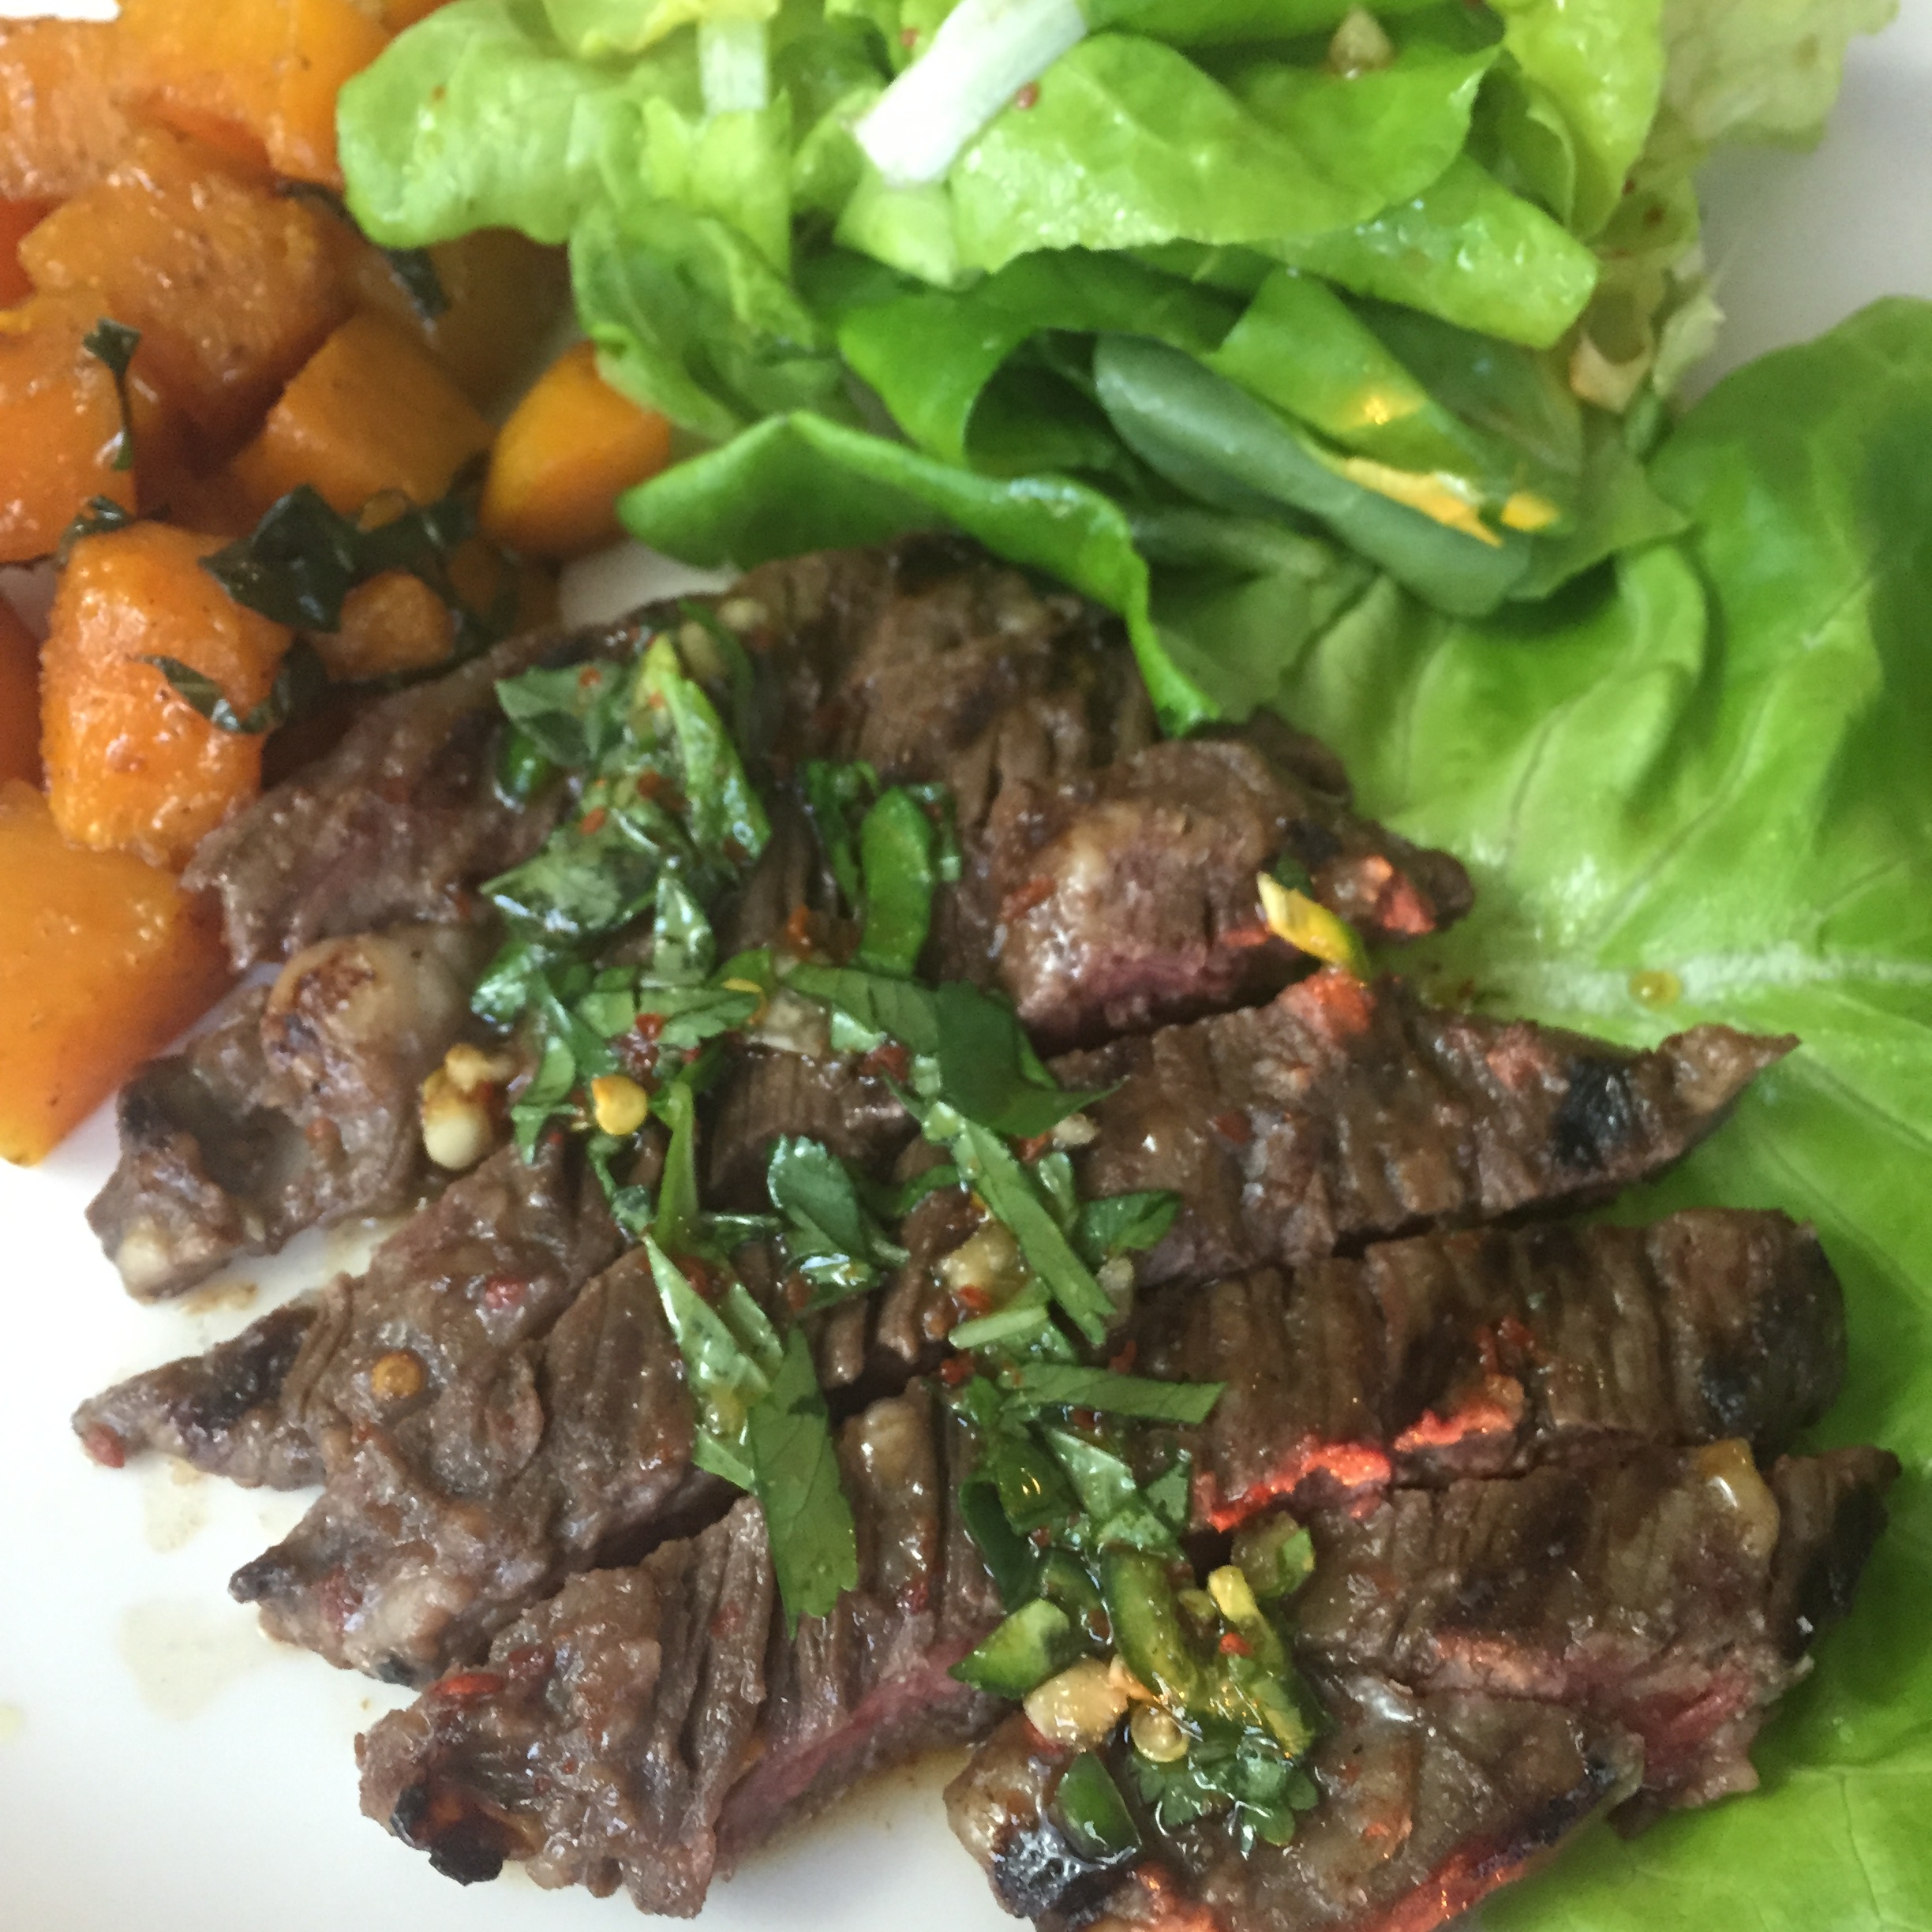
Almost ANYTHING. This stuff is like money in the bank. It will last in your fridge for weeks, and kick all your dishes up about ten notches. Try it with any seafood, any meat, and as a dip or salad dressing. Saute shrimp and greens in this sauce, or just pour it over the finished product. One of my favorite things to do with chimichurri is a quick tomato salad – especially when I am serving something with chimichurri already – putting it in the salad dressing just ties the whole meal together. And it’s so fast and easy!  

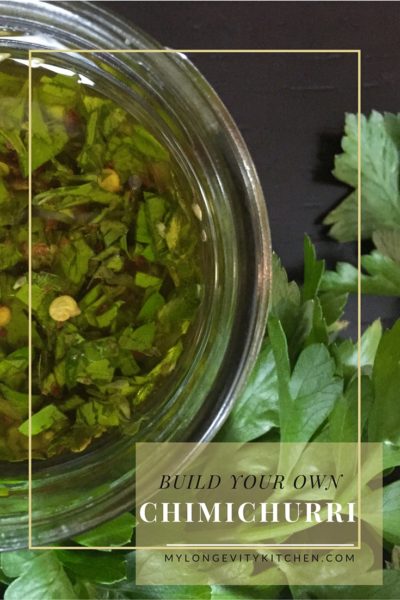
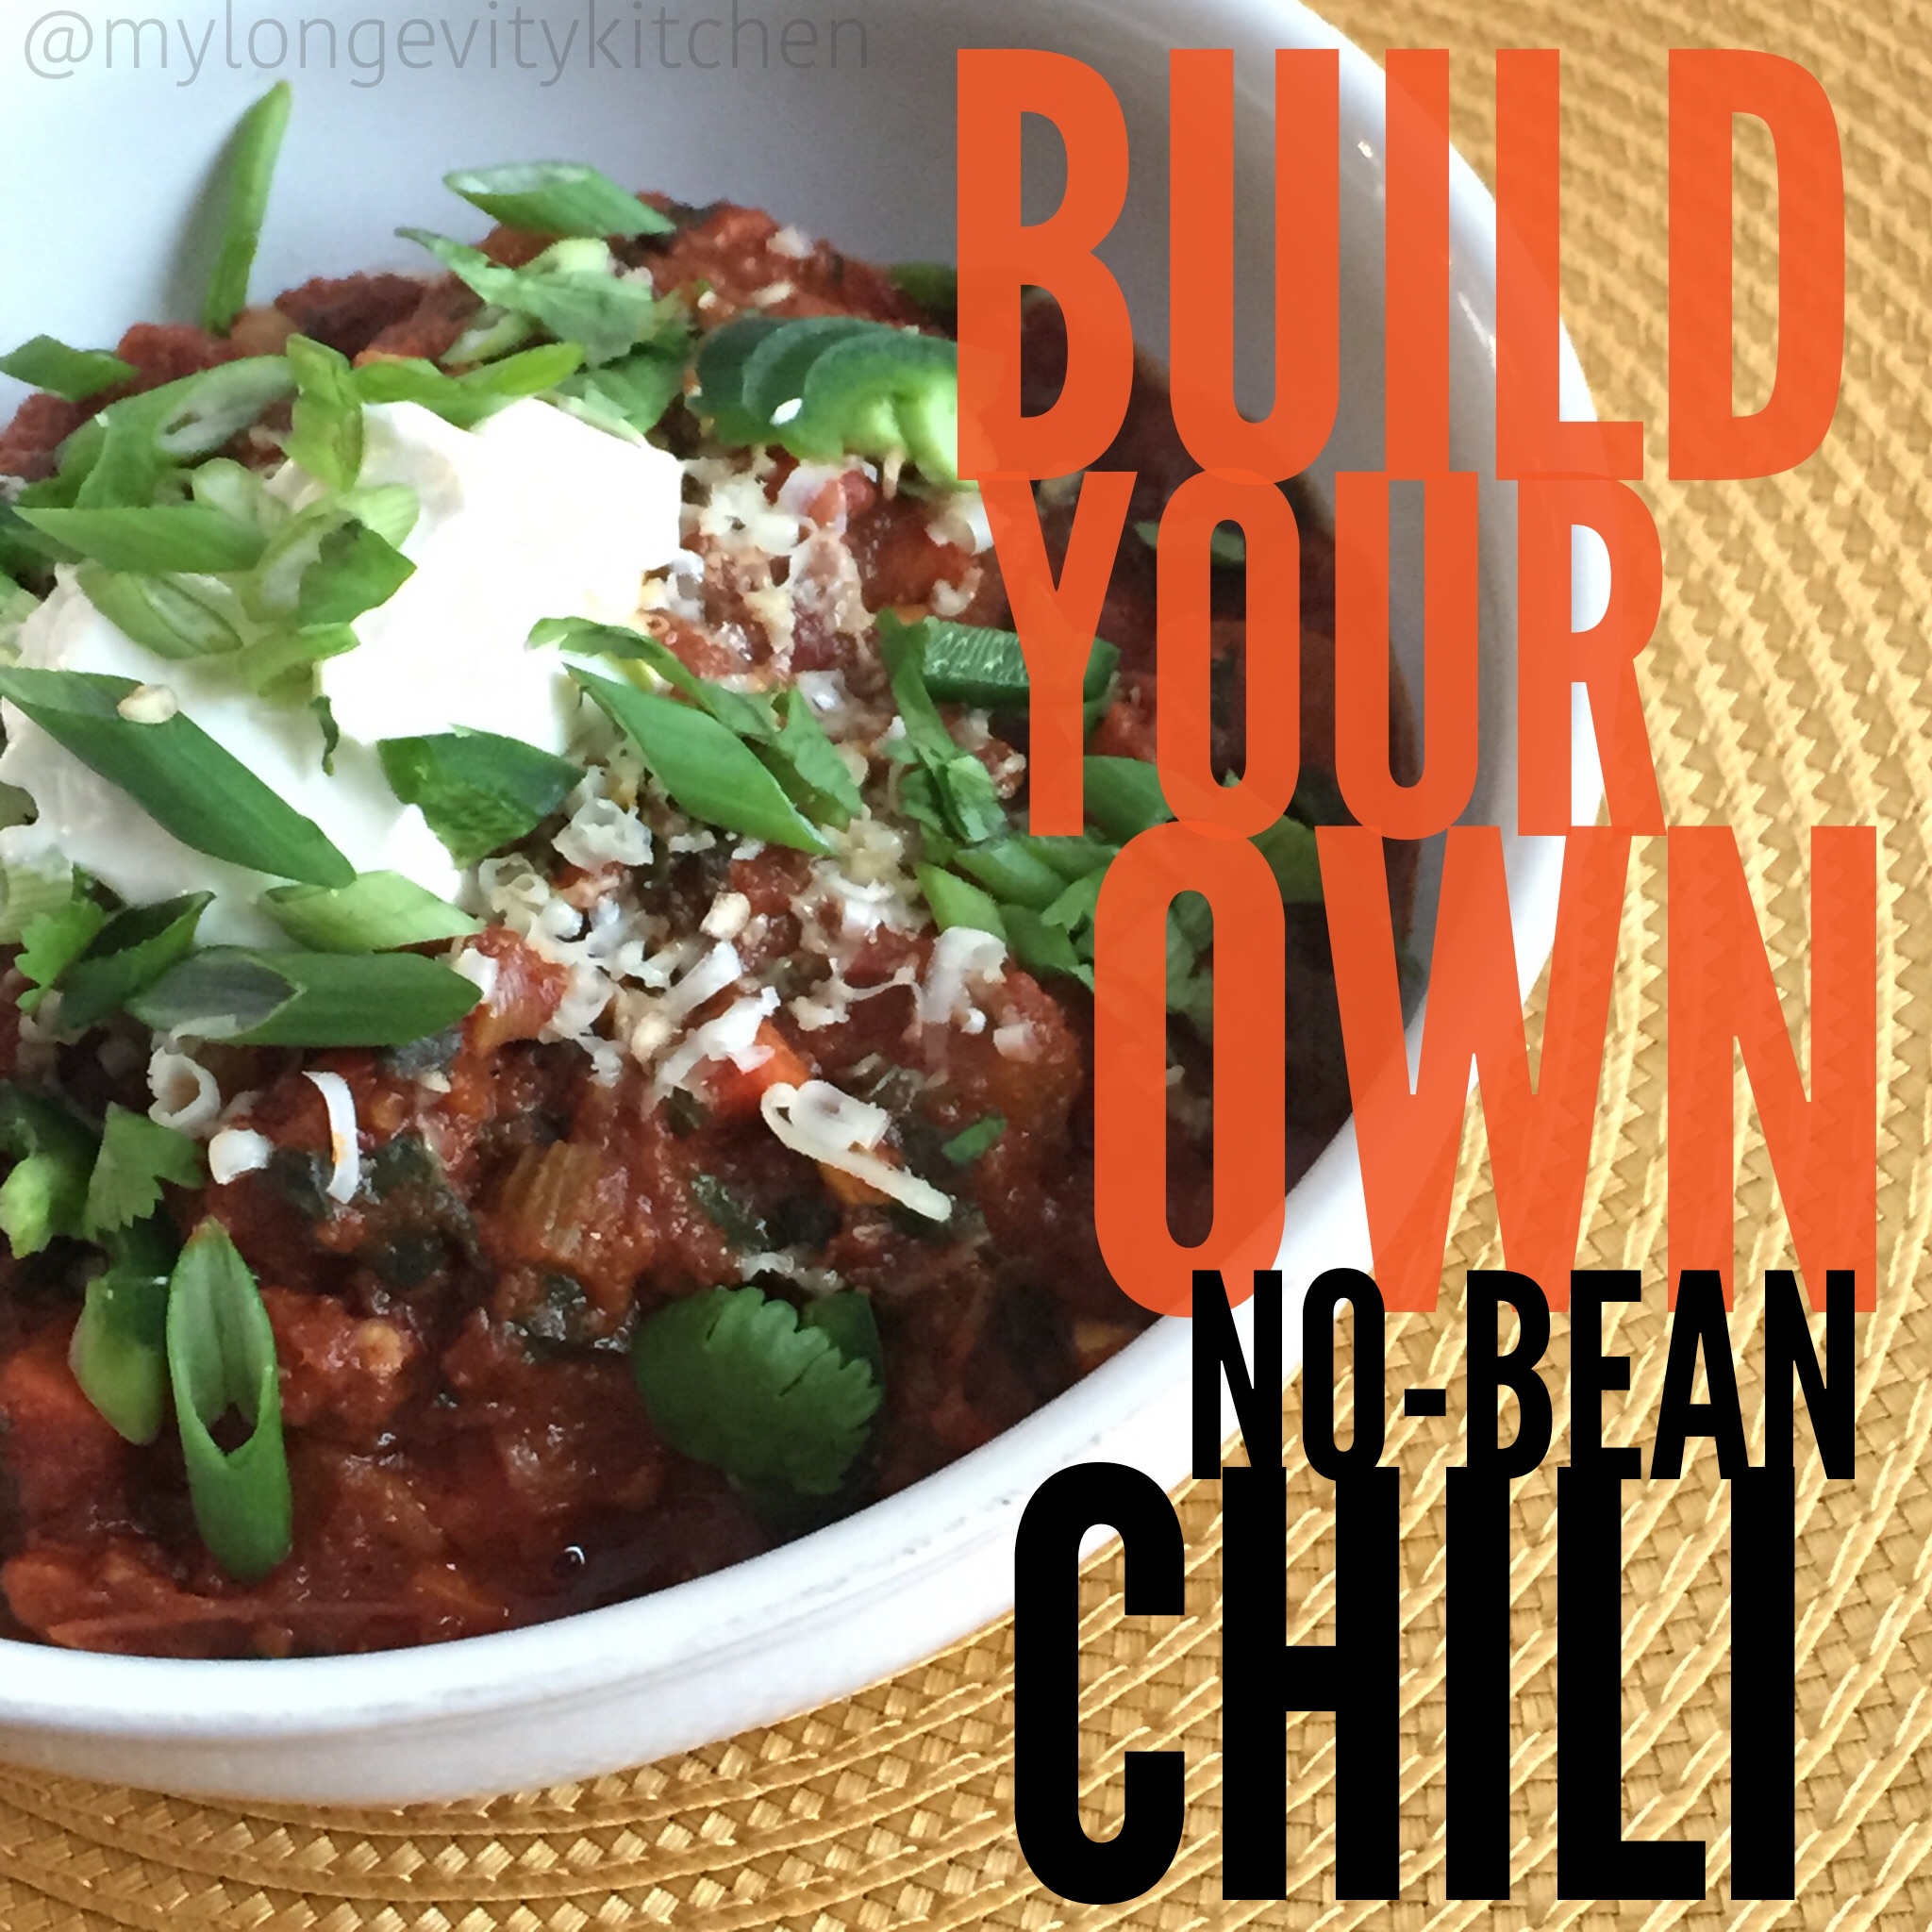
I made this recipe BUILD-YOUR-OWN because you can truly customize it to your liking. I love making chimichurri with Cilantro…but honestly? That’s not really chimichurri. The authentic version would not use cilantro. BUT WE LOVE IT!  It’s fun to combine cilantro and parsley in different quantities. And it’s great to be able to swap out ingredients according to what you already have on hand! 

The best part is there are two ways to actually make this. You can do it by hand, chopping everything real fine, just like they would in an Argentinian kitchen; or you can use a food processor like we do in the modern world because we like everything to be FAST AND EASY! Am I wrong? 


I would like to take a moment to send a shout out to the Italian man who started The Slow Movement,  in 1986. From the farming of the food, to the preparation in our homes, to the time we finish eating; food should be cherished. Time should nearly stand still. 

Food is a wonderful thing, especially when it’s made with your own two hands.  

Go on and rock this recipe out whichever way you’d like. Don’t be afraid to try new things, ask questions, and taste as you go! And look at my notes at the bottom of the recipe for some great ideas for serving and storing this sauce! 

Tag @mylongevitykitchen on Instagram or Facebook, or #mylongevitykitchen. 

Build your own chimichurri sauce for convenience and incredible flavor. This sauce has so many applications, from marinade to salad dressing to dipping sauce. Make it the authentic way, use dried herbs or fresh; endless possibilities. Recipe by Marisa Moon of My Longevity Kitchen

Build-Your-Own-Chimichurri
Yields 1
This vinegary herb based sauce is so versatile already. But this recipe makes it more versatile than ever! Build-your-own Argentinian-style chimichurri based on what you have on hand! Chop it up the old fashioned way, or blend it in the food processor to save time. You pick the ingredients, and you pick the method!
Write a review
Print
Total Time
10 min
Total Time
10 min
Base
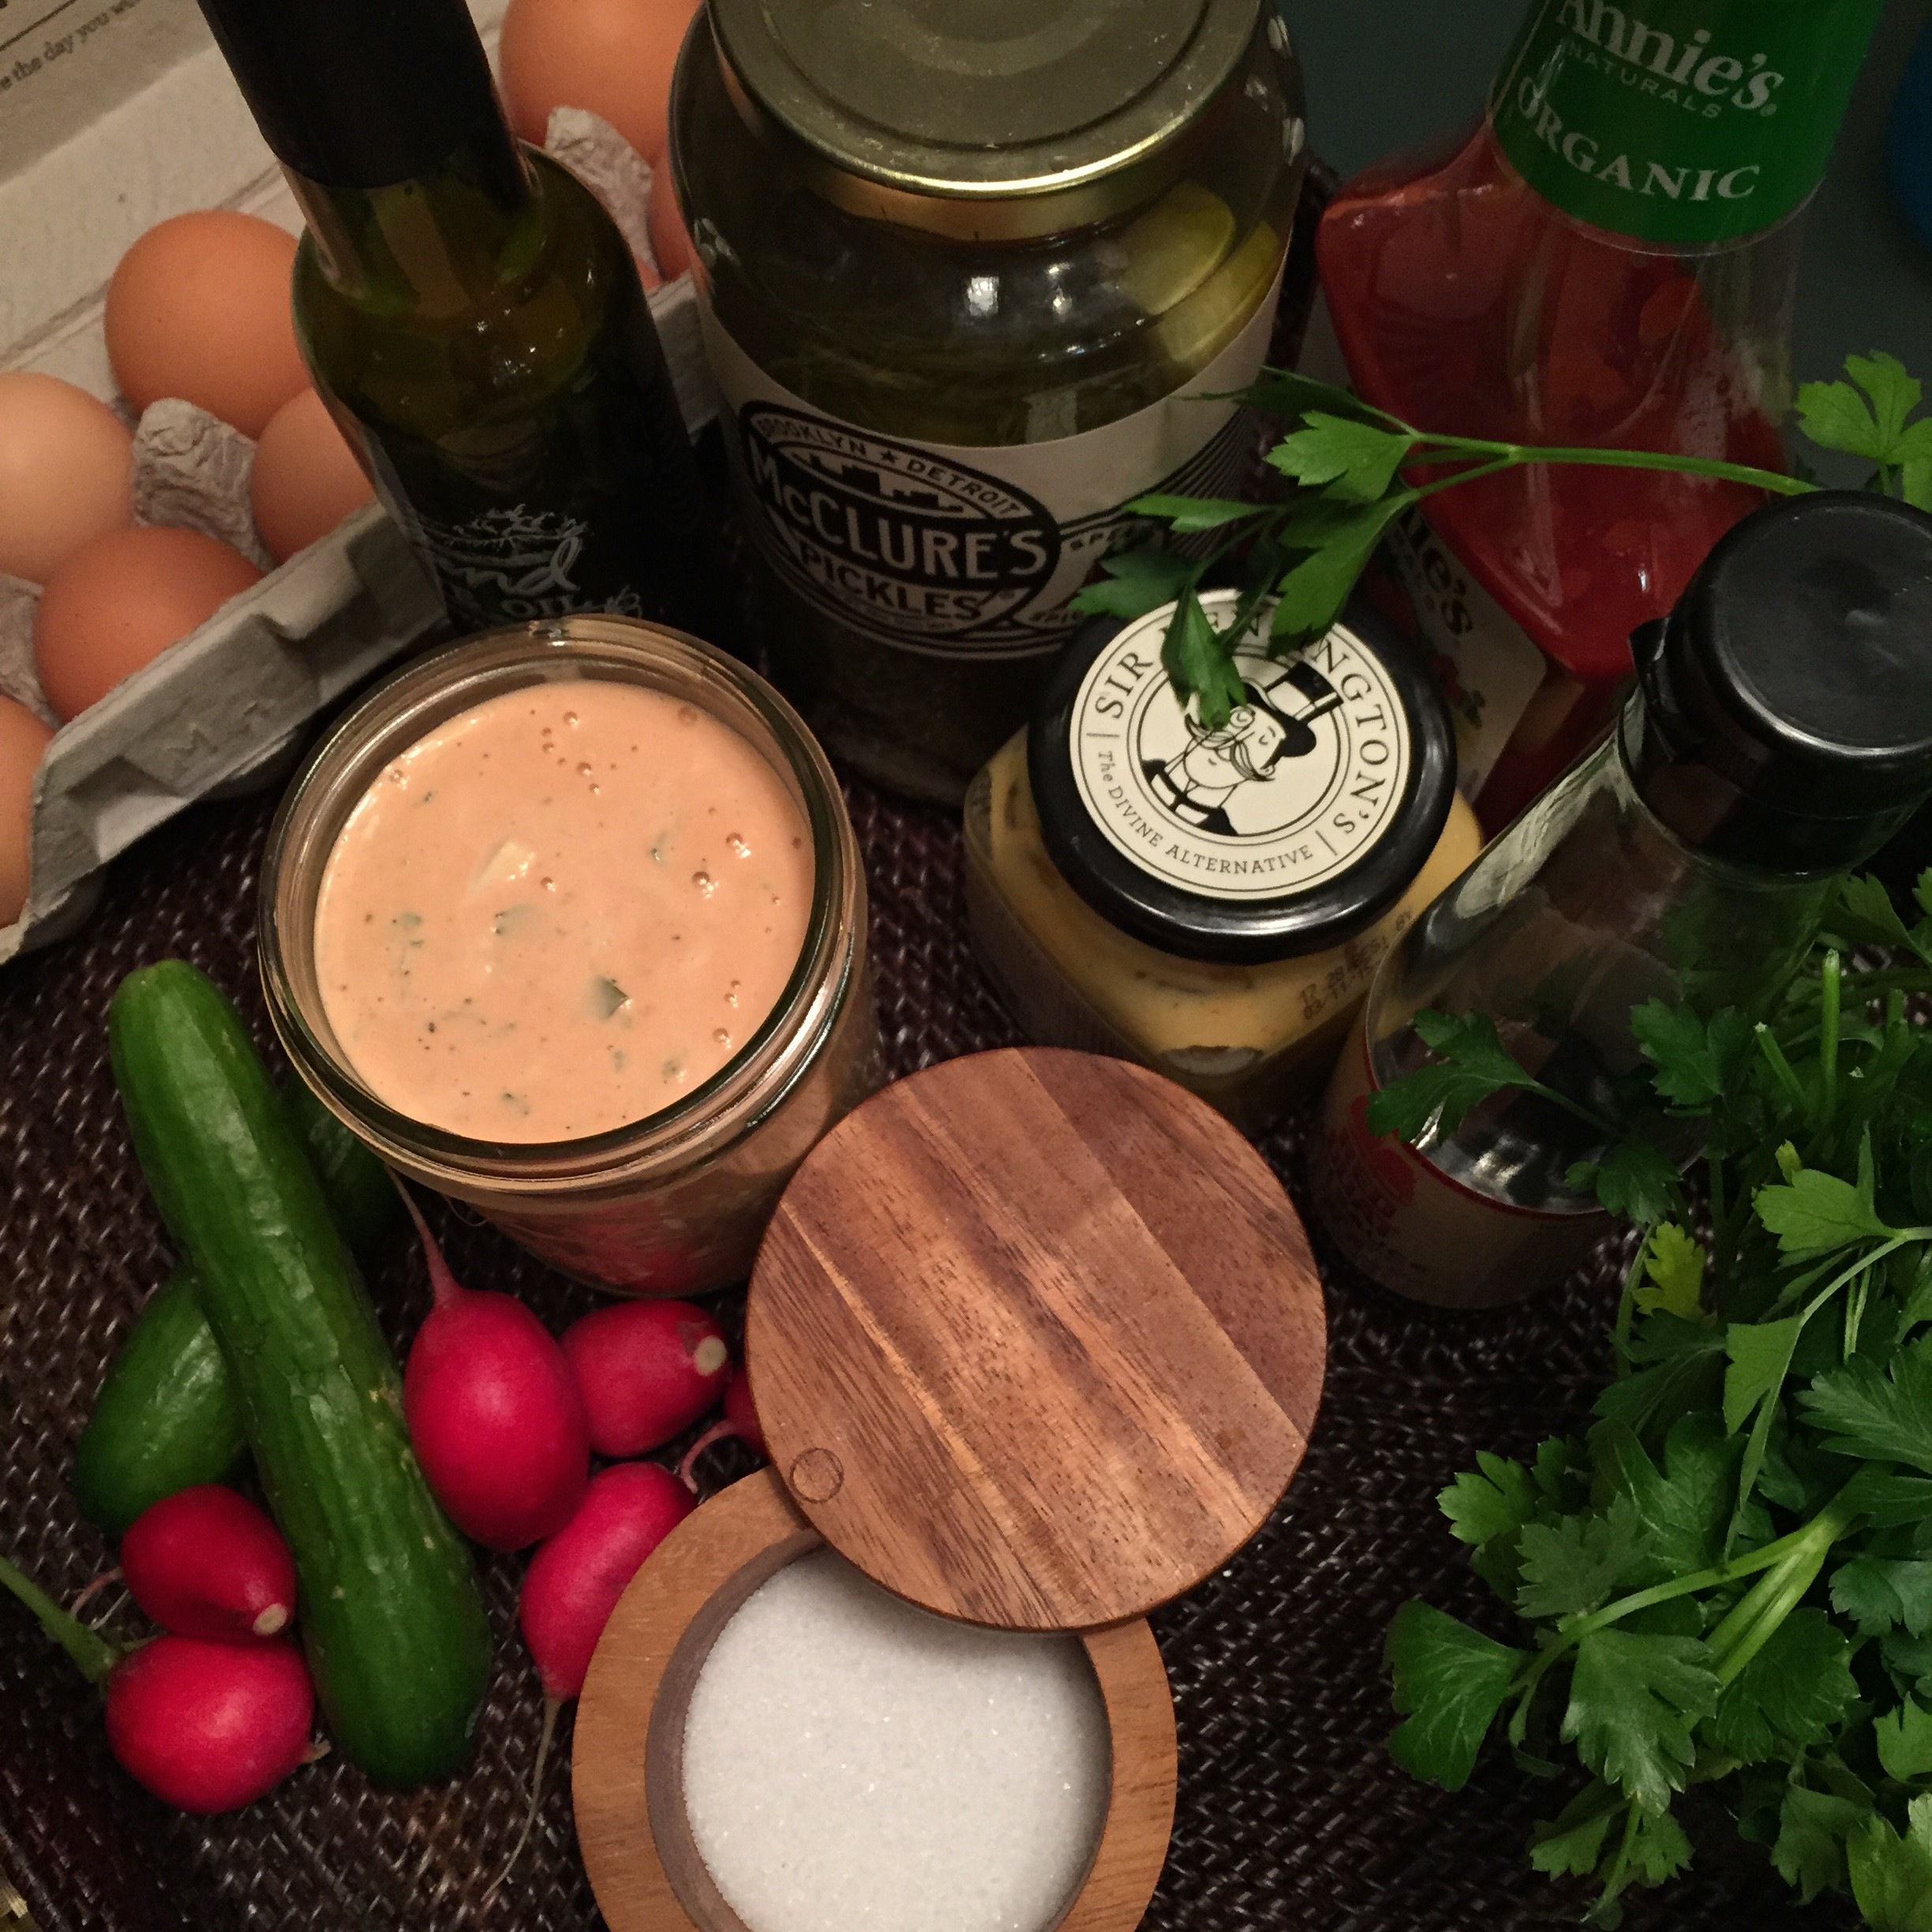
  1. 2 to 6 GARLIC CLOVES, minced
  2. FRESH OR DRIED OREGANO, MARJORAM, or THYME. ¼ Cup Fresh OR 1 Tbsp Dried (oregano is traditionally used)
  3. 1 tsp each SALT & PEPPER
  4. 1/3 Cup ANY Combination of WINE VINEGAR and/or Lime Juice (Red Wine Vinegar is traditionally used)
  5. 2-4 Tbsp WATER
  6. 3-4 Cups loosely packed FRESH PARSLEY OR CILANTRO or ANY COMBINATION of these herbs (Parsley is traditional, Cilantro is a flavor explosion)
  7. ¾ Cup EXTRA VIRGIN OLIVE OIL
Optional Additions
  1. 1 FRESH HOT PEPPER OR ½ BELL PEPPER, minced
  2. ½ SHALLOT OR ¼ ONION, minced
  3. 2 teaspoons CRUSHED RED PEPPER
  4. 1 teaspoon PAPRIKA
Directions to Make By Hand (traditional method, rustic sauce, beautiful finish)
  1. Mince all of the garlic, fresh herbs, and any onions or peppers.
  2. To take the edge off the garlic (and onion if using), mix all base ingredients except for the parsley/cilantro and olive oil, PLUS now you will add your “optional add-ins”. Let this mixture soak for 30 minutes room temp or longer in the fridge (overnight is fine). You may also add the herbs now, which is more traditional, but the bright green herbs will turn a dull color. To save time you can skip this step and add everything at once.
  3. Add the herbs and 3/4 cup of olive oil.
  4. Taste and decide if the vinegar is too strong for your taste. You can add up to 2 more tablespoons of water (when you use mostly parsley, you will want to add more water; cilantro can stand up to the vinegar much better). Taste for salt, and Enjoy!
  5. Keep this in a jar in the fridge for weeks. See notes for more ideas.
Directions to Make in Food Processor (less chopping by hand, smoother sauce)
  1. If using food processor, still roughly chop the garlic, onion and fresh pepper to assist in proper mixing.
  2. To take the edge off the garlic, mix all of the base ingredients EXCEPT the fresh herbs and olive oil, PLUS the “optional add-ons”. Let this mixture rest for 30 minutes at room temp, or longer in the fridge (overnight is fine). To save time you can skip the step of resting 30 minutes.
  3. Add the fresh herbs to the food processor and pulse just a few times.
  4. Now add everything else to the food processor and turn it on for literally a second, just to mix. For a creamier sauce you can add everything EXCEPT the olive oil, and pour it into the machine while it is running. This will thicken the sauce a bit, and really blend it smooth.
  5. Taste if you like the strong vinegar flavor, or add up to two tablespoons of water (using parsley calls for more water, but cilantro can stand up to the vinegar better). Taste for salt, and enjoy!
  6. Keep this in a jar in the fridge for weeks. See notes for more ideas.
Notes
  1. My Favorite version is mostly cilantro, some parlsey, and some fresh oregano. I mix red wine vinegar and lime juice, and blend in the food processor. The flavor is insane!
  2. You can even freeze chimichurri in ice cube trays. Once they are frozen, transfer to a freezer bag, and then use them to add flavor to dinner whenever you want!
  3. Try it as a Salad dressing
  4. Boil/Steam Potatoes and toss with Chimichurri for a killer potato salad
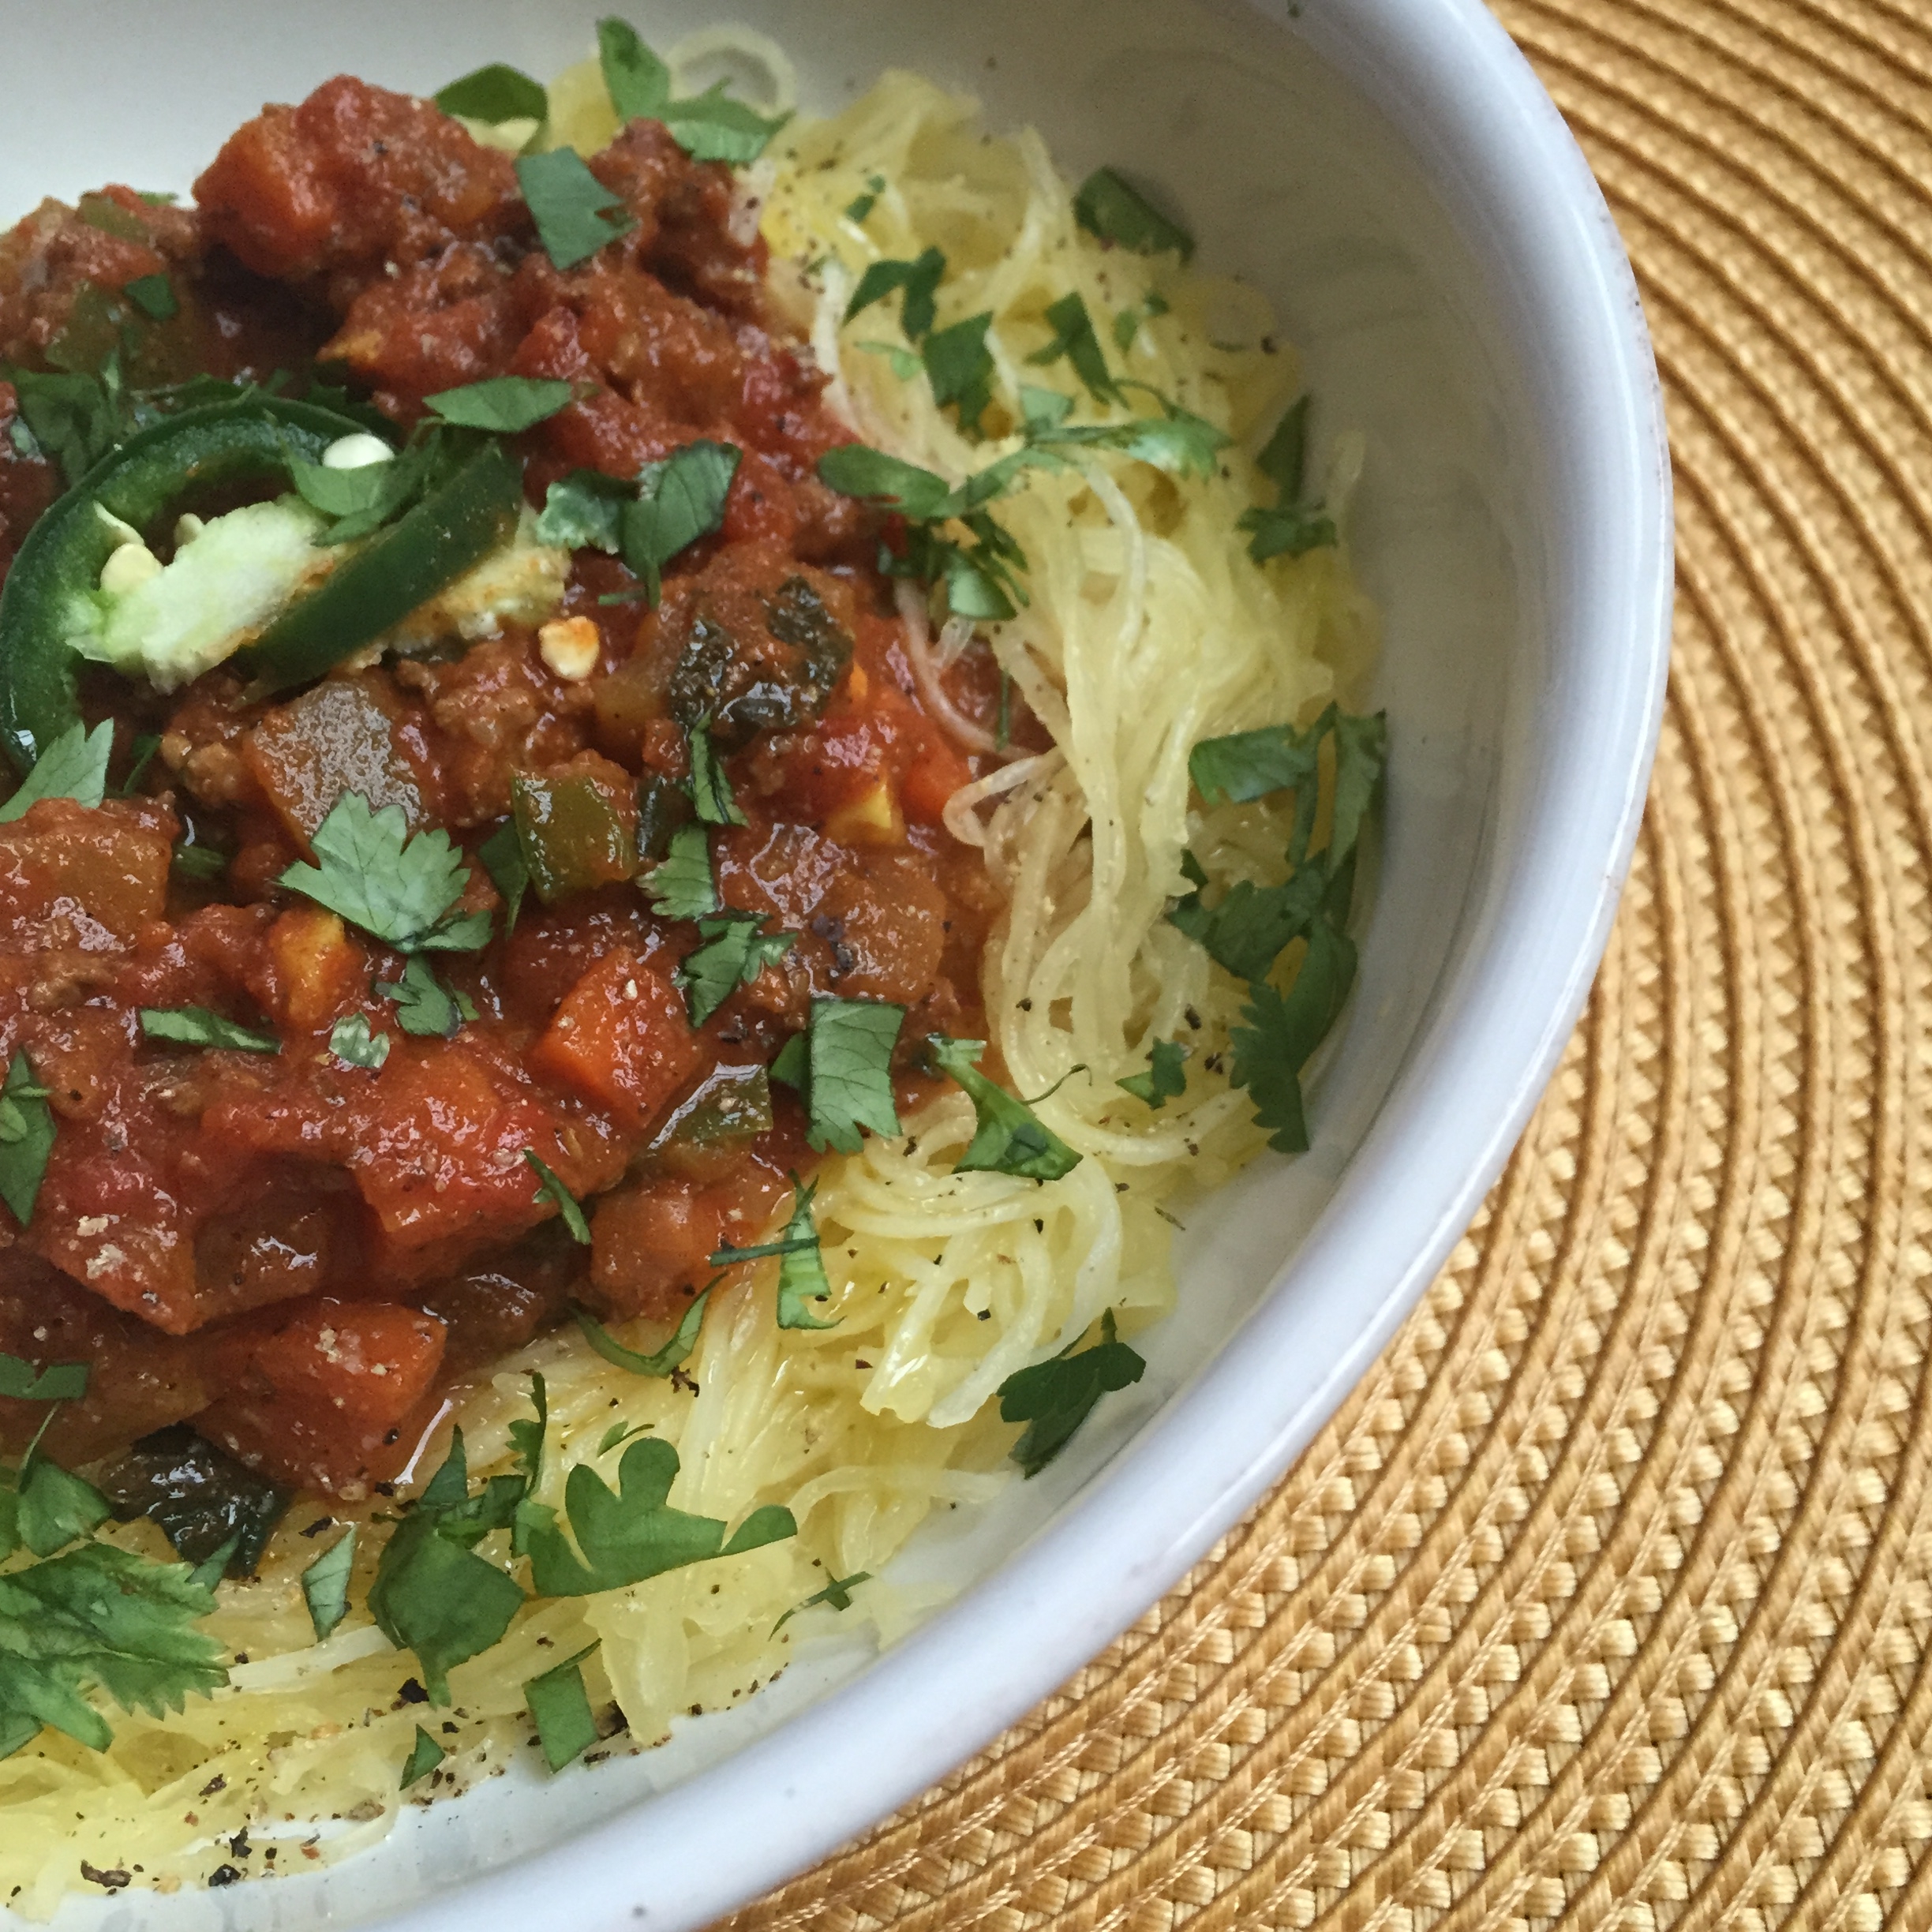
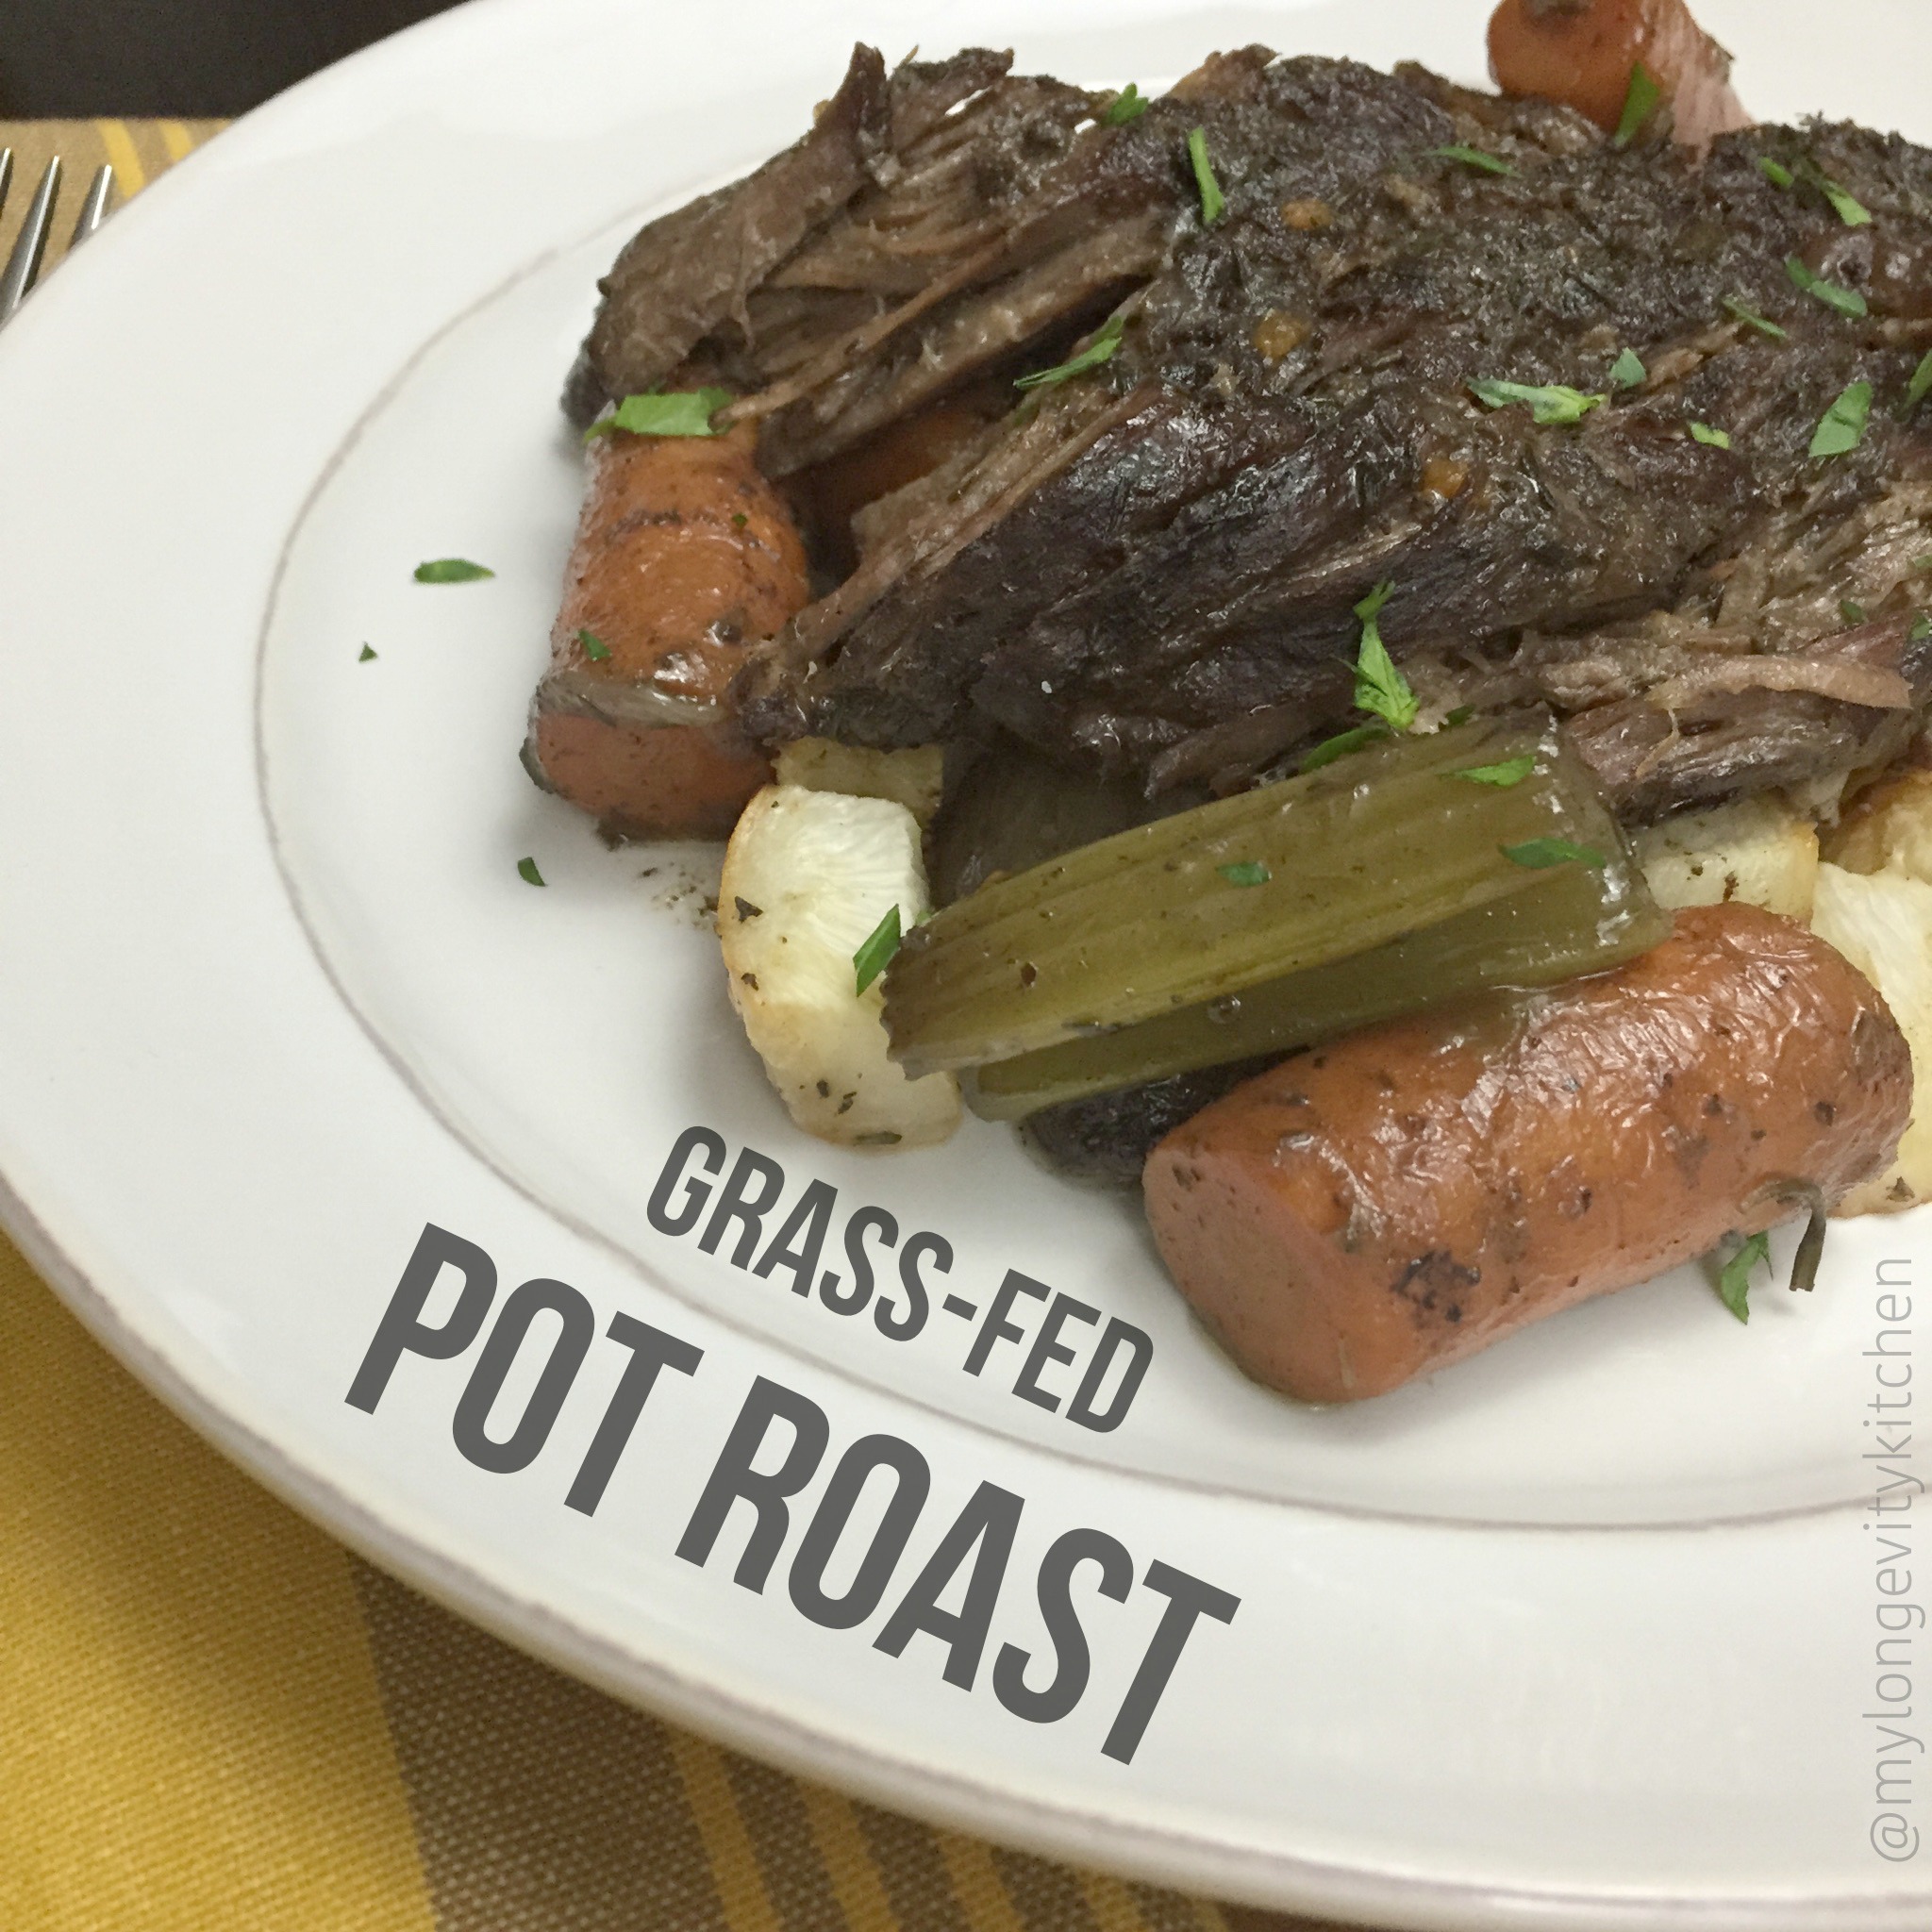
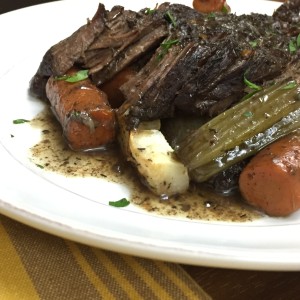
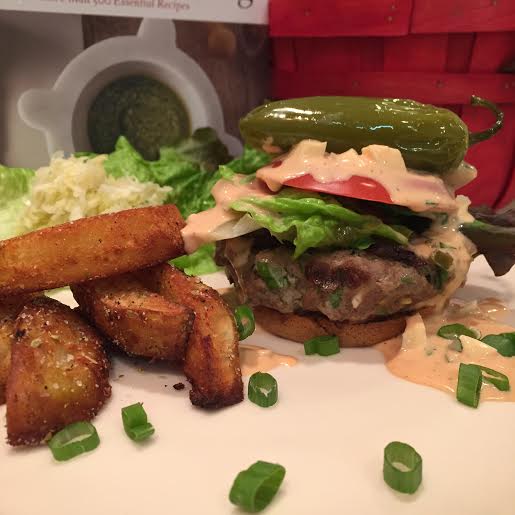
  5. Amazing with any type of fish or meat
My Longevity Kitchen https://mylongevitykitchen.com/

Is the Paleo Diet Nonsense?

16525961761_ec5ee03369_n

According to most of the media, the Paleo diet is nonsense.

See the latest example by clicking right here.

They make statements like “the low-carb interpretation of the paleolithic menu is probably all wrong. The researchers posit that our cavemen and cavewoman ancestors loved-and needed-carbs as much as we do, even if they gathered them instead of cultivated them.”

My Mom sent me that above article and wanted to know what I think….

WHAT DO I THINK?

I agree with most of the points they are making, and so will most Paleo dieters. If you google “Paleo Diet” you’ll see long lists of foods you CAN’T eat, and all these strict guidelines. You’ll also see plates full of t-bones and bacon. Then, when you dig a little deeper, you’ll find that the most notable leaders in this ancestral health movement (such as Chris Kresser, Mark Sisson, and Robb Wolf) will say there is no “one-size-fits-all” approach to the Paleo diet, and white potatoes, for instance, are more than okay for anyone with healthy blood sugar regulation. Most Paleo advocates focus on eating as many vegetables as we can; veggies first, meat second. Oh, and note to all: veggies are carbs.

I follow the Perfect Health Diet which is a variation of the Paleo Diet, also based on history and science. This diet focuses on maximizing nutrients and minimizing toxins; preventing disease. Most of our ancestors thrived on a paleolithic diet which included tubers and white rice. Our ancestors have a massive part to play in how our lives have been, however, over time food has changed and the way of living has dramatically provided a different world to what it used to be, in fact, we can only go so far back in our family histories with the surname meaning and origin of us individually, as there have been an unchecked amount of changes. We do know though that the way they ate did help them greatly, and we should be implementing that in this day and age.

So, I am not “low-carb”, and I think many Paleo dieters are the same way. Depending what your goals are – weight loss, fighting disease, healing from autoimmunity, or overall good health – you will not eat the same Paleo diet as another. In fact, one’s version of the Paleo diet may change several times in their own life, in order to suit their current needs (like when I HAVE switched to low carb, for a brief period, to stimulate weight loss). And others have done the same. I heard from one friend that they decided to add some more weed into their diet. She tells me she found more information by deciding to read more at West Coast Cannabis’s website. Apparently, this further stimulated weight loss. But I am more focused on just the Paleo diet. I’m well aware that many people change their diets or their exercise regimes to help ensure that they focus on any weight loss they are looking to achieve. This can be harder for some people than it is for others, and that is just how things are. Once you’ve managed to achieve your weight loss goals, then you should start to feel an overwhelming feeling of relief, until you may realize that you’ve been left with excess skin and fat. This is the last thing that you should have to worry about as there are many things that you can do to help get the figure that you are looking for. Some people might decide to try something similar to this tummy tuck in Newport Beach, CA to see if this is the best option for them to help them feel confident again. This is just one of the many side effects that the Paleo diet and other diets can bring to a person. But they definitely help people to receive their desired effects.

The Media should look through a wider lense, and they will see there is so much more to Paleo than at first glance. The diet they are referring to is NOT the Paleo Diet that most of us believe in, and practice. Besides, Paleo is much more than a diet.

-Marisa Moon

Asian Marinated Kale & Kraut Salad

"InstaRecipe" Alert! (click here for info)


This kale salad is MARINATED.  

The biggest mistake people make with kale salad is when they don’t massage or marinate the kale!  Don’t make this mistake.  No one actually enjoys chewing on this fibrous raw veggie without a little help.  

Looking for a way to get fermented foods into your diet??? This is a great way to do it.  Mixing it into a salad is a sure-fire sneak-attack that will have you singing “Sauerkraut” in no time.  Try it!

“Ewww Marisa.  Why fermented foods?”  

Think probiotics people!  Think about your digestive health.  Your gut is considered your second brain.  Check out this quick description about why fermented foods are important and how you can eat more of them!

And onto the delicious, easy, make-ahead, keep-em beggin’ marinated kale salad recipe!  

Asian Marinated Kale & Kraut Salad
Serves 2
This makes a great make-ahead lunch or side dish! Give raw kale the love it deserves and massage and marinate it before you're ready to chow down. The combination of sesame oil, tangy sauerkraut, hard boiled egg, and sesame seeds works perfectly here.
Write a review
Print
Prep Time
15 min
Prep Time
15 min
Dressing/Marinade
  1. 1 Garlic Clove, Minced
  2. 2 Tablespoons Rice Vinegar (you can experiment with white wine vinegar or lime)
  3. 1 teaspoon Sesame Oil
  4. 2 teaspoons Oil of your choice (I used homemade chili olive oil, but extra virgin olive oil, or avocado oil are also good choices)
  5. 1 Tablespoon Coconut Sugar (Coconut Aminos would be great here too)
  6. ½ Tablespoon Water
  7. ½ teaspoon each of fine sea salt and black pepper
  8. ½ teaspoon mustard powder (optional; and chinese mustard, or wasabi are great subs)
Salad
  1. 1 Head Curly Kale, stemmed and ripped into 2-3 inch pieces (these vary in size, so start with less and add more once you see how much marinade is left)
  2. 2-4 Tbsp Sauerkraut or Tsukemono (Tsukemono is the same as traditional sauerkraut but without the caraway. Your ingredients should say cabbage and sea salt only; feel free to experiment with other flavors)
  3. 2 Hard Boiled Eggs, sliced or diced
  4. *Sesame Seeds, or Furikake, or Seaweed Gomasio (see notes for more info)
Instructions
  1. Mix the dressing ingredients in a bowl big enough for the kale
  2. Add the kale and toss to combine
  3. Now, take your hands and get in there, squeezing the kale to break down the fibrous texture and work in the dressing
  4. Cover the bowl with plastic wrap and leave at room temp for 2-3 hours, or refrigerate overnight. This salad gets better with time...even days!
  5. When you are ready to eat the salad, mix in 1-2 Tablespoons of Sauerkraut per serving.
  6. Then add the egg. Go ahead and mix it in for a wonderfully messy combination of textures (I kept it pretty for the photos)
  7. Drizzle your salad with a little extra olive oil or chili oil, and sprinkle generously with sesame seeds, or Furikake, or Seaweed Gomasio. Crushed Chili Flakes will be great too!
Notes
  1. *Search Furikake or Seaweed Gomasio on Amazon.com, and buy one if you haven’t tried it! It’s awesome with eggs, rice, soup, and anything Japanese or Korean. The healthier versions are only a few ingredients: Nori flakes, Sesame Seeds, and Sea Salt.
  2. This serves 2 people for lunch, but will serve many more as a side dish.
  3. Tag me in your photos on IG @mylongevitykitchen and #mylongevitykitchen
  4. Want to be part of my recipe testing team? Leave a comment on the blog to let me know!
My Longevity Kitchen https://mylongevitykitchen.com/


Build-Your-Own Tuna Salad


Photo Apr 03, 2 36 20 PM

If you don’t have canned fish in your pantry then I might assume

one of two things…

Either you don’t know anything tasty to make with them, or you think canned fish is gross. This recipe can change your mind in both of those scenarios, so let’s…

BUILD YOUR OWN TUNA SALAD!

Photo Mar 31, 3 18 56 PM (1) Most people think of tuna salad like potato salad and cole slaw…it’s always creamy. That is not true! Many ethnicities use these foods to make bright and refreshing salads just like the tuna salad I am introducing here.     I decided to make this recipe “build-your-own” because there are so many different ways you can go! It’s such an awesome recipe to make when you are out of ingredients, and even out of time! I bring this over to friend’s houses for a quick party appetizer, and people always love it.   Grab whatever you’ve got, and use my recipe template to build your own delicious salad.   ………………………………….

We should really take a minute and talk about how many different canned tunas there are.

Too many! Well most of them are pretty crappy. They are overcooked, packaged with extra liquid, and even artificial flavors. Some tuna fish are much larger than other tuna and will have a higher mercury content.   For many of these reasons above, I have switched over to Wild Planet Tuna. It’s cooked once, packed in it’s own juices (no water or oil), and they fish for smaller fish! Their white anchovies and sardines are the best I have ever had too. My pantry is always stocked with those.

BUT WAIT …

There’s a brand new tuna in town! And it sounds like it is far superior than anything available to consumers before. It is by a brand called SAFE CATCH. 100% of the Safe Catch tuna is tested for mercury levels (with their finest tuna being 10 times less mercury than the FDA limit). The fish is packed raw, and they have tested 70 cooking methods to find the perfect result for the final product. WOW! Safe Catch found me on Instagram and is sending me some free sample. I am pumped! I will probably order right now anyways…sales just started online.  So go ahead and get the safest tuna around! It’s between $3.50 and $4.50 a can.  Photo Mar 31, 3 08 02 PM

I think it’s time to build your own tuna salad!  

Try this salad recipe with crab, and any other canned/cooked fish you like! Let me know how it goes! Tag me on IG @mylongevitykitchen #mylongevitykitchen      

Build-Your-Own Tuna Salad
Yields 2
Using bright herbs, briney goodies, and crunchy veggies, we are really setting a higher standard for canned tuna salads here. This easy tuna salad template will have you rockin' out a refreshing tuna salad with whatever you have in your fridge and pantry! Perfect for lunch or appetizers. See recipe notes for tons of ideas!
Write a review
Print
Prep Time
15 min
Total Time
15 min
Prep Time
15 min
Total Time
15 min
Base Ingredients
  1. 5 oz Tuna preferably packed in its own juices, or drained
  2. 1.5 Tbsp Extra Virgin Olive Oil
  3. 1 Clove Garlic, minced (or 1/2 tsp garlic powder)
  4. 1/4 Cup Sliced Scallions/Green Onions (or 1 Tbsp minced red onion or shallots)
  5. Sea Salt & Black Pepper
Customizable Ingredients
  1. CHOOSE YOUR ACID. 1-2 Tablespoons of acid like Lemon, Red Wine Vinegar, White Wine Vinegar, White Balsamic, Distilled Vinegar, Sherry Vinegar (almost any acid will work for this!)
  2. CHOOSE YOUR PICKLED BRINY GOODIES. 1-2 Tbsp Capers, or chop any of the following and use up to a 1/4 cup: Olives, Pickles, Pickled Peppers, Caper Berries.
  3. CHOOSE YOUR SAUERKRAUT. 1-2 Tbsp of your favorite Kraut! I suggest any basic Cabbage, Raddish, or Beet Sauerkraut; Not Kimchi
  4. CHOOSE YOUR FRESH VEGGIES. 1/2 Cup Fresh Crunchy Veggies, diced small or sliced thinly. Try Celery, Raddish, Fennel, Carrot, Jalapeno, Cabbage, etc…, in any combination)
  5. CHOOSE YOUR HERBS. 1 Tbsp minced Fresh Herbs (parlsey, cilantro, oregano, basil) + 1/8 tsp dried herbs (thyme, oregano are best)
Instructions
  1. In a mixing bowl, mix together the Olive Oil, Garlic, Onions, and 1 Tbsp of your chosen acid, with a pinch of salt and pepper.
  2. Now, add the rest of the ingredients and mix well.
  3. Taste for extra acid, if you prefer.
  4. Eat right away, or refrigerate and enjoy in the next 3 days.
  5. See Notes for many different serving ideas.
Notes
  1. Serves 2 for lunch, 6 for an appetizer.
Serving ideas
  1. Put a heaping scoop on top of mixed greens, and you instantly have an entrée salad.
  2. Wrap it in romaine lettuce leaves and eat it like a taco.
  3. This tuna salad is fantastic alongside a scoop of cottage cheese or an avocado.
  4. Serve small scoops inside raddichio or "cabbage bowls" with extra lemon wedges on the side.
  5. Serve like a dip. Add a tablespoon more of oil, and a dash of acid (or a spoonful of mayo) to help thin out the salad, and serve it in a bowl surrounded by sticks of celery, endive spears, or anything you'd like to dip! Keep a small spoon or fork in the salad to make it easier on your guests. (I often make this to bring to parties at the last minute, when I need to throw something together)
My Longevity Kitchen https://mylongevitykitchen.com/

Build-Your-Own No-Bean Chili

Build-Your-Own No-Bean Chili

My Inspiration

A good bowl of chili is like a warm hug in front of the fireplace…and a GREAT bowl of chili is homemade and packed with veggies!!! 

Chili can be so flexible.  So forgiving.  It can be fast or slow, meaty or vegan.  It can be thick or stewy, spicy or mild.  It can be a one pot meal, a crock pot meal, and it freezes perfectly for your convenience.  I just HAD to make this recipe “Build-Your-Own”. 

This is not a precise recipe that you have to adhere to.  You don’t have to run out and shop for the ingredients.  You can make the chili spice blend from scratch, or you can cheat and skip a few steps (see recipes at the bottom).  You can choose your favorite veggies and meat, or just use whatever you’ve already got!  I love it on a bed of spaghetti squash…

Build-Your-Own No-Bean Chili squash

I have made this chili several times this winter, and it’s perfect every time. 


Longevity Tips…

What kind of meat will you use?  Chili enthusiasts will argue which cuts of meat are appropriate for chili.

I say anything goes!

This is a great opportunity for you to cook with grass-fed beef or bison if you don’t already. The grass-fed ground beef can be found for as low as $3/lb, and the bison may be expensive, but in this veggified chili dish you will be stretching that $8/lb ground bison into 4-6 meals! Bison is more wild, and has even more longevity benefits than grass-fed beef. You may also use grass-fed beef stew meat diced small, chuck roast/pot roast diced small in 1/2 inch pieces.  You can change it up entirely and go with some organic ground turkey or chicken…although I always suggest ruminant meats (grass grazing mammals: cows, lambs, bison, and goats) over poultry because they are more nutritious. 

If we were to rank popular meats by their healthfulness, the order would be (1) fish and shellfish, (2) ruminants (beef, lamb, goat), and (3) birds (duck, chicken, turkey).  In last place would be pork,” says Paul Jaminet from Perfect Health Diet.

Now…WHY NO BEANS?? You might be thinking beans will add bulk for less buck; but that’s not the way I look at beans or legumes.

I look at beans or legumes as a specialty item you should be cooking with only if you take the time to prepare them the old-fashioned way.

You’ve probably seen few recipes that instruct you to soak the beans overnight.  Soaking beans and legumes overnight (grains too), is the proper way to treat these foods in order to ensure proper digestion and mineral absorption.  Not until the last 30-50 years have we been in such a hurry to skip this crucial step required to cook nutritious legumes.  When you use beans in the can, you can be sure they were not soaked or cooked properly. They can cause digestive distress and block the absorption of all those beneficial minerals they are known to contain.  So, only use those canned beans when you are in a bind! And take the time to learn more about cooking your beans. Soaking overnight sounds hard, but it’s hands free and only takes a little planning! Read more about the big legume debate here, from my favorite myth busting expert Chris Kresser

Bushels of organically grown tomatoes from my friends at Smits Farms in IL/IN

Lastly, lets take a minute to recognize the star of this dish.  The cooked tomatoes. 

Tomatoes, like other fruit, multiply in nutrients when you cook them. And the longer you cook them, the more nutrtients they will provide you! “Just 30 minutes of cooking can more than double their lycopene content,” and lycopene is the cancer-fighting, skin-enhancing compound that makes tomatoes red! Start cooking with organic tomato paste for the big win. This concentrated form of tomatoes has up to 10 times the lycopene of raw tomatoes!

Time out.

If you aren’t already buying organic tomatoes, you should start right now. Standard tomatoes are sprayed with some of the highest levels of herbicides/pesticides being used. These chemicals are “classified as ‘bad actors’ by the Pesticide Action Network (PAN). A “bad actor” is a chemical that is toxic, promotes cancer in lab tests and animal studies, interferes with reproduction, or contaminates the environment.”

Thanks to Jo Robinson’s book “Eating on the Wild Side: The Missing Link to Optimal Health”, I am able to provide you with this important information.

And skip the traditional cans because they are lined with all sorts of chemicals that tomatoes leach from (even if they are BPA free). Go for glass jars or cartons of organic tomato products.

“But Marisa! They’re wayyyy too expensive!”

Everything healthy is expensive if you buy it at regular price. I stock up on organic tomato products when they are on sale. You can often get glass jars around $3 a piece or less! Keep your eyes peeled and start stocking up (hello Costco). It is worth it people. Why use a cancer-fighting food if you are going to burden your body with loads of chemicals at the same time? I heart organic tomatoes.

Build-Your-Own No-Bean Chili Main Edit


It’s Time To Cook…

This is the type of dish you make on a Sunday when you might be interrupted a million times while cooking, you are feeling kinda lazy, and you want to make a dish worthy of family praise.   Although very simple, this is the type of dish you have to prep the ingredients first!  You cannot chop-as-you-go!  This might sound a little troublesome, but it’s actually to your advantage in many ways.  You can chop all the veggies up to a day in advance.  Consider making a triple batch of chili seasoning in the recipe below, and use it later to give anything a spicy, smokey, warming flavor.  

Because this recipe is so chillaxed, you will need to get your salt and pepper arsenal ready and spice this chili with some intention!  We will likely use different broths, different meats, or different tomatoes, different veggies; our salt is probably different types or grain sizes, and we may even be using different spices!  For that reason, I cannot tell you how much salt you need;  I can only guide you.

salt crock


OH!  AND BUY YOURSELF A SALT CROCK ALREADY!  

Stop using the salt shaker from the table, and get real chef!  You need to be picking up the salt with three fingers, and sprinkling it over your food like they do on TV.  That’s how you get your food to taste good!  Buy a salt crock, buy a bag of fine sea salt, and start practicing your salt showers today!  P.S. It is almost impossible to get too much sodium in your diet when the food is homemade and you use sea salt. 


Now that you are armed and ready to make a pot of longevity chili, you better get goin! Tag me in your delicious photos, and tell me how it goes! @mylongevitykitchen #mylongevitykitchen  

Build-Your-Own No-Bean Chili
Serves 4
You'll find it hard to believe that 8 cups of veggies are jam packed into this no-bean chili. With the combination of grass-fed meats, slow cooked tomatoes, all those veggies, and homemade spice blends, you can really deliver the nutrition in this old-time family favorite. AND with this flexible recipe, you can customize it to your liking! Try it with different veggies, different meats, the slow-cooker method, and build-your-own spice blend. I've laid it all out for you in this DIY chili template.
Write a review
Print
Prep Time
45 min
Cook Time
1 hr
Prep Time
45 min
Cook Time
1 hr
Longevity Chili Seasoning (for one batch of Chili; read below for "cheater" blend)
  1. 2 Tbsp CHILI Powder
  2. ½ Tbsp GARLIC Powder
  3. ½ Tbsp ONION Powder
  4. 1 tsp PAPRIKA
  5. 1 tsp SMOKED PAPRIKA (optional, but awesome)
  6. 1 Tbsp ground PEPPER (black, white, pink, anything goes)
  7. 1 tsp ground CUMIN
  8. 1 tsp TURMERIC (optional, brightens the red color in chili)
  9. ½ tsp GROUND MUSTARD(optional)
  10. ½ tsp CHIPOTLE Powder, or any Hot Chile Powder like cayenne (optional for spicy food lovers; Chipotle adds smoky flavor)
Cheater Chili Powder (if you reallllly don't want to make the above recipe)
  1. 4 Tbsp CHILI Powder
  2. ½ Tbsp GARLIC Powder
  3. ½ Tbsp ONION Powder
  4. 1 tsp CUMIN
Veggie Prep
  1. 4 Cups HARD VEGGIES, diced (any combination of Onions, Celery, Carrots, Turnip, Rutabaga, Squash; I suggest 1 cup of onions, 1 cup of carrots, and any combo for the last 2 cups)
  2. 3 Cups of LEAFY GREENS (any combo of any combination of kale, swiss chard, mustard greens, collards, or spinach)
  3. 4 Cloves GARLIC, peeled and chopped at least 10 minutes before cooking (activates anti-cancer properties)
  4. 1-2 Cups PEPPERS (bell peppers, fresh jalapenos/serranos, poblanos, banana, etc...)
Chili Ingredients
  1. COOKING FAT, for High Heat (e.g. palm oil, ghee, avocado oil, organic lard, palm shortening, bacon fat)
  2. 1 lb Grass-fed/Organic MEAT (e.g. grass-fed ground beef, grass-fed stew meat diced 1/2 inch small, organic/pastured ground turkey or chicken, and my favorite is ground grass-fed bison)
  3. 1 batch of Longevity Chili SEASONING (approximately ½ Cup or as measured above)
  4. 40 oz Organic canned/jar TOMATOES (approximately 4-5 cups; you may used diced, peeled, crushed, or I prefer whole peeled tomatoes smashed)
  5. 1.5 Cups Bone BROTH or Stock (beef or chicken)
  6. Sea Salt and Black Pepper
Instructions
  1. Prepare your chili seasoning blend, and prep all of your vegetables.
  2. If cooking with the old-fashioned stove-top method, continue to step 4.
  3. If using the crockpot/slow-cooker, throw all of the ingredients in and set timer for Low (8 hrs) or High, (5 hrs) depending on your schedule. Use the browning method if your cooker has one, and brown the meat first for more flavor. If you like a thicker chili, transfer to the stove top for 10 minutes at a light simmer, uncovered and most of the liquid will reduce. See notes for toppings!
  4. Heat a stock pot with 2 Tbsp of cooking fat.
  5. When it's hot, add your meat, and season with salt and pepper. You should hear the meat sizzle.
  6. When the meat is browned on all sides, remove it with a slotted spoon, and set aside.
  7. Now add 2 more Tbsp of COOKING FAT, turn the heat to high, and throw in your 4 cups of the HARD VEGGIES (onions, carrots, etc...)
  8. SEASON with salt and pepper and cook for 3 minutes, stirring occasionally.
  9. ADD GARLIC and LEAFY GREENS. Cook 1 minute, stirring occasionally.
  10. Add your MEAT and your longevity CHILI SEASONING, and stir. Can you smell the lovely spices?
  11. When the spice mixture aroma fills the air, about 1 or 2 minutes, you will add the TOMATOES and the bone BROTH/stock.
  12. Stir and bring everything to a simmer. Stir again and REDUCE HEAT to low, COVER PARTIALLY and set a timer for 30 minutes (partially covering it allows liquid to evaporate, and your chili to thicken).
  13. ADD your diced PEPPERS and 1 TBSP SALT, partially cover, and set timer for 15 more minutes.
  14. Uncover and STIR. If your chili is soupy, simmer for 10 more minutes uncovered. Taste for salt, and serve. See notes below for yummy toppings!
Notes
  1. Suggested Chili Toppings include scallions, fresh jalapenos, cilantro, pickled peppers, organic sour cream or yogurt, diced avocado, and guacamole.
  2. Stretch this dinner by serving over spaghetti squash or rice that is seasoned with olive oil, salt and pepper.
  3. This recipe is freezer friendly.
  4. Tag me in your photos! @mylongevitykitchen #mylongevitykitchen
My Longevity Kitchen https://mylongevitykitchen.com/


Grass-fed Pot Roast

Grass-fed pot roast recipe for the whole family.  Paleo, Primal, Nutritious Recipe with winter root vegetables.  By Marisa Moon of My Longevity Kitchen

I love braising.

Braising is cooking something in liquid, at a low temp, usually after searing it first.

Why do I love braising?

It is easy; almost foolproof (unless you have too little liquid and burn your food), it always yields a flavorful, professional quality dish; and it is one of the greatest cooking methods for longevity.

What makes it healthier than other cooking methods?

Just like our modern lifestyle, we like everything fast. We usually crank up the heat on our grills, ovens, and stoves, and quick cook our favorite foods to get a crusty, smoky, texture and flavor. This is tasty, no doubt, but I would rather leave that for the grilling season… allow me to explain with a quote from my favorite nutrition book, The Perfect Health Diet by Paul Jaminet, PH.D., and Shou-Ching Jaminet, PH.D.:

“In meats that are grilled, barbecued, or pan fried, heterocyclic amines (HCAs) form from amino acids, sugars, and creatine. Formation of HCAs is substantial at temperatures around 400 degrees F. HCAs can cause cancer.”

Take a look at the warnings on www.cancer.gov, and see for yourself. 

Is this definitive? Can we be positively sure?  No. It’s nearly impossible to test such a thing in controlled studies, especially on humans.

But, gathering the information we have so far, HCAs and PAHs are dangerous to our DNA and might be making us especially vulnerable to cancers.

What are HCAs and PAHs? They are chemicals created during the process of cooking meats at high temperatures, or over an open flame.

I love the smells and flavors from grilling and roasting meats just like everyone else, but I am content now knowing that those cooking methods should be saved for specific occasions.

Braising is a great technique to learn.  You will find this cooking method works well on many of your favorite foods!  This works especially well with inexpensive cuts of meat, meat on the bone, and hearty vegetables. 

This slideshow requires JavaScript.

Speaking of inexpensive cuts of meat, the chuck roast, or pot roast, is an economical cut of beef. It comes from the shoulder of the cow, and has lots of connective tissue which makes it perfect for slow cooking.

This is a great cut of meat to buy when switching over to grass-fed meats, trying to feed a family on high quality meats, and if you love tender, slow-cooked beef. If you find one with bone in, then go for it! Bones equal more flavor, and you can even reuse them to make stock after you scarf down this lovely meal.

See the recipe notes for ideas how to stretch this meal, or even save hands-on cooking time using the slow cooker.  This traditional braising method will give you the meatiest result though, so go for the big win!  

Grass-fed Pot Roast
Serves 4
A traditional dish with tried and true cooking methods that delivers tender and flavorful results every time. This flour-less pot roast recipe is made with grass-fed chuck roast, bone broth, and assorted winter vegetables. This warming, soulful dish will be a repeat in any house. This amount can serve 2 adults and 2 children, or 2-3 hungry adults. This makes great leftovers, so when it doubt, make more!
Write a review
Print
Prep Time
20 min
Cook Time
2 hr
Prep Time
20 min
Cook Time
2 hr
Ingredients
  1. 1.5-2 lb Grass-fed Pot Roast/Chuck Roast (left at room temperature for at least 20 minutes)
  2. Sea Salt & Black Pepper
  3. High Heat Cooking Fat (e.g., Ghee, Pastured Lard, Palm Oil, Avocado Oil)
  4. 1 or 2 Onions, cut in half, skins removed
  5. 3-4 Carrots, cut in 2 inch large chunks
  6. 3 Celery, cut in 2 inch large chunks
  7. 1-2 Turnips, or small/medium Potatoes; peeled, cut into 2 inch pieces
  8. ½ Cup Red Wine
  9. 1.5 to 2 Cups Bone Broth or Organic Beef Broth (Water or any broth can be used in a pinch)
  10. 1 teaspoon Dried Rosemary, or 1 Tablespoon Fresh
  11. 1 teaspoon Dried Thyme, or 1 Tablespoon Fresh
  12. Heavy pot/dutch oven with a lid
Instructions
  1. Preheat your oven to 275 degrees F
  2. Heat 1 Tablespoon ghee on high heat, and season the roast with plenty of salt and pepper on all sides.
  3. Once the pan is surely hot, place the roast in the pan using tongs. You should hear a loud sizzle. Time approximately 3-4 minutes on the first side to get a good sear.
  4. Sear both sides of the roast. You want dark brown color which takes about 3 minutes per side.
  5. Remove the roast from the pan and set it aside on a plate.
  6. Add 1 Tablespoon of fat, then the onion halves, flat-side-down, and the carrots. Brown the onions and the carrots.
  7. Now add the ½ cup of red wine, and using tongs, scrape the bottom of the pan with the onions...you want all the beefy goodness that is stuck on the bottom of the pan.
  8. Cook the wine for 2-3 minutes on a good simmer, so you reduce the amount of wine by half.
  9. Add the celery, turnips/potatoes, the rosemary, thyme, and some more sea salt and pepper. Give everything a good mix.
  10. Now make room for the steak in the center, placing it in the middle, and moving all the veggies to the outsides of the pan (it’s okay if they are on top of the steak)
  11. Add 1.5 Cups of broth. Use more broth if needed to cover at least half of the steak.
  12. Cover the pot, and transfer to the oven for 2 hours.
  13. Your roast is ready when it is fork tender, and flaking nicely. You may serve it sliced or shredded, on top of the braised vegetables. I usually finish with a sprinkle of coarse sea salt.
Notes
  1. For a quick gluten-free gravy, while the roast is cooking, heat 2 Tbsp of butter/fat in a sauce pan. Then add 2 Tbsp of rice flour stirring for 2 minutes, careful not to burn. Now add 1 Cup of warm or room temperature broth, and whisk to incorporate. Bring to a simmer and continue stirring occasionally. The gravy will thicken as the heat rises. Season with salt, and herbs.
  2. If you are making the roast ahead of time, it is a great idea to use the broth left in the roasting pan to make this gravy as directed above.
  3. Stretch this meal by braising extra root veggies on the side. Peel and cube the veggies, rub with fat, season with salt pepper and dashes of rosemary and thyme, and place them in a pot/pan with enough broth to cover half of the veggies. Cover and cook in the oven while making your pot roast, but check your veggies after 1 hour.
  4. Slow Cooker Method: This method can be great if you don't have time to do the full recipe. Season your meat with plenty of salt and pepper, place in the slow cooker, top with the veggies and spices, and pour 1/4 Cup Wine and 1.5 Cups Broth over the top of everything. Cook on low for 6-8 hours.
If cooking larger roasts, use extended cooking times as follows
  1. 3 lb roast, 3 hours in oven
  2. 4-5 lb roast, 4 hours in oven (8 hours in slow cooker)
My Longevity Kitchen https://mylongevitykitchen.com/

Italian Broccoli Cauliflower Salad

Italian Broccoli Cauliflower text

Italians love their salads. There is always a salad at the family meal.

A salad isn’t just a lettuce salad though.  Tomato salads, broccoli salad, potato salad (no mayo over here), zucchini salad, yada yada, baccala salad.  We often consider marinated and pickled veggies a salad when we’re in a pinch.  And yes, even something like Hitchcock Farms’ Broccoli burratta recipe could technically be a salad. If you think hard enough.

Here I have recreated a popular salad from my childhood.  Broccoli salad was one of my Mom’s greatest hits if you ask me!  I added cauliflower this time, along with the greens that surround the head.  I also use scallions instead of red onions because that’s one of the only ways I can get onions past Eric.  Feel free to add more or change up the onions if you’d like! 

This salad is sooooo easy, but a little laborious if you make a lot at once.  I say that because you can only fit so much into the steamer basket and have to steam the veggies in batches.  Other than that, it’s the easiest thing, and tastes so delicious!  To save time, try this recipe with one head of broccoli or cauliflower.  Just divide the dressing recipe, or make the whole batch of dressing and save some in a jar for salads during the week. 

The steaming and chilling process of the broccoli and cauliflower is great for meal prep. You can use this steamed broccoli and cauliflower in any dish to help save time during the week.

You should always blanch or steam cauliflower for dip platters and party trays…no one likes a dry crumbly cauliflower; that’s why there’s always cauliflower on the tray! Steam it lightly and you’ll see them start flying off the tray. One trick for steaming cauliflower, and retaining its bright white color, is to add lemon juice or vinegar to the water instead of salt. The salt can make it slightly yellow. It is one of the only veggies that benefits from an acid in the water. Italian Broccoli Cauliflower main circle

Quickly, before I hand over this simply delightful salad recipe, I must drop a little longevity kitchen knowledge:

Broccoli is one rapidly-aging beauty.  What I mean by this is broccoli’s nutrients vanish into thin air every day that passes after harvest.  It’s a darn shame I tell you!  I wish everyone could grow broccoli in their yards year round, or have a farmer on speed dial.  BUT, that’s not gonna happen. 

I’ll keep it simple.  NEVER buy broccoli that is pre-cut, or unwrapped.  It’s basically just fiber you’ll get with the pre-cut stuff.  So if you love broccoli that much, you are in a massive hurry, and aren’t going for nutrients, then fine.  Buy the bagged pre-cut stuff.  But other than that, it literally retains almost zero nutrients.  Just days after harvest the broccoli can lose 50-75% of it’s nutrients.  Sad, I know. 

Look for broccoli that is dark green on top with tight florets.  It should be wrapped in plastic, and have no yellow or pale florets.  The stem should be bright green, and the bottom of the stem should be moist and flat, with no pocked holes.  

Call your grocery store and ask when the broccoli comes in.  Buy it that day, and steam it right when you get home.  This will preserve the nutrients.  If you have a farm or farmers market you visit, call in advance if possible and ask about the day they harvest the broccoli.  Also ask if they chill it immediately after harvest.  This is key to obtaining the most nutritious broccoli with all the anti-cancer properties we love. 

Don’t worry as much about cauliflower.  It doesn’t have as rapid of a respiration rate, and we can relax a little with that one. 

So call that grocer, buy that broccoli, and let’s get steamin’! 

This recipe works great with asparagus, potatoes, and green beans. In the summer you will love to try this with tomatoes, potatoes, and green beans all together. That will be great with some red onion.  Tell me about your favorite combinations!    

Italian Broccoli Cauliflower Salad
This simple salad of steamed broccoli and cauliflower is a classic flavor and side dish you will surely fall in love with. The dressing is made of lemon, red wine vinegar, fresh garlic and herbs, and the best extra virgin olive oil you can find. Serve this salad at room temperature throughout the week along side many of your favorite dishes.
Write a review
Print
Prep Time
15 min
Cook Time
30 min
Prep Time
15 min
Cook Time
30 min
Ingredients
  1. 3 small heads organic Broccoli
  2. 1 medium head organic Cauliflower
  3. 1 Clove of Garlic, minced (10 minutes or more before using. This activates the anti-cancer properties)
  4. Juice of 1 lemon, 3 Tbsp Measure (zest if organic, and desired)
  5. 2 Tbsp Red Wine Vinegar
  6. 1 sliced Scallion
  7. 1 teaspoon dried oregano, or 1 Tbsp minced fresh
  8. 2 Tablespoons fresh parsley, minced
  9. 1 Tablespoon + 1 teaspoon fine sea salt
  10. 1 ½ teaspoon fresh ground black pepper
  11. ½ Cup Extra Virgin Olive Oil
Instructions
  1. Prepare a steamer basket and pot of salted water for steaming. Get a large bowl filled with ice water to chill the veggies after steaming, and gather other tools such as a timer, a large slotted spoon, and a strainer.
  2. Clean and chop cauliflower into large florets, the size of about 2 bites.
  3. If the cauliflower greens are in good shape, cut the green stems/leaves into 2 inch long pieces, no wider than ½ inch. You may have to cut the stems lengthwise to make thinner pieces.
  4. Prepare the broccoli florets as well. Keeping them the same size if possible.
  5. Steam the Cauliflower florets for 3 minutes, in a single layer and in batches, using a timer. It helps to steam only pieces of the same size.
  6. Immediately remove the steamed cauliflower and transfer to the ice bath (do not steam more than 4 minutes or most nutrients will be lost). When the next batch is steaming, move the chilled cauliflower to the strainer you’ve set aside to use.
  7. Once all the cauliflower is steamed, you may start the cauli stems and greens. The stems might only take 2 minutes to steam, 3 minutes max.
  8. Repeat the steaming and chilling process with the broccoli.
  9. Now you will assemble the dressing. Start with a large bowl, big enough for all the veggies, and room to mix. Add the garlic, lemon juice, and red wine vinegar, scallions, herbs, and spices. Everything but the oil. If you would like the onion and garlic flavor then you may move on to the next step immediately. If you would like to calm the pungent flavors of the onion and garlic, let this mixture sit for 5 minutes or more.
  10. To finish the dressing, slowly stream in the oil while whisking constantly. This will create a nice thick dressing and make each bite of the salad more consistent in flavor. Your dressing will taste salty, but that is what we want! Once you add the veggies, that will no longer be the case.
  11. Mix in your veggies now, tossing numerous times to mix well.
Notes
  1. This salad keeps in the fridge for a week.
  2. If you don't have a steamer basket you may blanch in salted boiling water for 2-3 minutes, but the result will be much less nutritious.
  3. If you are eating the salad right away, this should be the proper seasoning. You may need more olive oil, lemon or salt if you had larger heads of broccoli or cauliflower.
  4. If you are eating this salad later, refrigerate, and remove 10 minutes prior to eating for the best flavor, and also to let the olive oil come to the right consistency.
  5. The veggies absorb the dressing the longer they sit, so you may feel the need to add more salt, oil, or lemon/vinegar, along the way.
  6. This salad is great to eat by itself, or you may add it to any salad greens with just a little extra oil and vinegar for a quick side salad!
My Longevity Kitchen https://mylongevitykitchen.com/

Lime Marinated Grass-Fed Skirt Steak

Lime Marinated Skirt Steak Feature small

That name is a mouthful…a mouthful of meaty greatness! 

Skirt Steak is a great way to introduce grass-fed steaks into your budget.  It’s much more economical and has a ton of beefy flavor. 

This cut can be tough or chewy if it is cut the wrong way, or even prepared the wrong way.  And the beef from grass-fed animals, or animals raised on pasture, is much more lean (and full of meaty flavor), which can result in a tougher bite.  That’s why I chose an acidic marinade here.  The lime juice in the marinade ensures a tender chew, and desirable flavor.    

“Arghhh, No Marisa!  I don’t have time to marinate!  I have a 9-5 and barely make it home in time to make dinner as it is!”  I hear you friends.  Now, hear me out


Lime marinade

When you include acids in your marinades you are speeding up the process like crazy!  You can set this aside while you prepare a salad and heat the grill, and it’s already going to be amazing.  I’ve also prepared this marinade recipe with a dual function in mind.  You will be using 1/3 of the marinade for exactly that, and the other 2/3 to make a delicious sauce and dressing. 

When I made this dish I made the marinade before bed.  Then about 2 hours before dinner I put the steak in the marinade (that time worked for me, but you can marinade 30 minutes before dinner too).  See the recipe below for more pointers and variations!


About this steak.  I am lucky enough to have purchased this grass-fed skirt steak from a local rancher.  Lucky for many reasons, but mainly because I know where my food comes from, I am supporting hard-working, honest farmers in my community, I know this animal lived a healthy life eating the food it was meant to be eating (the latter is not as much about my compassion for animals as it is about the fact that a healthy animal yields healthy meat). 

That being said, I did not have the opportunity to choose my steak out of a lineup at the butcher counter, and inspect it for its size and accurate trimming.  My steak was a little small, and thin on one end.  I also had to do a little trimming myself just to remove the thick layer of excess fat.  This article on Serious Eats shows you how and tells you why. 

Call up your honeys and let them know that steak is for dinner!  Heck, steak is even for lunch!  These make great lettuce wraps.  Have fun, and tag me in your photos on instagram @mylongevitykitchen #mylongevitykitchen 

Lime Marinated Skirt dinner

 Suggested side dishes: Basmati or Calrose rice and Six-Spice Butternut Squash

Are some of these ingredients new to you?  Buy a bottle of Fish Sauce if you haven’t already. It lends a salty tangy dimension, like soy sauce and worchestershire combined, and is a healthy source of omega-3’s. The best brand is Red Boat Vietnamese Fish Sauce.  Check out my explanation of Coconut Aminos here


Lime Marinated Grass-fed Skirt Steak
A quick marinade of lime and fish sauce tenderizes your grass-fed steak, and gets an impressive dinner on the table with ease. This dual-purpose marinade serves as a delicious plating sauce and salad dressing.
Write a review
Print
Prep Time
45 min
Cook Time
10 min
Prep Time
45 min
Cook Time
10 min
Ingredients
  1. 2 cloves Garlic, minced
  2. ¼ C Water
  3. 2 Tbsp Coconut Sugar
  4. 3 Tbsp Lime Juice
  5. 2 teaspoons Fish Sauce (or coconut aminos)
  6. 2 teaspoons crushed red pepper
  7. 2 small grass-fed skirt steaks, up to 1.5 lbs total weight
  8. 4 fresh Basil Leaves
  9. 2 Tbsp Cilantro or Parlsey
  10. 2-3 Tbsp Extra-Virgin Olive Oil
  11. ½ fresh Chili Pepper, diced
  12. Butter/Bib lettuce leaves, or Salad Greens for two
Instructions
  1. In a small glass jar with a lid, mix together the water and coconut sugar, garlic, lime juice, fish sauce, and crushed pepper. Shake it all up and set aside.
  2. Pat the steaks dry with paper towels and place them in a gallon-size Ziploc bag.
  3. Marinate your steak at room temperature 30 minutes before dinner by adding 3 Tablespoons of the marinade to the Ziploc bag with steak. Swish it all around to coat the steak.
  4. IMPORTANT NOTE: Max marinade time for this recipe is 2 hours refrigerated. You MUST refrigerate the steak while marinating if you go longer than 30 minutes because this is a salty/acidic marinade. Marinating any longer will ruin the taste and texture completely. Remove the steak from the fridge 15-30 minutes before cooking so it can come to room temperature.
  5. Once ready to cook, heat a grill pan, cast iron pan, or heavy bottomed pan; and coat the grill with a high-heat fat like ghee, avocado oil, palm oil, or palm shortening. You want the grill pan nice and hot before cooking.
  6. Remove the steak from the bag and shake off the excess marinade.
  7. Grill the steak 3 minutes on the first side and sprinkle with sea salt while grilling.
  8. Flip the steak and cook 2 more minutes on the other side, sprinkle with sea salt.
  9. Place the steak on a plate to rest for 3 minutes before plating.
  10. Meanwhile, add the herbs, olive oil, and diced chili to the jar with the leftover dressing. Shake it up.
  11. Spoon the dressing over each steak as you serve. You can use the lettuce to make a wrap or you may toss the greens with the leftover dressing.
Notes
  1. Make the marinade the night before, and add to the steak when you get home from work. Then by the time you’re ready to grill it will be ready to go!
  2. I suggest serving this for dinner with basmati rice, and my six-spice butternut squash. Makes a great lunch all by itself with the salad or lettuce wraps.
  3. This recipe works with flank steak too. Flank needs longer cooking time by 2-4 minutes extra per side.
My Longevity Kitchen https://mylongevitykitchen.com/

Six-Spice Butternut Squash

Six-spice butternut 2 edit The butternut is more than just a squash.  It is a long-lasting, flu-fighting, time-saving winter veggie.    Dice up this golden beauty and you have a super simple side dish just when you thought you were out of veggies.

I’m talking about that day when you have used up all your greens, all your potatoes, and all your produce.  You look over at your pantry and think, “there’s gotta be some canned artichokes in here or somethin!”  Nope.  Just when you’re about to give up and skip the veggies, you see something out the corner of your eye.  It’s been decorating your kitchen with this fall harvest ornamental flair, and you think to yourself, “YES!  BUTTERNUT!  I am so glad you’re here!”  I absolutely love butternut squash, but don’t even tell me for a second you can’t relate.  Sometimes I forget it is in my kitchen, and then boom!  Two weeks later that baby is still standing tall and ready to be put to use (right when I need it the most).  If this hasn’t happened to you then you need to just buy one, and set it aside, and wait.  It’ll happen.  

Winter SquashWe shouldn’t leave winter squash on the sidelines, however, because these starchy, hearty vegetables have some powerful immune-boosting properties that we should take advantage of. 

Sweet winter squash doesn’t need much attention from the cook.  But, considering it’s much less sugary than its tuberous friend the sweet potato, it makes sense to spruce it up with some sweet and spicy flavors.  I only used a few ingredients here, but many of them may be new to you. 

First, I will mention the spices.  Have you heard of Five-Spice Chinese Powder?  I first purchased a bottle of this spice blend years ago when making one of Eric’s favorite foods from his homeland in Hawaii.  Shoyu chicken.  It is a dynamite dish of stewed chicken thighs in a sweet and salty umami bath.  (If you’re feeling adventurous or have longed for a good shoyu chicken recipe, I recommend this one from Reggies Kau Kau Time blog .  I am definitely going to make a longevity version of this dish for the blog one day.  It’s on the list!)  Chinese Five-Spice is typically a blend of Cinnamon, Clove, Peppercorn, Fennel, and Star Anise.  I recently bought a version containing ginger, but traditionally it is made without.  A little goes a long way, and you’d be surprised how useful it is in the winter!  I seasoned the squash here with five-spice powder, and some warming ground cumin.  If you’re not familiar with cumin, I’d have to disagree with you (huh?).  It’s the name “cumin” that people are unfamiliar with, not the taste.   Cumin is the most important flavor in every taco seasoning packet ever!..so I’m sure you will recognize the flavor quite well.  I LOVE IT. coconut aminos

Lastly, I’d like to introduce you to Coconut Aminos.  It is a sweeter alternative to soy sauce that is prized in the paleo world, and new to the culinary scene.  It’s basically salty coconut sap, but without the coconut flavor you might expect.  One bottle will last you a while (unless you go coconut aminos crazy like some of us do at first) so I suggest you go for it!  Tossing the butternut squash in this sauce really helps bring all the flavors together.  Are you nervous about trying all of these new flavors???  I sure hope not.  If you like Thai Food, or Indian Food, Moroccan Food, or trying new things, then you’ll love this dish!

PS I admit I ate it cold several times right out of the fridge.  mmmm.      


Six-Spice Butternut Squash
Butternut squash coated in a warming blend of spices including cumin, cinnamon, clove, star anise, ginger, and fennel.
Write a review
Print
Ingredients
  1. 1 small Butternut Squash, under 2 lbs
  2. 2 Tbsp Ghee, Palm Oil, Coconut Oil, or Lard, melted
  3. 2 tsp Coconut Aminos (or 1 tsp fish sauce + 1 tsp coconut sugar)
  4. 2 tsp Coconut sugar
  5. ½ tsp Cumin
  6. ½ tsp Chinese 5 spice
  7. ¼ tsp Sea Salt
  8. 2 fresh Basil leaves
Instructions
  1. Preheat the oven to 400
  2. Cut off both ends of the squash by root and stem, and peel the skin off with a vegetable peeler.
  3. Cut the squash in half crosswise. Then, cut both halves lengthwise and use a spoon to scoop out the seeds.
  4. Cut the squash into 1 inch cubes.
  5. In a mixing bowl, combine the melted fat with the coconut aminos, coconut sugar, and the rest of the spices except for the basil.
  6. Add the squash to the mixing bowl, and toss well to coat
  7. Roast for 25 minutes, turning the pieces after 15 minutes.
  8. Thinly slice the basil by stacking the two leaves, rolling tightly like a cigar, and slicing across to create ribbons. Carefully mix the basil ribbons into the hot squash.
Notes
  1. Enjoy this sqush on the side of a juicy steak or any tender braised meats.
  2. The spices compliment many asian and latin flavors.
  3. Try it with my Lime Marinated Grass-fed Skirt Steak.
  4. We also ate the leftovers for breakfast in a one-pan scramble of eggs, kale, and the six-spice squash.
  5. Tag me in your squash photos! @mylongevitykitchen #mylongevitykitchen
My Longevity Kitchen https://mylongevitykitchen.com/

Fiery Sundried Tomato Pesto

sundried tomato pepper pesto

I think hot sauces, and salsas are my favorite foods ever.  And doesn’t just the word “Pesto” make your mouth water? 

Why don’t you imagine now a pesto that is hitting you from every corner!  It’s hot, it’s smoky, it’s tangy, it’s fragrant, and it’s salty.  Oh, and the garlic.  Oh yes.  We’ve got organic, sun-dried tomatoes, bunches of peppery fragrant Italian basil, only the best Extra Virgin Olive Oil you can find, fresh spicy jalapeno peppers, smoky aleppo pepper flakes, and salty briny capers.  Mmmmm hmmmm…

Don’t you even think for a minute that this pesto has to be paired with something bland because of its mighty super-tasty powers!  This pesto is to Italian food like sriracha is to Thai food.  Don’t believe me?  Make it yourself and slap it on everything you eat.  Ahh-mazing.

Before you dive in and start this recipe, I must introduce you to my favorite sun-dried tomatoes.   These bagged tomatoes are much different than the oil-packed style you’re used to seeing (and eating).  Try these, and you’ll be amazed how delicate the flavors are while still bringing you what you would expect of a delicious sun-dried tomato. 


Sundried-Tomatoes-814985000135

Have fun with the recipe and try using all sorts of peppers!  Especially if you can get your hands on organic fresh peppers.  Add some olives, nuts, and even Parmesan!  Invite me over for dinner would you? 

Fiery Sundried Tomato Pesto
A mouth-watering combination of fiery fresh jalapeno peppers, Italian basil, garlic, sun-dried tomatoes, capers, Aleppo pepper, and of course Extra Virgin Olive Oil. This 5 minute pesto will add heat and dimension to your favorite foods like you could never imagine.
Write a review
Print
Prep Time
5 min
Total Time
15 min
Prep Time
5 min
Total Time
15 min
Ingredients
  1. 1 Cup Organic Sundried Tomatoes (packed without oil), roughly chopped
  2. 1 Cup Fresh Hot Peppers, such as Jalapenos, roughly chopped
  3. 3 Cloves Garlic, finely chopped or minced
  4. 1 Bunch of fresh Basil, stemmed
  5. 3 Tbsp Aleppo Pepper, or crushed red chili flakes
  6. 1/4 Cup Capers, drained
  7. Sea Salt and Cracked Black Pepper
  8. 1/2 to full cup Extra Virgin Olive Oil
Instructions
  1. Add the tomatoes, fresh hot peppers, and garlic to the food processor and pulse several times to finely chop and incorporate each ingredient.
  2. Now add the Basil, Aleppo Pepper, and Capers, along with a generous sprinkle of salt and pepper. Pulse several times to crush all the ingredients together. Add a splash of oil if the mixture is too thick to process.
  3. Taste the pesto for salt.
  4. Scoop the pesto into glass jars, and cover the pesto with oil.
  5. Stir the jars carefully to saturate the pesto with oil, and refrigerate.
Notes
  1. This mixture should last two weeks in the fridge as long as it remains covered in oil
  2. Variations: Try olives instead of the tomatoes or capers. Try any type of fresh peppers. Try Adding Parmesan and pine nuts.
  3. Tag me with your creations! @mylongevitykitchen #mylongevitykitchen
My Longevity Kitchen https://mylongevitykitchen.com/

Homemade Ghee

Ghee

If you haven’t heard of this popular cooking fat that is making a comeback right now, I would be very surprised!  GHEE is everywhere!  But WHY? 

This ancient form of clarified butter has been used as a healthy cooking fat for longer than documentation can confirm.  Ghee is essentially strained brown butter, resulting in “butter oil“.  When the butter is slowly warmed on the stove, the water evaporates, milk solids and proteins begin to separate from the fats, and you can easily separate these fats to retrieve the clarified butter (clarified butter is the star ingredient in the mother sauce, known as Hollandaise).  Now, cook that butter a little longer, and browning begins to occur.  Soon, you develop a nutty depth and complexity that can only be found in Ghee.  Both Ghee and Clarified Butter have incredible health benefits.  As long as the butter is from a healthy source (such as cows raised on pastures, fed grass, free of growth hormones and antibiotics, fed non-gmo supplemental feed), the resulting “butter oil” is high in conjugated linoleic acid (CLA combats cancer and cardiovascular disease, and inflammation), Vitamin A, Vitamin K2, beta carotene (you can tell this by comparing the golden color of grass-fed butter next to the pale white color of conventional butter), and has a far better Omega-3 fatty acid ratio than conventional butter.  You should also note that most of the milk solids and proteins (lactose and casein) are removed during the process of making ghee and clarified butter.  This means nearly everyone but the most sensitive individuals can enjoy the benefits of ghee in their diet.  Did I mention that ghee and clarified butter have a much higher smoke point than regular butter?  You can pan fry and roast foods in ghee without causing damaging free radicals! 

Sure you can buy grass-fed organic ghee at the supermarkets now, but they are more than $1.00 per ounce!  You can make your own ghee for less than half that price.  Try out this step by step tutorial, and let me know how it goes!


Homemade Ghee

Step 1:

Using a small sauce pan, melt 8 oz of butter on low heat. (you may dice the butter to rush this step)

Step 1Step 2:

About a minute after the butter is all melted, the top layer will become fluffy foam.  Step 2 cTo encourage the water to evaporate, and allow air to escape, you can rest a slotted wooden spoon upside-down like the second photo below. Or gently move the foam around, by skimming the top, to let air escape.

step 2 b

Step 3:

About 2 minutes later, you will notice the foam is no longer fluffy, and starts to bubble more and separate.

Step 3

Step 4:

Continue cooking, and if you tilt the pan, you’ll notice almost all of the white milky solids will have fallen to the bottom of the pan, while the top is still bubbling and foaming again.

Step 5

step 5 9minStep 5:

In these next few minutes (around 9-12 minutes into the process) the milk solids will be browning at the bottom of the pan.  

Step 6:

Tilt the pan to check on the browning. Keep cooking until it is dark brown, and remove the pan from the heat when it looks like it might begin to burn.

Step 6Step 7:

Allow it to cool for 10 minutes, and then skim off all of the remaining foam that floats on top.  This is what you are left with:

Step 7 coolStep 8:

Pour the ghee through cheesecloth or a coffee filter resting on a funnel.

Step 8 filter

Congratulations!  You made your own GHEE! 

fiinal

Ghee is safe kept in an airtight container at room temperature for up to a month, or you may refrigerate it to prevent any possibility of spoiling.  Make a bunch so you can stock up!  You can freeze ghee too. 

*To make Clarified Butter (which has a cleaner, more neutral taste, and shorter processing time), carefully skim all of the foam off the top in Step 2.  Once you have cleared off as much foam as possible, without disturbing any milk solids that settled to the bottom, you may ladle or pour out the remaining fat (carefully avoiding the milk solids on the bottom).  Clarified Butter may not last at room temperature for more than a couple of weeks since it is not strained like ghee is. 


Paleo Thousand Island Dressing

Paleo Thousand Island Recipe

I’m going to go ahead and proclaim “Thousand Island is the best American salad dressing!”  Yes, even versus ranch dressing.  Try this recipe and you’ll soon agree. 

McDonald’s can keep their poisonous special sauce, because I have a homemade version that will make you forget any other existed.  You can eat my dressing like a dip for your veggies, slather it on wraps and burgers, serve with my salmon sardine cakes, enjoy it with potatoes, use like a salad dressing of course, and more!  Don’t forget about a tasty rueben.  This is so easy to make, and you’re family will thank you for it! 

thousand island burger
Now that’s what I call a Big Longevity Mac!


Don’t be intimidated by all the ingredients.  It’s so easy to throw together, especially if you already have the mayo.  I keep Primal Kitchen Foods Mayo, or Sir Kensington’s Mayo, in my pantry as a backup, but I always make my mayo homemade if I have the oil on hand (Primal Kitchen Foods Mayo is the healthiest mayo on the market, but only available online and very few select Whole Foods; Sir Kensington’s still uses sunflower oil which is generally unhealthy because it is high in omega-6 fatty acids, but this will still be better than any other mayo in the store).  Making homemade mayo is quick and easy if you have an immersion blender.  Follow this recipe by “The Healthy Foodie”, but the only thing I would change is use the yolk only.  Not the whole egg. 

There’s hardly a single bottle of salad dressing sold in stores that I would buy or eat these days.  Go ahead and check your fridge, and read the bottles of dressing in there.  Even the organic brands like Annie’s have soybean or canola oil as the base.  The only brand I do know of that actually uses olive oil is Tessamae’s All Natural olive oil based salad dressingsIf you want to live a long and healthy life, it’s time you learn about your healthy fats, and ditch the “industrial seed and vegetable oils”.  Marketing and Media did a fantastic job making us believe industrial seed and vegetable oils like soybean oil and canola oil are healthy for us…but they are dead wrong. 


Want to know the whole story about why and how we’ve been deceived?  Check out Mercola’s article called “The Great Con-ola”Watch this video if you’d like to see what the rapeseed has to go through to become Canola Oil on the shelf.  You’ll be disgusted to see the chemical washes and bleaching that must be done before the canola oil is ready for sale (ignore the health claims, and skip to after 1 minute to see the factory processing). 


In a nutshell, American’s excessive consumption of these oils (such as soybean oil, canola oil, corn oil, safflower oil, cottonseed oil, and sunflower oil) is now believed to be largely responsible for the rise in liver disease, heart disease, obesity, allergies, asthma, mental illness, bowel disorders, and cancer (more references and information can be found in my favorite, most trusted diet book called the Perfect Health Diet, in Chapter 11: The Dangerous Fats: PUFA). 

Toxic Oils

“But Marisa, what are we supposed to use if we can’t use these oils?” 

Healthy Fats

It’s time to take back control, and fill our kitchens with wholesome ingredients that have been keeping our ancestors healthy for centuries. 

Post your questions in the comments below.  I know what it feels like to learn about toxic oils for the first time.  You’ll have many questions about how and why and what to do!  Start small and work your way up.  The most important thing is to be aware, and continue to educate yourself because repetition will help you remember and find a deeper understanding.  Bookmark this page, pin these images, and spread the word.  Let’s help keep our loved ones free from cancer and disease, starting with this delicious homemade dressing! 


Read this article by “The Healthy Skeptic” Chris Kresser to learn more about toxins in our food.  If you don’t have time now, bookmark it and read it later.  This is important information to understand and apply if you want to live a healthy life and fight chronic disease. 

Paleo Thousand Island
Make your own thousand island dressing from scratch, and you'll get high fives all around. This dressing is made with wholesome ingredients, and it lasts in the fridge for at least a week. Use it as a dip for veggies, salad dressing, burger topping, or just like any other condiment!
Write a review
Print
Ingredients
  1. 2 cups homemade Mayo (Primal Kitchen Foods Mayo, or Pure Avocado Oil Mayo)
  2. 1 cup organic Ketchup
  3. 1 Tbsp White Balsamic Vinegar (or 1 tsp Apple Cider Vinegar + 1 Tbsp Coconut Sugar)
  4. 1 Tbsp Vietnamese Fish Sauce (or organic worchestershire)
  5. 3/4 C finely chopped Pickles (or natural relish)
  6. 3 Boiled Eggs, finely chopped (optional)
  7. 3 Scallions, finely chopped
  8. 2 Tbsp Fresh Parsley, minced
  9. Fine Sea Salt, 1 tsp
  10. Cracked Black Pepper, 1 tsp
Instructions
  1. Mix all the ingredients together with a fork (too chunky for a whisk).
  2. Try not to eat all of it at once.
  3. Store in a glass jar in the fridge for a week.
Notes
  1. Buy a bottle of Fish Sauce if you haven't already. It lends a salty tangy dimension, like soy sauce and worchestershire combined, and it is full of healthy enzymes and antioxidants. The best brand is Red Boat Vietnamese Fish Sauce.
My Longevity Kitchen https://mylongevitykitchen.com/


Italian Stewed Cauliflower

I almost never make the same thing twice…but this dish happens pretty often in our house.

There was a time when I had so much cauliflower I didn’t know what to do with it all!  This happened after a trip to Smit’s Farm, owned and sustainably operated by a family friend and their loving family.  My Nonno showed us the VIP treatment, taking us into the fields to harvest the most beautiful assortment of vegetables.  It was incredible to see how much variety they grew.  And the cauliflower were massive!

Inspired by the versatility of cauliflower, along with a recipe from David Rocco’s book “Made in Italy” called “The Best Cauliflower Ever” or “Cavolfiori Stufati Al Pomodoro”, I slowly stewed my way to this dish.  I realized I can use any tomato product, such as puree, whole peeled, or even jarred salsa, to make it.  And it’s always AMAZING.  Don’t forget about the greens and stems that hug the head of cauliflower.  If they are still in good shape then slice them up and cook them too!  I also was somewhat surprised that this dish is best at room temperature, like David Rocco suggests.  The flavors stand out much more when it is at room temp, and it’s even more rich and comforting.  This type of dish, that can be eaten room temp, is perfect for company or a busy day in the kitchen. 


image

If you haven’t seen David Rocco’s Dolce Vita, do yourself a favor and DVR a few of those episodes.  It’s the perfect show to help you get away, explore the beautiful country of Italy, and understand the culture’s appreciation for quality ingredients, and simple cooking.


If you are still reading now, I know you love Cauliflower more than a handsome Italian man…and I thank you.  In return, I shall give you this amazing Cauliflower recipe. 


Italian Stewed Cauliflower
This warming and tender adaptation for simple white cauliflower is the perfect way to fulfill your pasta dreams, and please the whole family. The versatility of this recipe makes it even more incredible. Try it with jarred salsa, leftover sauce, or even pizza sauce. This dish is surprisingly best at room temperature. Trust me on that. I suggest doubling the recipe if you serve it as a main course. You may also freeze the finished dish for future use.
Write a review
Print
Prep Time
15 min
Total Time
1 hr
Prep Time
15 min
Total Time
1 hr
Ingredients
  1. 1 large head cauliflower, core removed, stems and greens saved
  2. 1 onion or 2 shallots, finely diced (can be omitted if you use a flavorful sauce or salsa instead of tomato puree)
  3. 2 cloves of garlic, minced (optional)
  4. 16 ounces Tomato Puree, Sauce, Crushed, or Diced, or Salsa
  5. 1/2 cup cubed hard cheese and rinds like parmesan, grana padano, or pecorino romano
  6. 1/4 cup extra virgin olive oil
  7. 1/2 cup fresh parsley chopped
  8. 1/2 cup water
  9. 1/2 cup grated cheese
Instructions
  1. Cut the cauliflower florets and stems into small bite sized pieces. If the greens (including firm ribs) around the head are in good shape, slice them thinly with the cauliflower.
  2. In a large pot, heat the olive oil on medium heat, and saute your onions until they are getting soft.
  3. If you haven't already, cube the hard cheese into small bite size chunks.
  4. Add the garlic and parsley to the onions, and stir to start releasing the fragrance of the garlic.
  5. Add the cauliflower and stems, some black pepper, and a generous three-finger pinch of sea salt. Stir to combine.
  6. Now add your water, and tomato puree or choice of tomato sauce.
  7. Mix everything together, cover the pot, and turn the heat on medium low.
  8. Set a timer for 40 minutes and check back every so often to give it a stir.
  9. After 40 minutes, stir and smash the cauliflower, and taste for salt. You will likely need more salt if you used an unseasoned tomato base.
  10. Remove the pot from the heat, and stir in the cubed cheese, and grated cheese. Mix it well, and let it sit for 15 minutes before digging in.
  11. Enjoy at room temperature with grated cheese, and crushed or dried chilli flakes
Notes
  1. This will serve 6 people as a side dish, and 3 people as a main dish.
  2. This dish will be great with the addition of fennel, or even some leftover meat like italian sausage or beef. Simply add in with the cauliflower.
  3. Tag me in your stewed cauliflower pics #mylongevitykitchen @mylongevitykitchen
My Longevity Kitchen https://mylongevitykitchen.com/

Paleo Maca Cookie Dough

This paleo cookie dough is a major hit!  I made it at least 3 times in two months.  Maybe more.  

I rolled it into balls and dipped them in dark chocolate for Thanksgiving too!  It’s super slammin’ just out of the jar (with a spoon in da mouth), but the chocolate covered balls bring it to a whole ‘nother level.  Dare to walk passed your fridge without grabbing a nugget every time.  The best part is, they are even more delicious when they’re cold! 

Before I tell you what’s in this creamy nutty magical mixture, I must tell you about a fairly recent addition to my longevity pantry. 

Since the Summer of 2014, I have been hooked on figuring out ways to get more Maca into my cooking.  THIS cookie dough was the perfect vessel I tell you!  Let’s give Maca the moment it deserves and discuss what it is and why I want it in my food. 

Maca is an Ancient Peruvian Superfood, created from the root of a vegetable high in the Andes.  Superfood you say?  Ohhhh yes.  Maca has been prized for millennia for it’s capabilities to regulate balance in the endocrine system (think thyroid, adrenal glands, ovarian and testicular glands), which in turn improves fertility, and reproductive function (might i mention it’s considered an aphrodisiac?).  This is especially important today because most people’s hormones are out of whack due to an over abundance of estrogen in plastics and other environmental toxins.  Take note that Maca is also used as a natural energy source (caffeine-free!) because of its micronutrient content, and the support it provides to the cardiovascular system. It is most popular in it’s dried powdered form because of its long-lasting shelf life and usefulness.  Gelatinized Maca is the form I recommend because the process by which it is made removes the indigestible starches, and you end up with a healthier, more concentrated powder.  It’s sweet, nutty, and earthy in taste.  A little goes a long way.  Most people work up a tolerance to Maca, starting with 1 Tbsp per serving, and working their way up to 2 Tbsp.  Ready to try it for yourself?  This is my favorite brand so far: Terrasoul Superfoods Gelatinized Maca Powder

 Let’s talk cookie dough! 

I found the original recipe by “Girl Gone Country” on Pinterest, and I was inspired to come up with my own variation including maca.   I also altered the original recipe by adding some alternative sweeteners.  Why?  First, to lower the glycemic index with some stevia, and then using the coconut sugar to bring out the cookie-like flavor I was seeking.  Lastly, the combination of them all was sure to satisfy a certain husband’s sweet tooth.  Check out Girl Gone Country’s original recipe here and play around with ingredients in your own way!  Tag me @mylongevitykitchen on social media and share your ideas in the comments below. 


Paleo Maca Cookie Dough
Grab a spoon and dig into a jar full of nutty, gooey, chocolatey, goodness! You can rest assured you're eating wholesome paleo superfood ingredients with this recipe.
Write a review
Print
Cook Time
15 min
Total Time
1 hr
Cook Time
15 min
Total Time
1 hr
Ingredients
  1. ½ C unsalted, grass-fed butter such as Kerrygold (or use warmed ghee and skip to step 2)
  2. 1 C Almond Butter, unsweetened (sprouted almond butter is the best choice for optimal nutrition)
  3. ½ tsp Pure Vanilla Extract
  4. 2 Tbsp Gelatinized Maca
  5. 1 Tbsp Coconut Flour
  6. ½ tsp Cinnamon
  7. Pinch of Salt
  8. 2 Tbsp Raw Honey
  9. 2 Tbsp Coconut Sugar
  10. 2 drops liquid Stevia (Vanilla is best)
  11. ½ C Enjoy Life Chocolate Chips (or Lily's Dark Chocolate Chips with Stevia)
Instructions
  1. In a quart-size sauce pan, brown the butter on medium heat. To brown the butter, you want to continue cooking the melted butter until it starts smelling "nutty" and sticking slightly to the bottom when you try to stir with a spatula. If you start to see black bits, don't panic. You can strain these out, and the browned butter is still delicious!
  2. Once the butter is slightly browned and smelling nutty, remove the pan from the heat, and add in the almond butter. Whisk or stir with spatula to create a smooth mixture.
  3. In a separate bowl, mix together the dry ingredients including maca, coconut flour, cinnamon, and salt.
  4. Sift the dry ingredients into the almond butter mixture, and mix until smooth.
  5. Add your sweeteners one at a time to determine your desired level of sweetness. (The coconut sugar is key to achieving a truly cookie-like flavor)
  6. Transfer your warm cookie dough to a bowl, cover loosely, and refrigerate for 45 minutes. Set a timer so you don't forget. If the mixture gets too hard, you’ll find it difficult to incorporate the chocolate chips.
  7. Stir in your chocolate chips and refrigerate for 30 more minutes and you're done! Enjoy by the spoonful.
Notes
  1. This cookie dough is best eaten cold out of the fridge. It does not retain it's flavor if kept in the freezer for more than a few days.
  2. Variation: For a party-ready application, you may freeze the mixture for 20 minutes, shape into balls, re-freeze, and then dip into melted chocolate! Refrigerate until you're ready to eat them.
Adapted from Girl Gone Country
My Longevity Kitchen https://mylongevitykitchen.com/