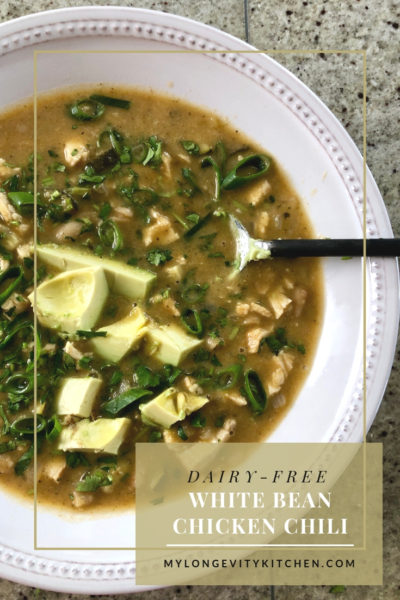
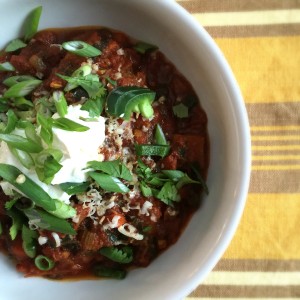
Not much can beat a warm bowl of chili when the snow starts fallin’…especially
when it’s on the table in 45 minutes. I’ll show you how to make this traditional white
chili without the dairy, and still get a rich and thick, comforting meal. You might want
to double up the portion of roasted chicken you make because this easy spice
mixture makes the chicken breast irresistible!
1 to 1.5 pounds Organic Boneless Skinless Chicken Breasts (skinless & bone-in works too)
1/2 teaspoon Chili Powder
1/2 teaspoon Fine Sea Salt
1.5 Tablespoons Extra Virgin Olive Oil
Chili
2 Tablespoons Extra Virgin Olive Oil
1 White or Yellow Onion
3 Garlic Cloves
1 Organic Zucchini, Diced Small
1 teaspoon Fine Sea Salt
1 Tablespoon Chili Powder
1 Tablespoon Ground Cumin
1 teaspoon Dried Oregano
3 Cups Chicken Bone Broth
1 Cup Salsa Verde (see notes)
1-15 oz Can Eden Organic Cannellini Beans, drained & rinsed (see notes)
Fresh Lime Juice
Optional Garnishes
Jalapeno
Scallion
Fresh Cilantro
Avocado
Instructions
Preheat oven 350 Degrees F. Line a baking sheet with foil or parchment and drizzle with 1.5 Tablespoons of Oil.
Line a cutting board with paper towels, and pat the chicken breasts dry. Cut the breasts in half (favoring the thinner side will help it cook more evenly), and separate the tenders if they are still attached.
Season the chicken with the chili powder and sea salt. Transfer the breasts to the baking sheet and turn them to coat them in oil. Roast the chicken for up to 30 minutes for larger pieces, and check it at 15 minutes for chicken tenders.
Meanwhile, chop 1 onion and mince the garlic cloves.
Heat 2 Tablespoons oil in a soup pot over medium heat, and measure out your chili spices so that they are ready to go (chili, cumin, oregano, salt).
Saute the onions and garlic for 3-5 minutes. While onions and garlic are cooking keep an eye on your roasting chicken.
When chicken is done cooking, remove it from the oven and let it cool.
Add the measured spices to the onions and garlic and stir until fragrant—about 1 min. Add the zucchini and cook for another minute.
Add 3 cups of chicken stock, 1 cup of salsa verde, and drained/rinsed cannellini beans to the pot. Stir. Turn the heat up to medium high and bring everything to a simmer.
Meanwhile, start shredding or dicing your chicken, keep it aside, and pour the chicken juices into the pot. Once your pot is simmering, turn heat down to medium low and cook for 10 minutes.
Scoop out 2 cups of the chili and put it into a blender. Holding the cover down with a kitchen towel, blend until smooth and add it back to the pot.
Now add the chicken to the pot. Cook for 5 more minutes. Squeeze the juice from a half or a full lime.
Taste for salt, and serve with optional garnishes (see ingredient list).
Notes
Salsa Verde: Find this traditional green salsa on grocery store shelves, in the Mexican food aisle; or buy some from your favorite Mexican restaurant.
Eden Organic Cannellini Beans: Eden Organic is the only brand of cooked beans on the market that I know of who prepares them the old-fashioned way. This company actually soaks their beans, dumps the soaking liquid, and cooks them with kombu seaweed (you can’t taste it). All of this is very important to eliminate toxins, release digestive enzymes, and make their nutrients more available to us. This brand is sold at Whole Foods Market and Jewel.
By Marisa Moon
My Longevity Kitchen https://mylongevitykitchen.com/
No time to read the full post? Listen here to the audio version:
My Inspiration…
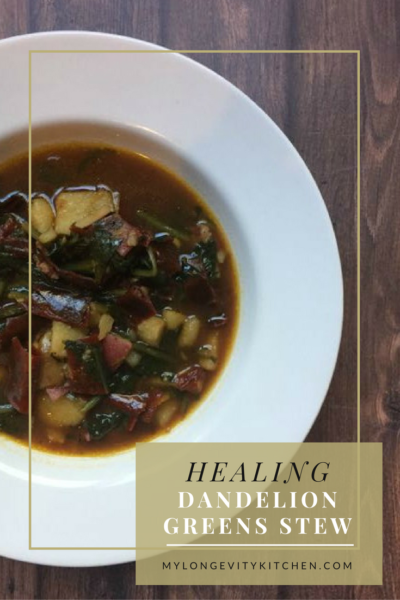
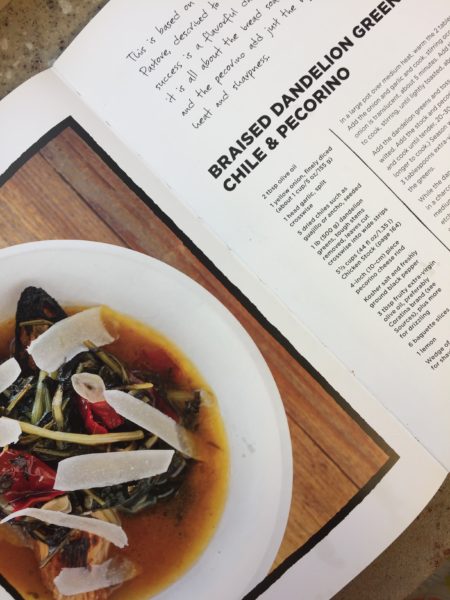
One of the first, most-interesting soups I ever made was a braised dandelion greens recipe by Top Chef Master, Chris Cosentino. It was bitter, and spicy, and full of dimension. It’s not for everyone, but that’s okay. This recipe is for anyone who appreciates bitter greens like rapini (broccoli rabe), frisse, escarole, and of course dandelion greens. The way Chris paired the greens with ancho chilies, lemon, olive oil, and true parmigiano reggiano just spoke to me. This is totally my language.
I’ve made it time and time again, swaying a bit from the recipe to make it compliant with my food and lifestyle choices. For instance, he suggests a crusty piece of bread on the bottom of your bowl so it will soak up all of the dandelion broth…and I know that sounds heavenly. But, I don’t really eat bread any more. I eat it on special occasions if it’s gluten free, or if I’m in the mood for a burger with a real bun-but otherwise I avoid it. So, I started adding potatoes to the soup instead. Bitter greens and potatoes are a popular combo with Italians, so that one was a no-brainer. I also changed the chicken broth base to a bone broth base, and the combination of bone broth with dandelion greens is what makes this recipe especially healing. Interested in Chris Cosentino’s cookbook? It’s called Beginnings – My Way To Start A Meal. It’s a beautiful book full of vegetables, cured meats, and artisanal cheeses; and it’s organized by seasons to highlight year-round ingredients for appetizers and small bites.
Longevity Tips…
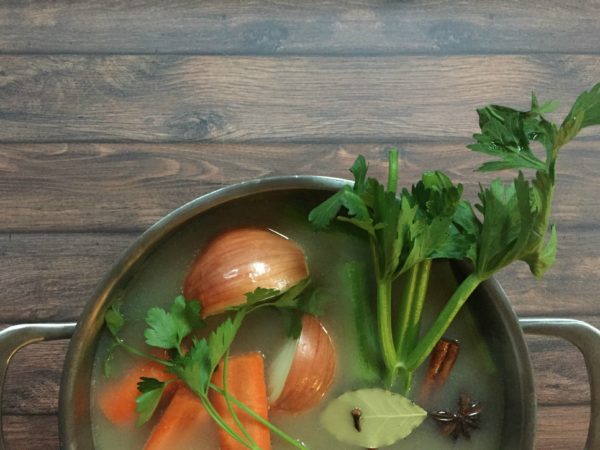
Bone Broth:
If you are a vegetarian then don’t worry, this soup can be made with water, or vegetable stock, and still turn out great! But for everyone else, let’s talk about bone broth. That’s possibly the main reason I called this recipe “Healing Dandelion Stew”; it’s the bone broth that makes it especially healing. The name “Bone Broth” either gets you excited, or Continue reading →
I feel so lucky being able to visit Austin for THE Paleo conference, working alongside passionate foodies, and visionary leaders whom I admire.
I had an exciting moment when it was time to announce the Best New Blog of the Year because I was a nominee! Even though I didn’t win, I was already feeling so accomplished after being voted into to the top 4 new blogs. On the day leading up to the awards ceremony, I had the chance to speak with Tony Federico, the host of Paleo Magazine Radio, and do a short impromptu interview about my experience at PFX. You can find my interview on the Paleo Magazine Radio podcast here. (I’m the first interview which starts at 2 minutes in.)
Okay, on to my favorite products!
I’m still going gaga over some products I purchased at paleo f(x), and I knew I had to share them with you! I’m going to keep it as brief as possible, on some items more than others, because if I try to explain each item and all of the benefits, I’d be writing this post for 12 days straight. So, if you have any questions about each item please comment below or just click the product photo to head over to the company’s site.
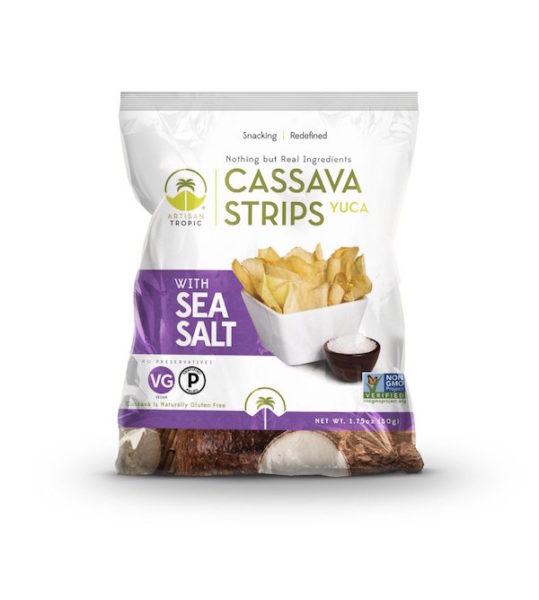
Artisan Tropics – Cassava Strips
Vegan, Grain-free, Diary-free, Soy-free, Non-GMO
These chips or strips are pretty awesome. If you’ve given up on chips because you believe there’s no such thing as a healthy chip, then think again! Continue reading →
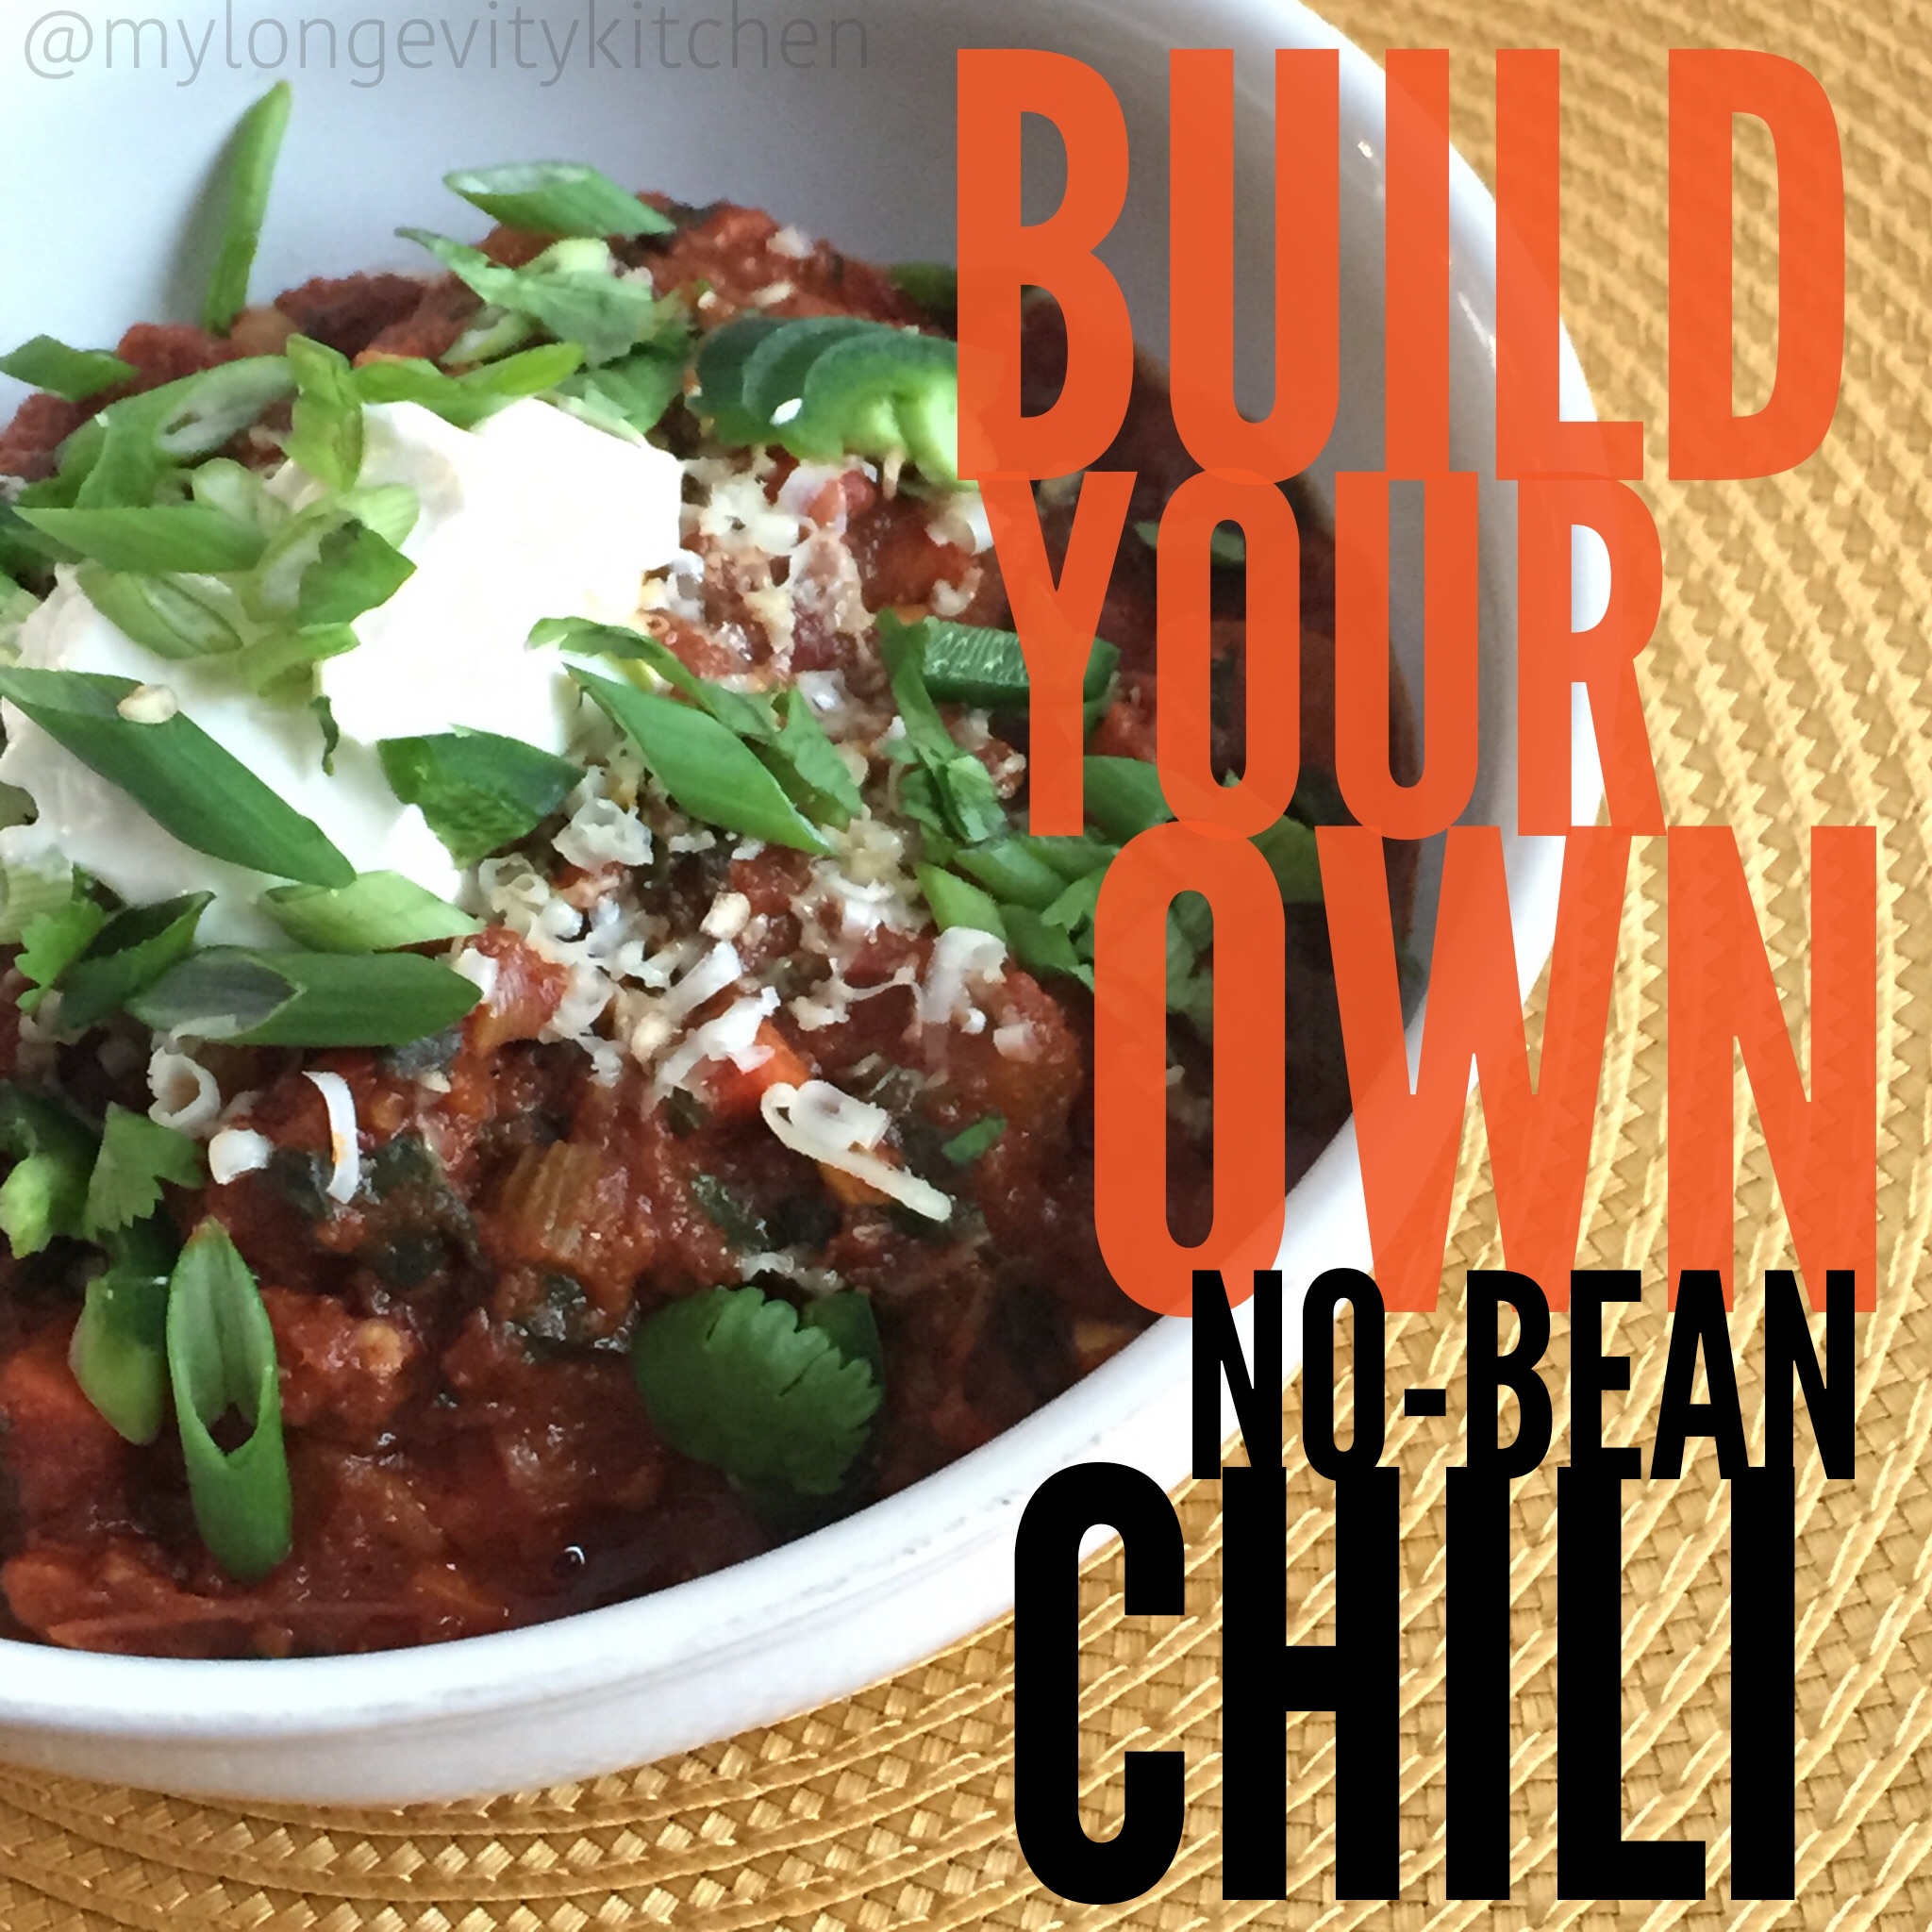
A good bowl of chili is like a warm hug in front of the fireplace…and a GREAT bowl of chili is homemade and packed with veggies!!!
Chili can be so flexible. So forgiving. It can be fast or slow, meaty or vegan. It can be thick or stewy, spicy or mild. It can be a one pot meal, a crock pot meal, and it freezes perfectly for your convenience. I just HAD to make this recipe “Build-Your-Own”.
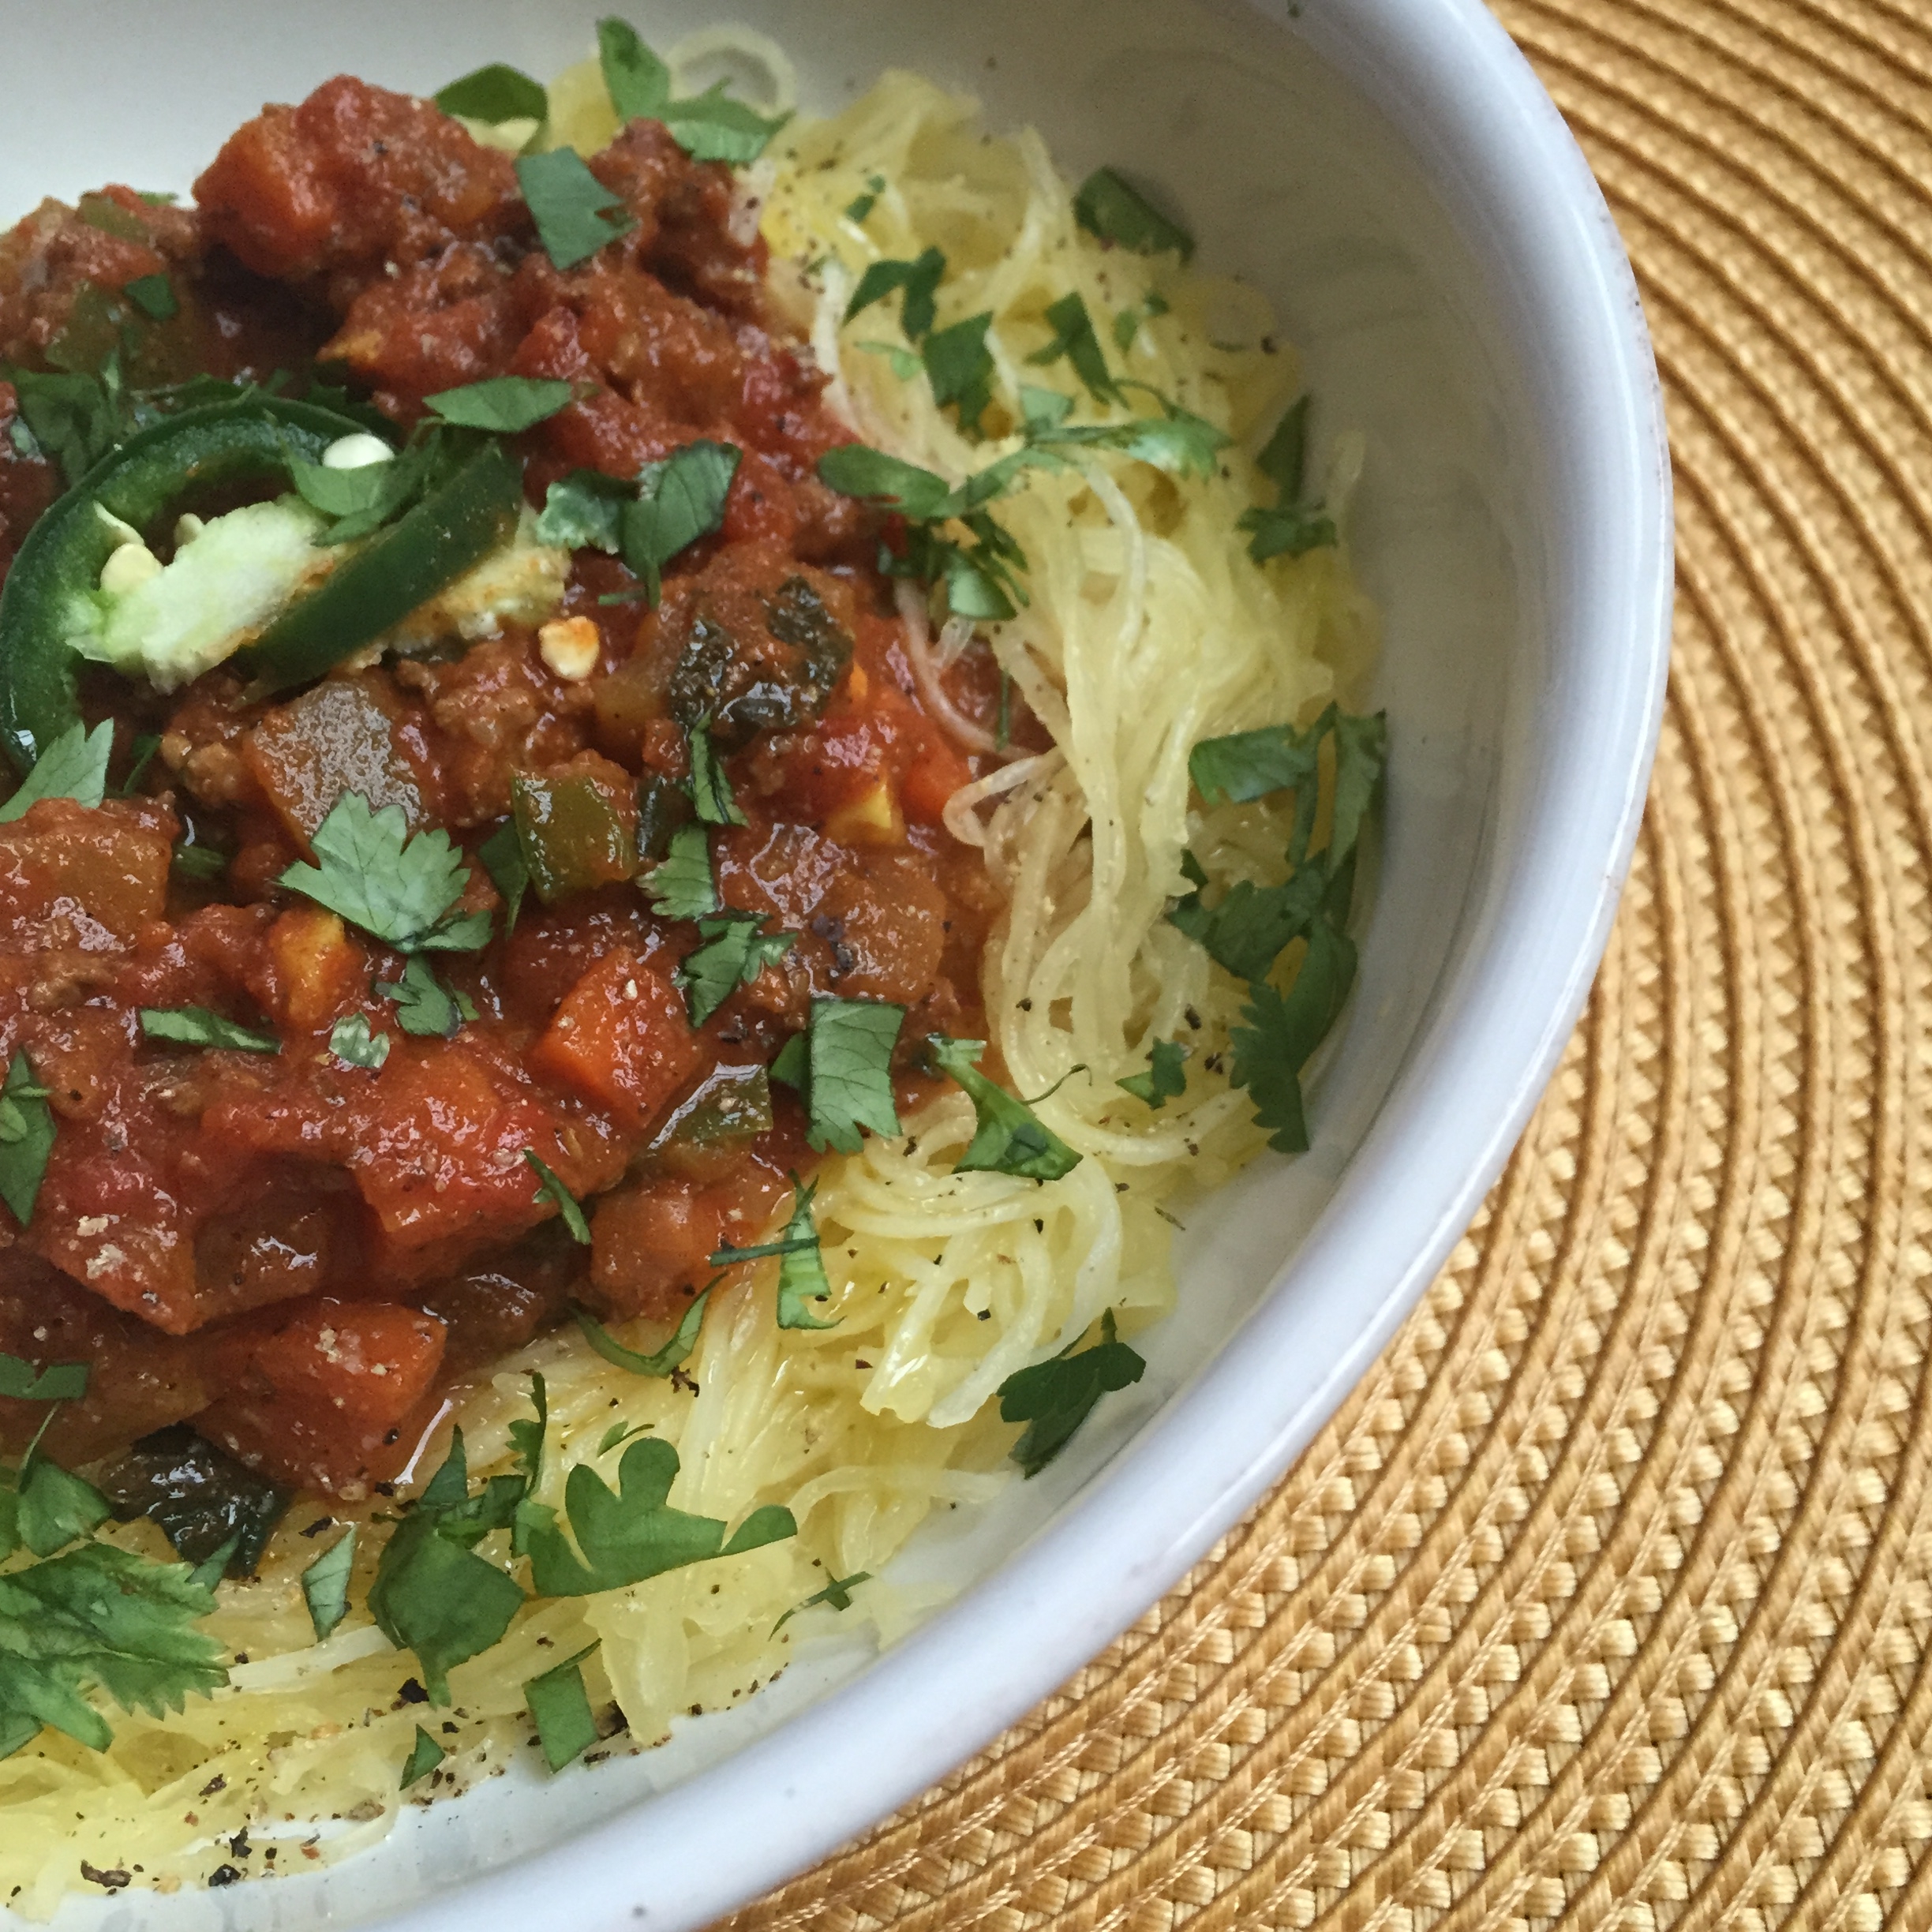
This is not a precise recipe that you have to adhere to. You don’t have to run out and shop for the ingredients. You can make the chili spice blend from scratch, or you can cheat and skip a few steps (see recipes at the bottom). You can choose your favorite veggies and meat, or just use whatever you’ve already got! I love it on a bed of spaghetti squash…
I have made this chili several times this winter, and it’s perfect every time.
Longevity Tips…
What kind of meat will you use? Chili enthusiasts will argue which cuts of meat are appropriate for chili.
I say anything goes!
This is a great opportunity for you to cook with grass-fed beef or bison if you don’t already. The grass-fed ground beef can be found for as low as $3/lb, and the bison may be expensive, but in this veggified chili dish you will be stretching that $8/lb ground bison into 4-6 meals! Bison is more wild, and has even more longevity benefits than grass-fed beef. You may also use grass-fed beef stew meat diced small, chuck roast/pot roast diced small in 1/2 inch pieces. You can change it up entirely and go with some organic ground turkey or chicken…although I always suggest ruminant meats (grass grazing mammals: cows, lambs, bison, and goats) over poultry because they are more nutritious.
Now…WHY NO BEANS?? You might be thinking beans will add bulk for less buck; but that’s not the way I look at beans or legumes.
I look at beans or legumes as a specialty item you should be cooking with only if you take the time to prepare them the old-fashioned way.
You’ve probably seen few recipes that instruct you to soak the beans overnight. Soaking beans and legumes overnight (grains too), is the proper way to treat these foods in order to ensure proper digestion and mineral absorption. Not until the last 30-50 years have we been in such a hurry to skip this crucial step required to cook nutritious legumes. When you use beans in the can, you can be sure they were not soaked or cooked properly. They can cause digestive distress and block the absorption of all those beneficial minerals they are known to contain. So, only use those canned beans when you are in a bind! And take the time to learn more about cooking your beans. Soaking overnight sounds hard, but it’s hands free and only takes a little planning! Read more about the big legume debate here, from my favorite myth busting expert Chris Kresser
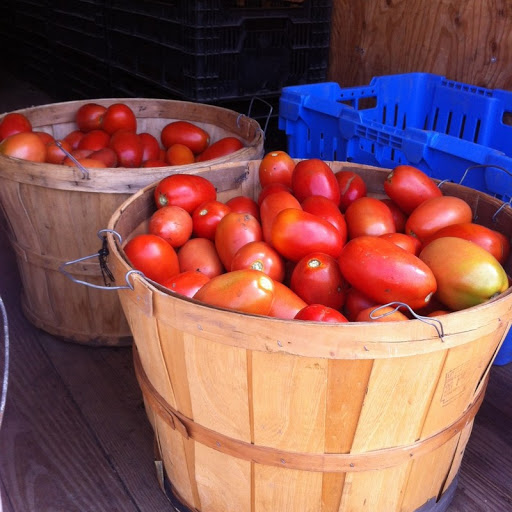
Bushels of organically grown tomatoes from my friends at Smits Farms in IL/IN
Lastly, lets take a minute to recognize the star of this dish. The cooked tomatoes.
Tomatoes, like other fruit, multiply in nutrients when you cook them. And the longer you cook them, the more nutrtients they will provide you! “Just 30 minutes of cooking can more than double their lycopene content,” and lycopene is the cancer-fighting, skin-enhancing compound that makes tomatoes red! Start cooking with organic tomato paste for the big win. This concentrated form of tomatoes has up to 10 times the lycopene of raw tomatoes!
Time out.
If you aren’t already buying organic tomatoes, you should start right now. Standard tomatoes are sprayed with some of the highest levels of herbicides/pesticides being used. These chemicals are “classified as ‘bad actors’ by the Pesticide Action Network (PAN). A “bad actor” is a chemical that is toxic, promotes cancer in lab tests and animal studies, interferes with reproduction, or contaminates the environment.”
And skip the traditional cans because they are lined with all sorts of chemicals that tomatoes leach from (even if they are BPA free). Go for glass jars or cartons of organic tomato products.
“But Marisa! They’re wayyyy too expensive!”
Everything healthy is expensive if you buy it at regular price. I stock up on organic tomato products when they are on sale. You can often get glass jars around $3 a piece or less! Keep your eyes peeled and start stocking up (hello Costco). It is worth it people. Why use a cancer-fighting food if you are going to burden your body with loads of chemicals at the same time? I heart organic tomatoes.
It’s Time To Cook…
This is the type of dish you make on a Sunday when you might be interrupted a million times while cooking, you are feeling kinda lazy, and you want to make a dish worthy of family praise. Although very simple, this is the type of dish you have to prep the ingredients first!You cannot chop-as-you-go! This might sound a little troublesome, but it’s actually to your advantage in many ways. You can chop all the veggies up to a day in advance. Consider making a triple batch of chili seasoning in the recipe below, and use it later to give anything a spicy, smokey, warming flavor.
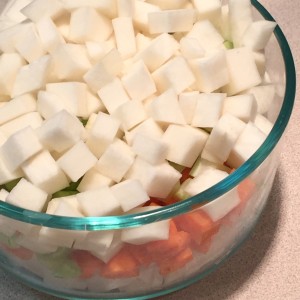
Veggie Prep: Onion Carrot Celery Turnip
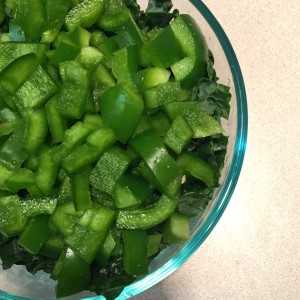
Veggie Prep: Bell Pepper, Jalapeno, Kale
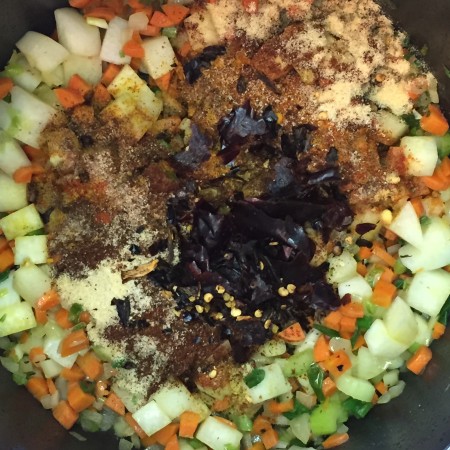
The Time I Added Dried Chiles
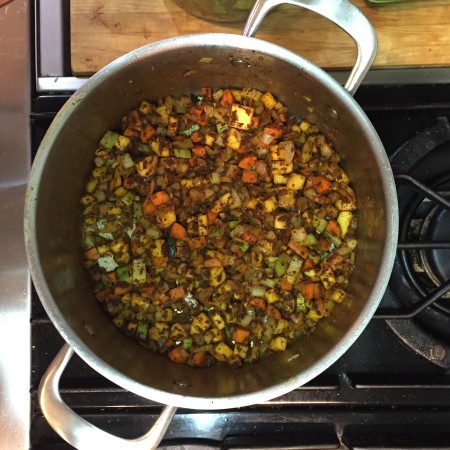
The Yummy Spices All Mixed In
Because this recipe is so chillaxed, you will need to get your salt and pepper arsenal ready and spice this chili with some intention! We will likely use different broths, different meats, or different tomatoes, different veggies; our salt is probably different types or grain sizes, and we may even be using different spices! For that reason, I cannot tell you how much salt you need; I can only guide you.
OH! ANDBUY YOURSELF A SALT CROCK ALREADY!
Stop using the salt shaker from the table, and get real chef! You need to be picking up the salt with three fingers, and sprinkling it over your food like they do on TV. That’s how you get your food to taste good! Buy a salt crock, buy a bag of fine sea salt, and start practicing your salt showers today! P.S. It is almost impossible to get too much sodium in your diet when the food is homemade and you use sea salt.
Now that you are armed and ready to make a pot of longevity chili, you better get goin! Tag me in your delicious photos, and tell me how it goes! @mylongevitykitchen #mylongevitykitchen
Build-Your-Own No-Bean Chili
2015-03-11 00:04:45
Serves 4
You'll find it hard to believe that 8 cups of veggies are jam packed into this no-bean chili. With the combination of grass-fed meats, slow cooked tomatoes, all those veggies, and homemade spice blends, you can really deliver the nutrition in this old-time family favorite. AND with this flexible recipe, you can customize it to your liking! Try it with different veggies, different meats, the slow-cooker method, and build-your-own spice blend. I've laid it all out for you in this DIY chili template.
1 tsp TURMERIC (optional, brightens the red color in chili)
½ tsp GROUND MUSTARD(optional)
½ tsp CHIPOTLE Powder, or any Hot Chile Powder like cayenne (optional for spicy food lovers; Chipotle adds smoky flavor)
Cheater Chili Powder (if you reallllly don't want to make the above recipe)
4 Tbsp CHILI Powder
½ Tbsp GARLIC Powder
½ Tbsp ONION Powder
1 tsp CUMIN
Veggie Prep
4 Cups HARD VEGGIES, diced (any combination of Onions, Celery, Carrots, Turnip, Rutabaga, Squash; I suggest 1 cup of onions, 1 cup of carrots, and any combo for the last 2 cups)
3 Cups of LEAFY GREENS (any combo of any combination of kale, swiss chard, mustard greens, collards, or spinach)
4 Cloves GARLIC, peeled and chopped at least 10 minutes before cooking (activates anti-cancer properties)
COOKING FAT, for High Heat (e.g. palm oil, ghee, avocado oil, organic lard, palm shortening, bacon fat)
1 lb Grass-fed/Organic MEAT (e.g. grass-fed ground beef, grass-fed stew meat diced 1/2 inch small, organic/pastured ground turkey or chicken, and my favorite is ground grass-fed bison)
1 batch of Longevity Chili SEASONING (approximately ½ Cup or as measured above)
40 oz Organic canned/jar TOMATOES (approximately 4-5 cups; you may used diced, peeled, crushed, or I prefer whole peeled tomatoes smashed)
1.5 Cups Bone BROTH or Stock (beef or chicken)
Sea Salt and Black Pepper
Instructions
Prepare your chili seasoning blend, and prep all of your vegetables.
If cooking with the old-fashioned stove-top method, continue to step 4.
If using the crockpot/slow-cooker, throw all of the ingredients in and set timer for Low (8 hrs) or High, (5 hrs) depending on your schedule. Use the browning method if your cooker has one, and brown the meat first for more flavor. If you like a thicker chili, transfer to the stove top for 10 minutes at a light simmer, uncovered and most of the liquid will reduce. See notes for toppings!
Heat a stock pot with 2 Tbsp of cooking fat.
When it's hot, add your meat, and season with salt and pepper. You should hear the meat sizzle.
When the meat is browned on all sides, remove it with a slotted spoon, and set aside.
Now add 2 more Tbsp of COOKING FAT, turn the heat to high, and throw in your 4 cups of the HARD VEGGIES (onions, carrots, etc...)
SEASON with salt and pepper and cook for 3 minutes, stirring occasionally.
ADD GARLIC and LEAFY GREENS. Cook 1 minute, stirring occasionally.
Add your MEAT and your longevity CHILI SEASONING, and stir. Can you smell the lovely spices?
When the spice mixture aroma fills the air, about 1 or 2 minutes, you will add the TOMATOES and the bone BROTH/stock.
Stir and bring everything to a simmer. Stir again and REDUCE HEAT to low, COVER PARTIALLY and set a timer for 30 minutes (partially covering it allows liquid to evaporate, and your chili to thicken).
ADD your diced PEPPERS and 1 TBSP SALT, partially cover, and set timer for 15 more minutes.
Uncover and STIR. If your chili is soupy, simmer for 10 more minutes uncovered. Taste for salt, and serve. See notes below for yummy toppings!
Notes
Suggested Chili Toppings include scallions, fresh jalapenos, cilantro, pickled peppers, organic sour cream or yogurt, diced avocado, and guacamole.
Stretch this dinner by serving over spaghetti squash or rice that is seasoned with olive oil, salt and pepper.
This recipe is freezer friendly.
Tag me in your photos! @mylongevitykitchen #mylongevitykitchen
By Marisa Moon
My Longevity Kitchen https://mylongevitykitchen.com/
You deserve to have a guide by your side as you navigate the steps it takes to become a healthier you.
Together we’ll find the ideal combination of challenges, accountability, and structure that you need to make it work and reach your goals.
Learn more about my coaching style—I’m relatable and realistic, and I combine health coaching with life coaching—and book your free consultation here at marisamoon.com