The Truth About Overnight Oats

No time to read? Listen to my podcast episode dedicated to this article: 


What's wrong with overnight oats, and how to prepare them in the most nutritious way. Recipe included! By Marisa Moon of My Longevity Kitchen

Somebody got this trend all wrong. 

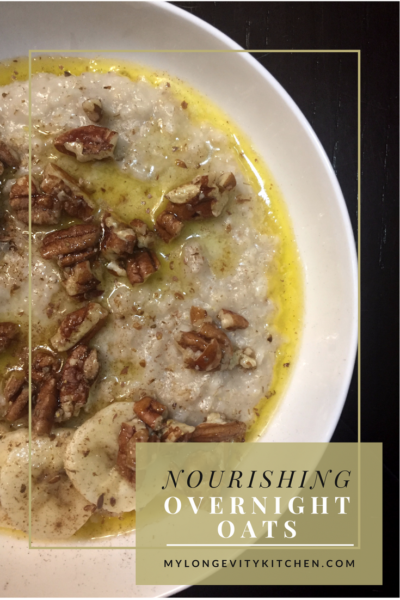
Well, not ALL wrong…but they messed up the only step in the recipe!  We shouldn’t be soaking our overnight oats in the refrigerator, we should be soaking them with warm water, at room temperature—or even warmer.  And would you believe that cooking the oats afterwards actually makes them even MORE nutritious.  This is not a food you want to eat raw.  Let me break down the basics for you…

Our ancestors ate whole grains after soaking them or fermenting them.  Over time they figured out that this was how grains needed to be prepared—in order to avoid illness.  It was probably thanks to serendipity that they figured this out back then because there weren’t any refrigerators…food was just left out.  But as generations passed, and food culture diminished, we have been hastily preparing our grains…and we’ve even gone as far as thinking they are best uncooked!  This is flat out wrong.  

Did you know that the oatmeal box, back in the day, used to say “soak overnight” in the directions?  What happened to that?

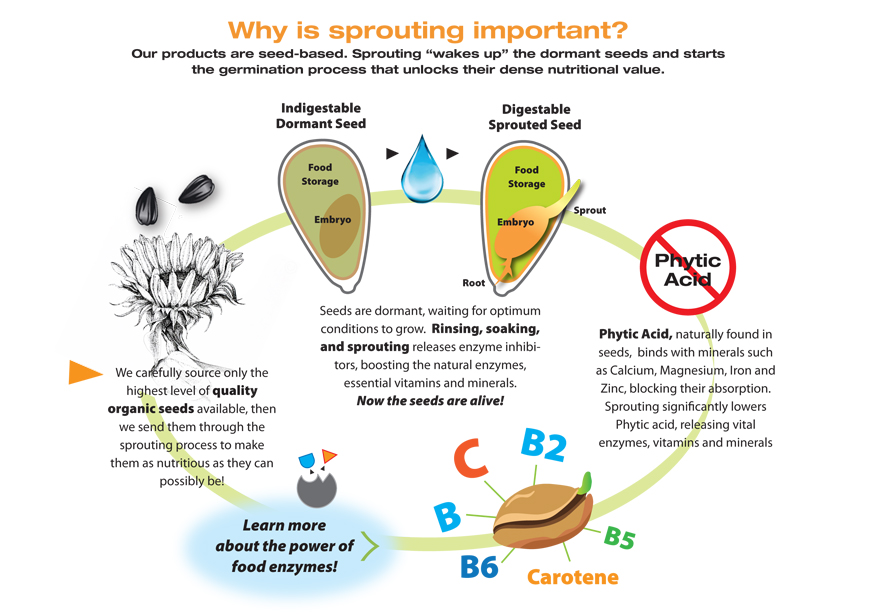
You see, all grains contain something called “phytic acid”—or phytates—in the outer layer or bran, and oats contain more phytates than almost any other grain. So, if this phytic acid is untreated, it will combine with important minerals in our body and block their absorption. I’m talking about calcium, magnesium, iron, zinc, and copper. We need these minerals, and our food supply is providing less and less of them because of modern farming methods. We should take every precaution to protect the minerals that are still available to us. Regular consumption of improperly prepared grains (also legumes, and nuts) can lead to mineral deficiencies, leaky gut, irritable bowel syndrome, bone loss, food allergies, and even mental illness…this is not only due to the phytic acid content, but more so a combination of these plant chemicals along with others like lectins, goitrogens, and oxalates to name a few. It’s the dose that makes the poison, and it varies widely from person-to-person (or gut-to-gut).   

Go Raw brand chart why to soak/sprout seeds
Illustration by Go Raw and EatDrinkShrink.com

So what’s the proper way to prepare these grains? 

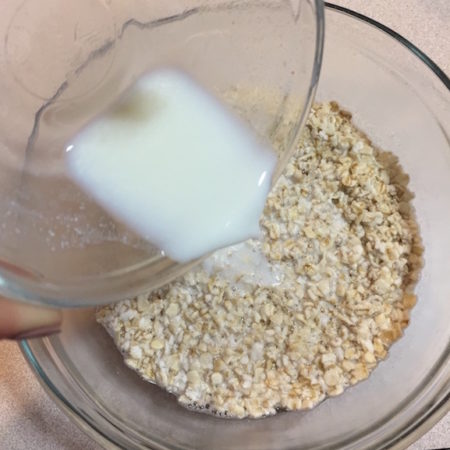
The process is simple really. All we need to do is soak the whole grains overnight at room temperature, or even warmer, and cook after soaking. It helps tremendously if, during the soak, you add an acid starter like liquid whey, kefir, yogurt, or even lemon juice. Allow the natural enzymes and other helpful organisms to begin fermenting the grains, for 7-24 hours, and this will neutralize a large portion of the phytic acid.

Soaking in warm, acidic or cultured water not only gets rid of this mineral-blocking substance, but it also releases all of the vitamins in grains, and encourages more healthy digestion by partially breaking down some of the proteins (like gluten). Win Win, all around! Finish your oatmeal by cooking for a quick 5-10 minutes (more on that in the recipe at the end of this post). 

The Truth About Overnight Oats
Pouring liquid whey into my soaking oats

Spread the word to those we care about.  

Oatmeal is one of those things that people eat habitually…every single morning. That’s why it’s important to spread the word.  Although I do not usually consume oatmeal or most grains, I felt the need to focus on this recipe because many of my closest friends and family are enjoying oatmeal on a regular basis. My goal with My Longevity Kitchen is to help explain how we can maximize the nutrients in our food, and minimize toxins. And my passion lies in the ways of our ancestors, and their time-honored traditional cooking methods. Oatmeal can be nutritious, or quite the opposite.  I hope you’ve learned a thing or two on how to make it truly nourishing.  Here are some more tips for you, and the recipe!

A nourishing recipe for properly prepared overnight oats with cinnamon, banana, and pecans. By Marisa Moon of My Longevity Kitchen

Continue reading

My Top 15 Products from Paleo f(x) ’16

Paleo fx 2016 top products

I feel so lucky being able to visit Austin for THE Paleo conference, working alongside passionate foodies, and visionary leaders whom I admire.

Paleo Magazine Radio Paleo fx 2016 I had an exciting moment when it was time to announce the Best New Blog of the Year because I was a nominee! Even though I didn’t win, I was already feeling so accomplished after being voted into to the top 4 new blogs. On the day leading up to the awards ceremony, I had the chance to speak with Tony Federico, the host of Paleo Magazine Radio, and do a short impromptu interview about my experience at PFX. You can find my interview on the Paleo Magazine Radio podcast here. (I’m the first interview which starts at 2 minutes in.)

Okay, on to my favorite products!

I’m still going gaga over some products I purchased at paleo f(x), and I knew I had to share them with you! I’m going to keep it as brief as possible, on some items more than others, because if I try to explain each item and all of the benefits, I’d be writing this post for 12 days straight. So, if you have any questions about each item please comment below or just click the product photo to head over to the company’s site.


Artisan Tropics – Cassava Strips

Vegan, Grain-free, Diary-free, Soy-free, Non-GMO Cassava Strips by Artisan Tropics

These chips or strips are pretty awesome. If you’ve given up on chips because you believe there’s no such thing as a healthy chip, then think again! Continue reading

Butternut Squash Breakfast Bowl

Butternut Squash Breakfast Bowl, a paleo grain-free alternative by Marisa Moon, Mylongevitykitchen.com

My Inspiration…

It may be difficult at first to imagine your breakfast without grains, but there are plenty of foods to replace the standard oatmeal breakfast.  Winter squash is available all year round and makes for a great base in this versatile breakfast.   

If you’ve been following me since January 2016, you would have heard that I created an e-cookbook for participants in the 6-week fitness and diet program called My6Method.  This ebook helps My6Method (M6M for short) clients stick to the recommended food list, and get cookin’!  This cookbook is exclusive to the M6M participants, but soon I’ll be replacing winter recipes with warm-weather recipes.  That’s why I decided to share a recipe with you…the Butternut Squash Breakfast Bowl!

Cover Final Green jpeg


Longevity Tips…

I created this recipe to show oatmeal-lovers that there is a grain-free alternative they will love just the same! It’s important for me to point out that I believe protein is a significant part of a healthy breakfast, as well as keeping sugary carbs, grains, or flour-based foods to a minimum (the only instance I believe protein is not important at breakfast is if you practice intermittent fasting and have a breakfast full of healthy fats, like with bulletproof coffee).

A higher protein breakfast will set you up for a day full of satiation and clear thinking. Studies show that protein-rich breakfasts reduce cravings and overeating throughout the day.  

That being said, I highly recommend enjoying this butternut breakfast bowl alongside some scrambled eggs & quality bacon (made from pork that is pasture-raised and antibiotic free), or try a simple grass-fed whey protein shake to get your protein in without filling up too much.  

Reserveage full size

Here’s my favorite brand of vanilla grass-fed whey at an affordable price. You can find it on amazon by clicking the photo or previous link, and Amazon usually has the best price! You’ll also see this at many Whole Foods Market stores.    


It’s Time To Cook…

Butternut Breakfast Bowl

I’ll show you how to roast a whole butternut squash, saving you time and effort…have you ever tried slicing raw winter squash?  Difficult.  So, let’s skip that step.  This whole-roasted squash technique results in an extra sweet, irresistible flavor that’s perfect with breakfast.   Continue reading

Coconut Green Tea Dairy-Free, Paleo, Sugar-Free

"InstaRecipe" Alert! (click here for info)

603750_10153276553197486_395972309578252352_n

I’d hardly call this a recipe because it is so simple!  But indeed it is a recipe for greatness, and it’s time to share it with you!  It tastes like a warm and creamy vanilla milkshake, for real!  It’s so frothy and delicious.

I am a Bulletproof Coffee fan, for life.  But I am also trying to figure out what my brain needs to function optimally and stay focused throughout the day.

After reading the famous book “Healing ADD” by Daniel Amen, I understand that coffee may not be the best choice for my morning routine.  Here and there yes, but not daily. Sooooo, I had to start toying with my green tea and make it “Bulletproof” too!..

I use coconut oil for the satisfying fats and MCT’s (medium chain fats that are good for the brain and metabolism), protein powder because most distracted brains thrive on higher protein and lower carbs (this is especially important earlier in the day to boost your focus and concentration skills), and often add in Bulletproof Brain Octane Oil for added brain boosting power.   This combo of healthy fats and protein provides you with a power breakfast that’ll hold you over for hours into your day!  And I still get to keep my morning routine.  I don’t miss the coffee one bit!

Caffeine makes you feel more focused but unfortunately it also decreases blood flow to the brain–and over time can make ADD symptoms worse.  Green tea is a better choice than coffee because it contains less caffeine, and more importantly, green tea contains Theanine and EGCG which both benefit the brain in many ways. Green tea is known to have healthy bioactive compounds that can help treat various diseases. Besides improving brain function, it may also help in fat burning and preventing type 2 diabetes. Additionally, drinking green tea can reduce bad breath and help in losing weight. So, if you are concerned about your health, you might as well consider consuming green tea instead of any other beverages. Green tea flavors like cardamom or earl grey can be sourced online. They could be available from Ahmad Tea USA sellers and similar web shops.

Coconut Green Tea made with coconut oil, cinnamon, and grass-fed vanilla whey protein. By Marisa Moon of My Longevity Kitchen

Scroll down for the recipe…

Looking for some high quality vanilla protein powders? Here are some brands that I recommend:

Primal Fuel Vanilla Coconut Whey Protein Isolate with Prebiotic Fiber

Reserveage Grass-fed Vanilla Minimally Processed Whey Protein 
 

Tera’s Whey Grass-fed Organic Bourbon Vanilla Protein 

Garden Of Life Raw Vegan Organic Protein, Vanilla, with Sprouted Foods & Pea Protein


Disclaimer: Marisa Moon of My Longevity Kitchen is a participant in the Amazon Services LLC Associates Program, an affiliate advertising program designed to provide a means for sites to earn advertising fees by advertising and linking to awesome products they recommend from amazon.com


Coconut Green Tea
Serves 1
Blend together hot organic green tea with nourishing coconut oil, and vanilla protein powder for a nutritious and brain-boosting breakfast alternative.
Write a review
Print
Total Time
5 min
Total Time
5 min
Ingredients
  1. 1 serving of prepared Hot GREEN TEA (organic)
  2. 1-2 Tbsp Virgin COCONUT OIL
  3. VANILLA Grass-Fed Whey PROTEIN POWDER (see notes for brands and measurements)
  4. A generous dash of CINNAMON
Optional
  1. Up to 1 Tbsp MCT oil or Brain Octane Oil
Instructions
  1. Using a blender, BLEND together the HOT GREEN TEA and the COCONUT OIL first.
  2. Touch the mixture with your finger to test the temperature. If its too hot to touch then it needs to cool a little longer before you add the whey protein powder (to avoid damaging the nutrients).
  3. Once it's at a temperature you can touch comfortably, add the protein powder and cinnamon. Blend again. Enjoy!
Notes
  1. Whey Protein Powders: All protein powders have different measurements and different levels of sweetness. I use Reserveage Vanilla or Primal Fuel Whey Protein and put 2 Tablespoons in my coconut green tea recipe. Terra's Grass-Fed Vanilla Bourbon Whey is also great, but you will have to double the quantity (4 Tablespoons). Do you have another brand? If so, start with 2 Tablespoons, and taste to decide if you need more. See my full list of recommended protein powders above. Happy sipping!
My Longevity Kitchen https://mylongevitykitchen.com/

Paleo Maca Cookie Dough

This paleo cookie dough is a major hit!  I made it at least 3 times in two months.  Maybe more.  

I rolled it into balls and dipped them in dark chocolate for Thanksgiving too!  It’s super slammin’ just out of the jar (with a spoon in da mouth), but the chocolate covered balls bring it to a whole ‘nother level.  Dare to walk passed your fridge without grabbing a nugget every time.  The best part is, they are even more delicious when they’re cold! 

Before I tell you what’s in this creamy nutty magical mixture, I must tell you about a fairly recent addition to my longevity pantry. 

Since the Summer of 2014, I have been hooked on figuring out ways to get more Maca into my cooking.  THIS cookie dough was the perfect vessel I tell you!  Let’s give Maca the moment it deserves and discuss what it is and why I want it in my food. 

Maca is an Ancient Peruvian Superfood, created from the root of a vegetable high in the Andes.  Superfood you say?  Ohhhh yes.  Maca has been prized for millennia for it’s capabilities to regulate balance in the endocrine system (think thyroid, adrenal glands, ovarian and testicular glands), which in turn improves fertility, and reproductive function (might i mention it’s considered an aphrodisiac?).  This is especially important today because most people’s hormones are out of whack due to an over abundance of estrogen in plastics and other environmental toxins.  Take note that Maca is also used as a natural energy source (caffeine-free!) because of its micronutrient content, and the support it provides to the cardiovascular system. It is most popular in it’s dried powdered form because of its long-lasting shelf life and usefulness.  Gelatinized Maca is the form I recommend because the process by which it is made removes the indigestible starches, and you end up with a healthier, more concentrated powder.  It’s sweet, nutty, and earthy in taste.  A little goes a long way.  Most people work up a tolerance to Maca, starting with 1 Tbsp per serving, and working their way up to 2 Tbsp.  Ready to try it for yourself?  This is my favorite brand so far: Terrasoul Superfoods Gelatinized Maca Powder

 Let’s talk cookie dough! 

I found the original recipe by “Girl Gone Country” on Pinterest, and I was inspired to come up with my own variation including maca.   I also altered the original recipe by adding some alternative sweeteners.  Why?  First, to lower the glycemic index with some stevia, and then using the coconut sugar to bring out the cookie-like flavor I was seeking.  Lastly, the combination of them all was sure to satisfy a certain husband’s sweet tooth.  Check out Girl Gone Country’s original recipe here and play around with ingredients in your own way!  Tag me @mylongevitykitchen on social media and share your ideas in the comments below. 


Paleo Maca Cookie Dough
Grab a spoon and dig into a jar full of nutty, gooey, chocolatey, goodness! You can rest assured you're eating wholesome paleo superfood ingredients with this recipe.
Write a review
Print
Cook Time
15 min
Total Time
1 hr
Cook Time
15 min
Total Time
1 hr
Ingredients
  1. ½ C unsalted, grass-fed butter such as Kerrygold (or use warmed ghee and skip to step 2)
  2. 1 C Almond Butter, unsweetened (sprouted almond butter is the best choice for optimal nutrition)
  3. ½ tsp Pure Vanilla Extract
  4. 2 Tbsp Gelatinized Maca
  5. 1 Tbsp Coconut Flour
  6. ½ tsp Cinnamon
  7. Pinch of Salt
  8. 2 Tbsp Raw Honey
  9. 2 Tbsp Coconut Sugar
  10. 2 drops liquid Stevia (Vanilla is best)
  11. ½ C Enjoy Life Chocolate Chips (or Lily's Dark Chocolate Chips with Stevia)
Instructions
  1. In a quart-size sauce pan, brown the butter on medium heat. To brown the butter, you want to continue cooking the melted butter until it starts smelling "nutty" and sticking slightly to the bottom when you try to stir with a spatula. If you start to see black bits, don't panic. You can strain these out, and the browned butter is still delicious!
  2. Once the butter is slightly browned and smelling nutty, remove the pan from the heat, and add in the almond butter. Whisk or stir with spatula to create a smooth mixture.
  3. In a separate bowl, mix together the dry ingredients including maca, coconut flour, cinnamon, and salt.
  4. Sift the dry ingredients into the almond butter mixture, and mix until smooth.
  5. Add your sweeteners one at a time to determine your desired level of sweetness. (The coconut sugar is key to achieving a truly cookie-like flavor)
  6. Transfer your warm cookie dough to a bowl, cover loosely, and refrigerate for 45 minutes. Set a timer so you don't forget. If the mixture gets too hard, you’ll find it difficult to incorporate the chocolate chips.
  7. Stir in your chocolate chips and refrigerate for 30 more minutes and you're done! Enjoy by the spoonful.
Notes
  1. This cookie dough is best eaten cold out of the fridge. It does not retain it's flavor if kept in the freezer for more than a few days.
  2. Variation: For a party-ready application, you may freeze the mixture for 20 minutes, shape into balls, re-freeze, and then dip into melted chocolate! Refrigerate until you're ready to eat them.
Adapted from Girl Gone Country
My Longevity Kitchen https://mylongevitykitchen.com/